Posted: 12/19/22
Top Truck Challenge Square Body
Axial SCX10 II Raw Builder's Kit
By Matt Higgins
Not all off-roading is rock crawling. As a teenager, when I first started working on full-size trucks, I grabbed each and every off-road magazine I could find. From Off-road to Four Wheeler to Jp to 4-Wheel & Off-road, each issue had plenty of show trucks to gawk at and cool tech articles to absorb, but what really grabbed my attention was Four Wheeler magazine’s annual Top Truck Challenge (TTC), which was a multi-event contest that ran from 1993 to 2015. This hardcore competition had rock crawling, and plenty of it with humungous boulders, but it also had everything else — mud, logs, water holes, hill climbs, sand, pulling. If it was off-road, you had to take it on at TTC.


The trucks that competed each year were absolute beasts — the best of the best. They were awe inspiring. They had big engines, giant tires, oversized axles. They had to do it all and take a massive beating while doing it. To me, the trucks were all inspirational. I loved the contest and I loved the vehicles. I knew I couldn’t build a real one but that’s where Axial comes in. Thanks to RC, I could have the TTC adventure without spending tens of thousands of dollars. Back in 2011, I built a TTC-inspired Axial SCX10 Jeep. It had 2.2s, rear steer, a stretched wheelbase, and a Holmes Hobbies cobalt motor. I built it specifically for an event held at R/C Excitement in Fitchburg, MA. This competition had a trail course, a dead weight pull, a tire change race, a teeter totter, a hill climb, a slalom course, and more. The event was amazing. It was a long day with a slew of competitors working their way through a lot of events, but it was absolutely one of the best times I’ve ever had in RC. When the dust settled, my rig got me first place in what was dubbed the 2.2 Unlimited class. I was stoked, but I think I could have finished dead last and still left smiling ear to ear.
Over a decade later, I still have that Axial SCX10. In fact, I can see it from where I sit here typing. Plug a battery in and it’s ready to go. But, while that rig is no slouch, a lot has changed in the RC crawling world. So, it is time . . . time for a new TTC rig — a whole new build. For the basis of this project I started with one of my all-time favorites, the SCX10 II Raw Builder’s Kit. Check it out:
Chassis
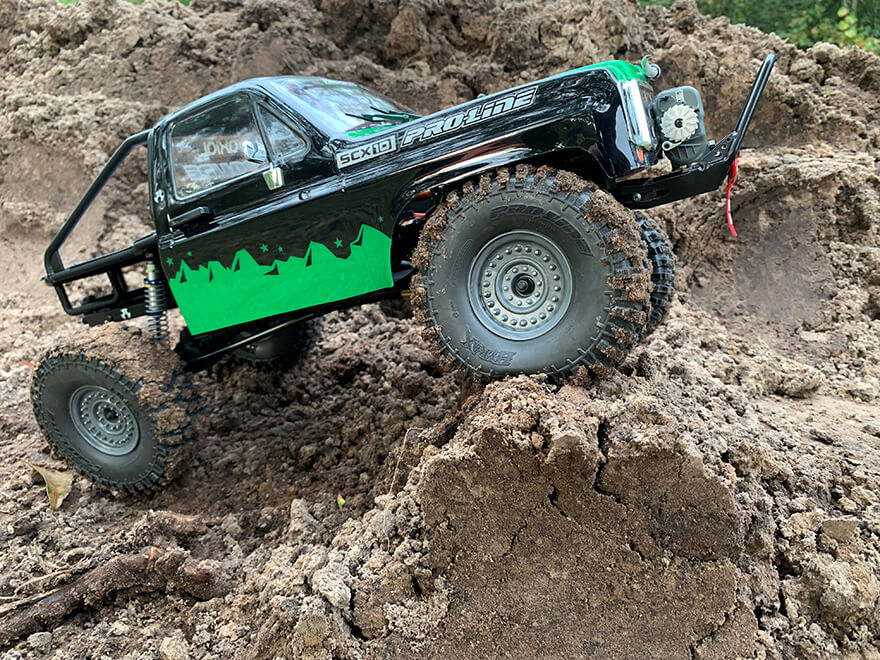
A low-slung, belly-dragging LCG comp chassis probably wouldn’t survive what I plan to subject this truck to. This truck needs to be bulletproof and capable of handling more than just rocks, so I kept the stock SCX10 II chassis. It’s steel and pretty much unbreakable. Overall, my chassis modifications are fairly minimal. I bolted up a welded steel front bumper to be able to easily mount a winch. Since I had a steel bumper that mounted to the sides of the chassis, I swapped out the front frame brace for a smooth one out of my parts bin. The one I used is discontinued, but it’s part number AX80026 if you want to go looking. There is plenty of new old stock (AKA the other NOS) out there. I also changed the rear frame brace, but this wasn’t for cosmetic reasons. I’m using Pro-Line’s Back-Half Cage (more on that later) with Knight Customs 3D-printed hinge mount. The hinge mount requires the use of the rear bumper set from the SCX10 II Jeep Cherokee. This parts tree includes the rear frame brace needed to properly space the cage for use with Pro-Line’s 2-piece truck bodies.
Most of us understandably spend a lot of time getting the topside of our rigs just right, but, when it comes to overall performance, what's underneath is just as, if not more, important. Simply put, as much as possible, you want your rig to glide over rocks and obstacles. So, to substantially smooth out the underside of my rig I bolted on JD3 Design Shop Rock Sliders in place of the stock side plates. These 3D-printed plates eliminate the built-in receiver box, but they have a smooth finish that is far less likely to get hung up on rocks. If you take on wet conditions, you can always add the Axial SCX10 III Receiver Box (AXI231918).
One of the many things I like about the SCX10 II chassis is its layout and, specifically, where it positions the battery. It’s right up front and while it’s above the axle, I run a lightweight Spektrum 11.1V 2200mAh 3S 30C Smart G2 LiPo battery so the rig’s center of gravity isn’t hurt. I did modify the battery box by notching out the left rear corner for motor clearance and moving on the three tabs that help secure different size batteries. These tabs are meant to help accommodate different batteries of different widths, but I drilled a hole and used one tab to keep my shorter length battery from moving around. In the front of the box, I used a piece of high-density foam, again from the parts bin, and attached it with hook and loop fastener to further secure the smaller pack.
Suspension
While they’re famous for their tires and bodies, if you care about performance, don't sleep on Pro-Line's shocks. Over the years, I’ve run them on multiple short course trucks, bashers, and, of course, crawlers. I can report they perform just as good as they look. On this project, I’m using the Pro-Spec 90mm-95mm Scaler Shocks. I used 35 weight shock fluid, which is pretty standard fair for a crawler. What I did that was a bit different is I used the stock Axial clamping lower spring perches. I also went with Axial springs. I’m currently using the yellow single-stage springs in the rear. These 2.63 lbs./in. springs are fairly stiff and typically used on the front of a SCX10 II, but I actually like a firmer rear suspension without gobs of rear articulation. To give a little softer initial axle movement, I moved the rear shock hoops as far forward as possible. This creates a progressive feel that is initially soft and feels stiffer as the suspension compresses. In front, I used 2-stage springs. On the bottom, the long spring is the included Pro-Line spring, but the top spring is an Axial short red spring. What works for you depends on your RC truck’s weight, weight placement, your driving style, the terrain you’re taking on, and just personal preference. There is no one-size fits all single solution. I do suggest trying the rear shocks moved forward. You might like it.
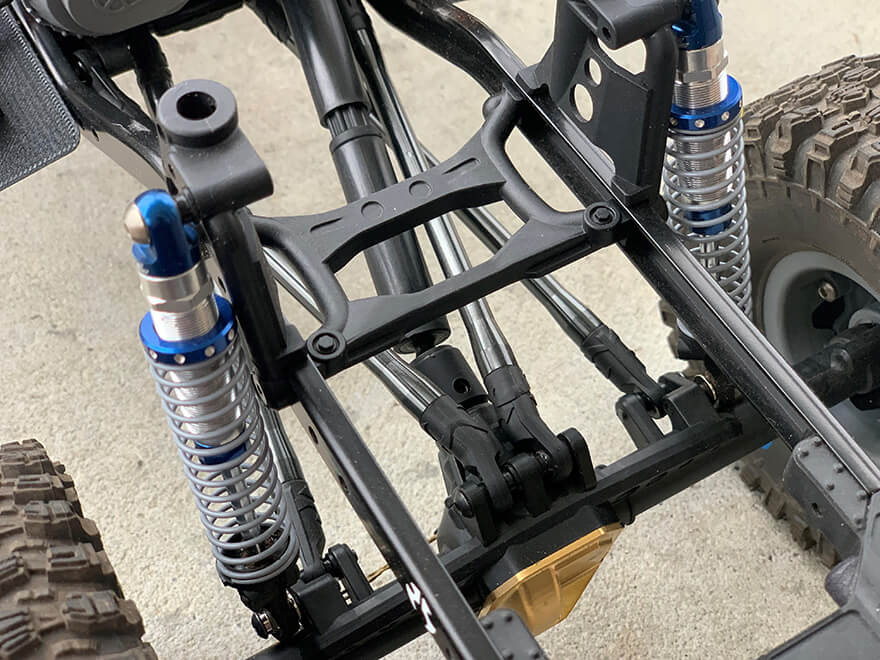


To help lower the rig’s center of gravity and increase front weight bias, I added D-Links Chubby brass lower links to the front. I might not use these on a comp rig, but they do the trick on this type of truck.
Eagle eyes might notice the screws I used to retain the top of the shocks are different. I went with Lunsford Racing Safety Screws, which have a fatter head and are machined out of lightweight, strong titanium. Unfortunately, Lunsford just recently closed their doors to retire. Growing up racing RC, I used countless Lunsford titanium parts. While I wish them the best and hope they have a fantastic retirement, I will miss their awesome products.
Drivetrain
With Wildboar WB8-HD driveshafts and steel front universal axles, there’s not much to do to the drivetrain. It’s solid. I did, however, overdrive the front with 27/8 gears in the front differential. To be able to install the new ring and pinion in place of the stock solid one-piece ring gear and locker, I used the 6-bolt differential locker. The stock AR44 axle gear ratio is 30/8 or 3.75:1. With the rear ratio remaining at the stock 3.75:1 and the front now spinning at a slightly faster 3.375:1, the difference is a mild 10% difference. The slightly faster spinning front tires will help tighten turning and provide a better climbing RC truck.
I capped each differential with brass diff covers for a little extra weigh down low. On an RC comp rig that needs to stick steep sidehills, the weight should be added at the ends of the axle, but on this truck, any weight added below the motor is a good thing.
Body, Wheels, & Tires
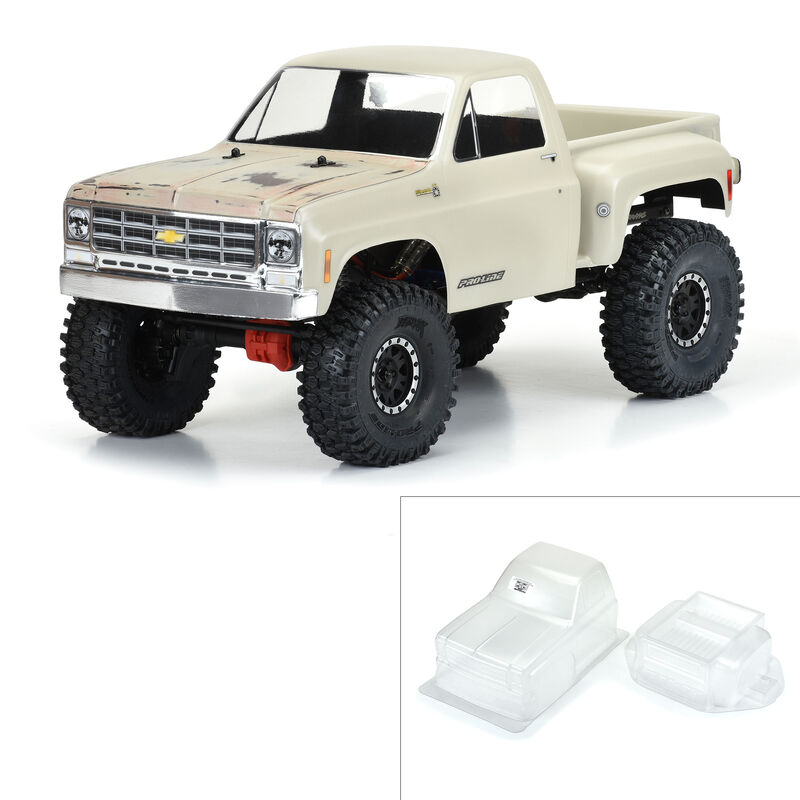
The SCX10 II Raw Builder’s Kit leaves the choice of the body, wheels, and tires up to you. I’ve been looking for a full-size square body Chevy for a couple years now, so this was a no brainer for me. Until I can find the right real one, I was going to have the RC version. So, I picked up the Pro-Line 1978 Chevy K10. Bill Zegers of Zegers R/C Graffixx handled the painting and did an amazing job. To add some dimension to the polycarbonate body, I added chrome side mirrors from Axial’s old Exterior Detail Parts tree (AXIC0048). They’re a bit on the small side, but they’re fairly flexible and I thought this combination might help them survive the abuse I planned to subject this truck to. The door handles and windshield wipers are from Exterior Body Detail Parts set for the Axial Jeep JLU. I used a little heat from a lighter reshape the wipers for the Chevy windshield, and while the door handles aren’t correct, they’re close enough. Up front, I used the bull horns from the SCX10 II Raw Builder’s Kit. I painted them with ordinary water-based craft paints. This is the cheapest and easiest way to paint scale accessories. The key is I sealed them with clear matte spray to protect the finish and give them a realistic dull finish. The last tweak to the body was a somewhat aggressive trim job. I cut the molded-in bumper completely off since I have the steel bumper. In addition to looking better, this allows the body to sit lower. Next, I cut about a half inch off the rocker panels. This keeps the body from dragging on obstacles and doesn’t impact the scale proportions of the body too much.
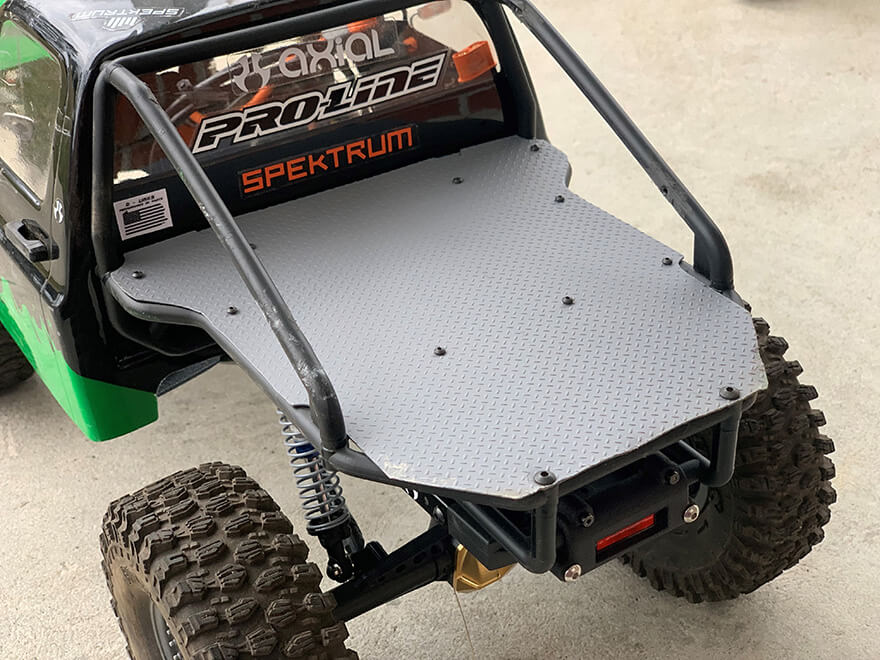
The bed is the Pro-Line Back-Half Cage . . . with my own homespun twist. I wanted a different look than the stock truggy cage with the spare tire mount, fuel cell, and web of tubes. I removed all of the tubes except the two main down tubes. I then replaced the bed and its molded-in fuel cell with a sheet of styrene diamond plate painted flat gray. The end result isn’t as flashy as the stock cage, which I believe looks awesome on late model trucks, but I believe my version really suits this older build perfectly. As an added bonus, it’s significantly lighter. Even without a spare tire mounted to it, my flat bed version weighs a fraction of the original.


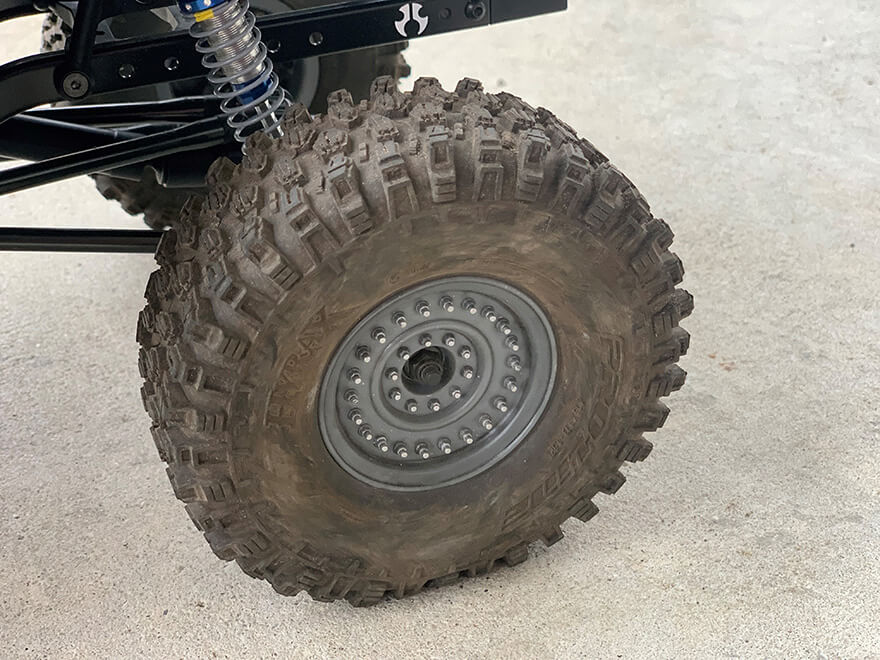
One of the more popular wheels used on full-size square body Chevy trucks is the military surplus wheel from AM General for the HMMWV (AKA the Humvee, AKA the Hummer, AKA the H1 Hummer or just H1). These wheels used be the “cheap” way to get heavy duty beadlocks. Plus, they look cool. As luck would have it, Axial has perfect replicas, the MW19 1.9 Beadlock Wheels. I opted for gray. I applied a black “wash” by mixing model flat black with thinner. I then hit each simulated nut and bolt (there are lots) with a chrome paint pen. To finish them off I sprayed them with matte clear. The wash flows with ease, highlights the detail, and adds the look of some grime. When combined with some matte clear coat as a last step, the end result is pretty realistic.
Tires were an easy choice. Needing something that’s as good at tearing up dirt as they are gripping rocks, I picked the Pro-Line Hyrax tires in their super soft Predator compound. With both big lugs and voids, these tires are just gnarly. To help keep the rear tires from binding up in crevasses or in undercut ledges, I stuffed Pro-Line’s Dual Stage foams in just the rear tires. If a rear tire is too soft, it will squish, twist, and get completely bound up in certain situations. The stiffer foam helps the soft, pliable tires keep their shape. This helps on undercuts, as described, and helps when sidehilling.


Electronics
I’m using a Spektrum DX5 Rugged DSMR transmitter, so I stuck with Spektrum for the rest of the electronics. This isn’t just about staying with one brand. I’m a huge fan of the Spektrum Smart technology. I also love that the Rugged offers something RC transmitters don’t — durability. It’s simply perfect for rock crawlers and bashers.
On a trail rig, I’ll almost always run a 5000mAh pack, but I don’t need that much runtime out of this Axial RC rock crawler. For the courses I plan on running, a Spektrum 11.1V 2200mAh 3S 30C Smart G2 LiPo is more than enough. I could even go smaller, but I like having the runtime to play around with.
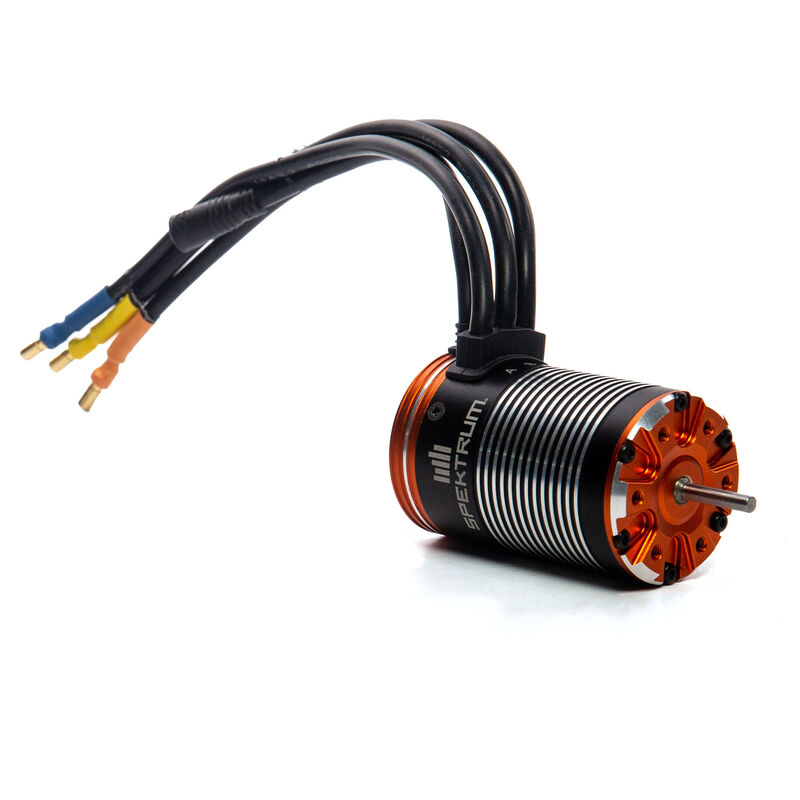
In real life, this Top Truck Challenge style rig would undoubtedly have a 454 big block or maybe a big diesel. Either way the motor would be overkill. My RC version went a little different route with the Spektrum Firma 1400Kv Brushless Sensored Crawler Motor “under the hood.” Only 1400Kv? Instead of pulling the power I need from a high Kv motor, I get it from the higher voltage 3S pack. I’m a big fan of low Kv, high volts. I swear by it, in fact. Whether outfitting a basher or a crawler, I find this strategy to be the best way to not overtax and destroy electronics. Speaking of electronics, what’s nice about running all Spektrum Smart electronics is I can monitor motor and battery temps right from the transmitter.
Next, I installed Spektrum’s Firma 60 Sensored Brushless Smart Crawler ESC. It’s waterproof, highly adjustable, and has the Smart telemetry. It has a big aluminum heatsink and cooling fan, so long runs are no concern. And, it’s easy to program via Spektrum’s Smart ESC Programming Box. To better balance my truck, I mounted the ESC on the right side of the chassis instead of behind the receiver box on the left as the instructions call for.
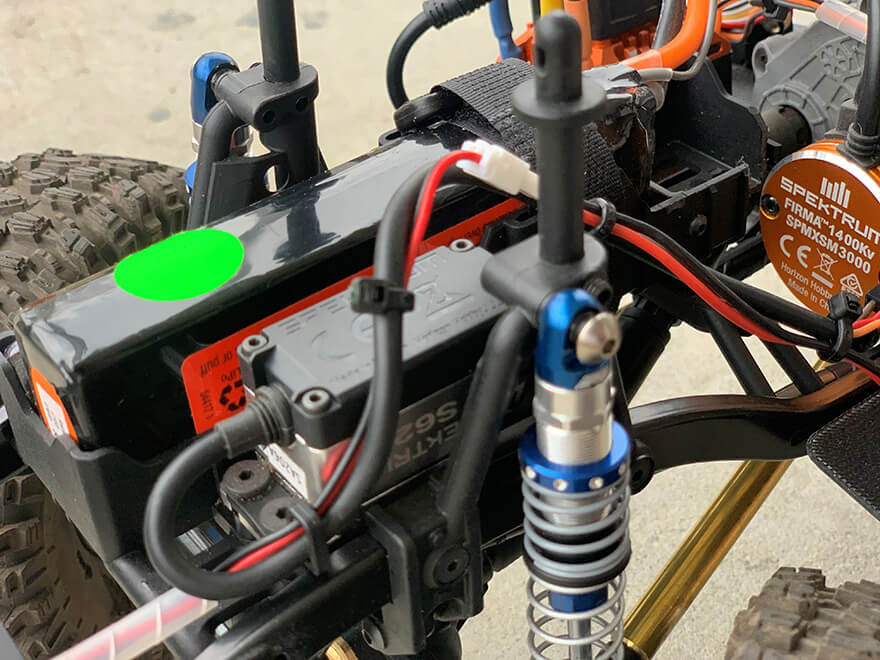


For steering, I bolted in a Spektrum S6250. With the BEC set at 7.4 volts, it delivers 339 oz-in of torque. Thus far, this has proven to be more than enough. It’s waterproof and has metal gears and ball bearings, so I know it’s going to last. I did add a Spektrum servo extension to make installation easier. Back in the day, I’d shorten all my wiring on all my RC cars. Not just the motor and battery leads, but the servo leads too. With today’s “plug and play” brushless systems, I find no real need to do this. Instead, I use numerous small cable ties to secure everything and make it all as neat as possible. I also use sections of 3mm spiral wrapping to protect wires from heat, moving parts, etc. Bottom line: if you want to dramatically cut down on malfunctions, take good care of your wiring.
The last item I added was RC4WD’s 1/10 Warn 8274 Winch, which is modeled after the quintessential full-size truck winch, the real Warn 8274. I did replace the stock line, which is listed as 3.28 ft long, with over 10 ft of line. Unlike the real version, the mini 8274 isn’t the fastest winch, but it does have the ability to free spool, which greatly speeds up the recovery process if you use it. Because I’m using synthetic line, I swapped out the roller Fairfield for a smooth RC4WD Poison Spyder hawse-style fairlead. Word of warning: the control unit, sold separately, is not waterproof, so if you favor water crossing, get busy with the waterproof silicone. To get out of tough spots, I tied on a big dual prong hook from DSM Off-Road. While it's not exactly scale, it's extremely effective. Sold in pairs, I run these hooks on multiple rigs.
Parts List
- Axial 1/10 MW19 1.9 Beadlock Wheels, Gray AXI43005
- Axial SCX10 II 4WD Raw Builder’s Kit V2 AXI90104V2
- Axial 6-bolt 27/8 Overdrive Gear Set AXI332001
- Axial AR44 6-bolt Differential locker AXI232002
- Axial SCX10 Frame Brace Set AX80026
- Axial JCROffroad Vanguard Rear Bumper AX31393
- DSM Off-Road 1/10 Multi Hooks (Stainless) 6200
- JD3 Design Shop Scx 10.2 Rock Sliders
- Knight Custom PL Back-Half Cage Hinge Mount PM10015
- Pro-Line 1/10 Back-Half Cage PRO632200
- Pro-Line 1/10 Hyrax Predator Tires PRO1012803
- Pro-Line 1978 Chevy K-10 Clear Body PRO352200
- RC4WD 1/10 Warn 8274 Winch RC4ZE0075
- RC4WD Poison Spyder Fairlead Warn 8274 Winch RC4ZS1761
- RC4WD Wired Winch Control Unit RC4ZS1089
- Spektrum 11.1V 2200mAh 3S 30C Smart G2 LiPo SPMX223S30
- Spektrum 60A Sensored Brushless Smart Crawler ESC SPMXSE1060
- Spektrum DX5 Rugged 5-Channel DSMR Transmitter SPM5200
- Spektrum Firma 1400Kv Brushless Sensored Crawler Motor SPMXSM3000
- Spektrum S6250 Standard Digital HV High Torque Metal Gear Waterproof Servo SPMSS6250
- Spektrum Servo Extension Lead: 3” Heavy-Duty SPMA3000
- Testors Enamel ¼ oz Thinner TES1148TT
- Testors Enamel ¼ oz Flat Black TES1149TT
- Zegers R/C Graffixx custom paintjob
Performance
I wasn't looking to build a pure rock crawler. For this project, I wanted to create an absolute all-around off-road beast. While I'll cover it in another post, I have a home course called the Gauntlet, which consists of 11 obstacles on a set, closed course. It has rocks, logs, sand, hills, ditches and more. The SCX10 II has proven its worth over on the extremely challenging Gauntlet. While the winch has been needed (haven't had a truck go through without needing the winch), the SCX10 II has screamed up steep hills and pulled its way through jagged, twisting concrete. It's big but it's still maneuverable. It's been able to do it all.
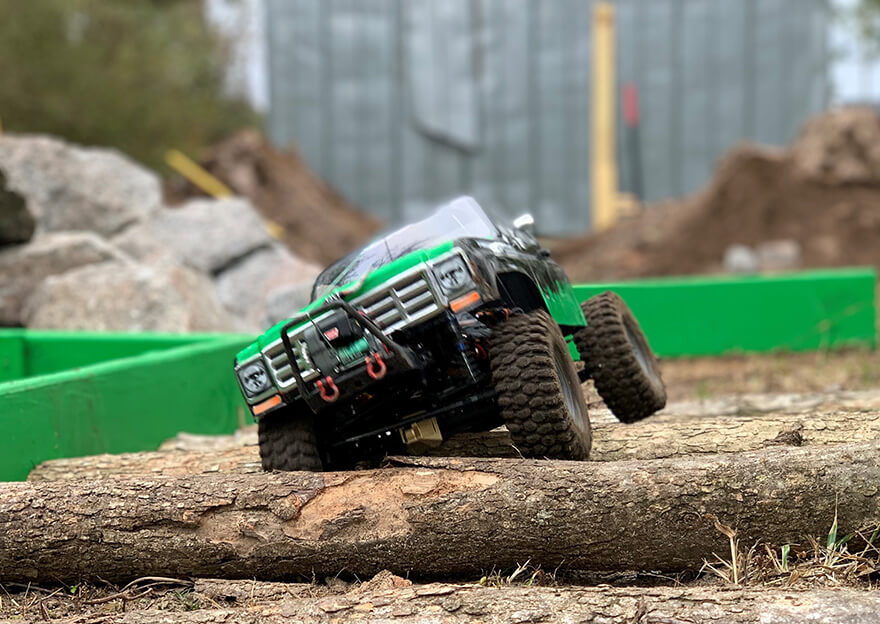


Since finishing the build, I have pretty much done nothing but beat on this poor truck. I am happy to report that it hasn't had a single failure. It is unquestionably durable. This is important. As the old saying goes: you can't finish first, if you don't first finish. In addition to using all quality parts, a lot of the durability comes from the fact that this RC truck only weighs 5.8 lb. While I do have some brass on this RC crawler, I didn't go crazy. Just because they make it out of brass doesn't mean you need it. Less weight equals less breakage.
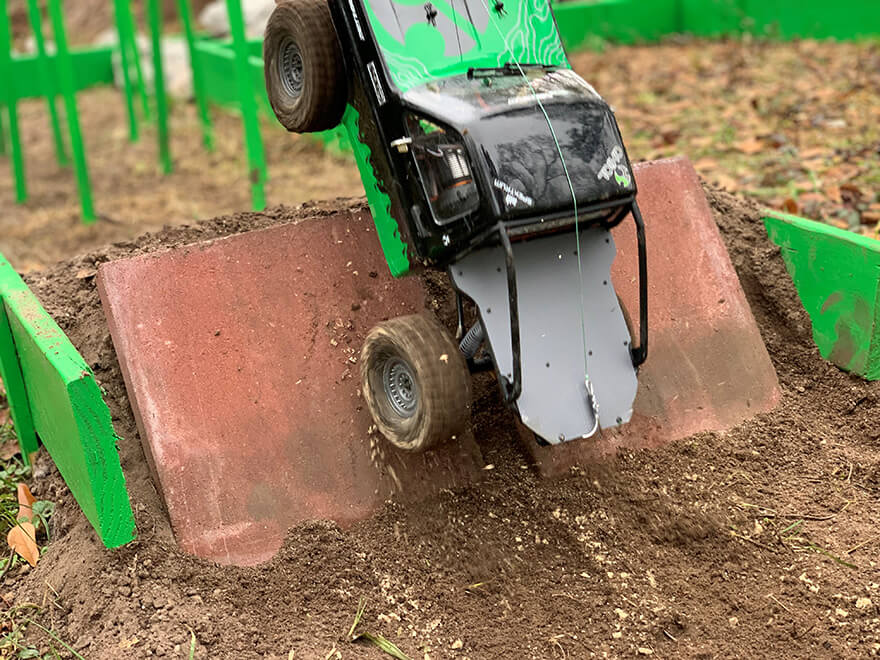


Overall, I am 100% pleased with this RC rig. I wouldn't change a thing . . . well, maybe one thing. One obstacle, the final challenge on the Gauntlet, called Hell Hole, is an extremely deep pit with basically a staircase of dirt out. The drop-in is brutal. Each time I've gone through, I've stuffed the metal bumper in and moved it back on one side or the other about a 1/4 inch. I'm currently working on a better way to lock the bumper in place, but the reality is a servo winch mounted behind the body would be a much better option. I love the looks of the Warn 8274 but getting rid of the bumper and winch out front will simply increase performance greatly via a far better approach angle. I'll probably keep this setup for now but it's something to keep in mind for your build. Bottom line is up front, less is more.
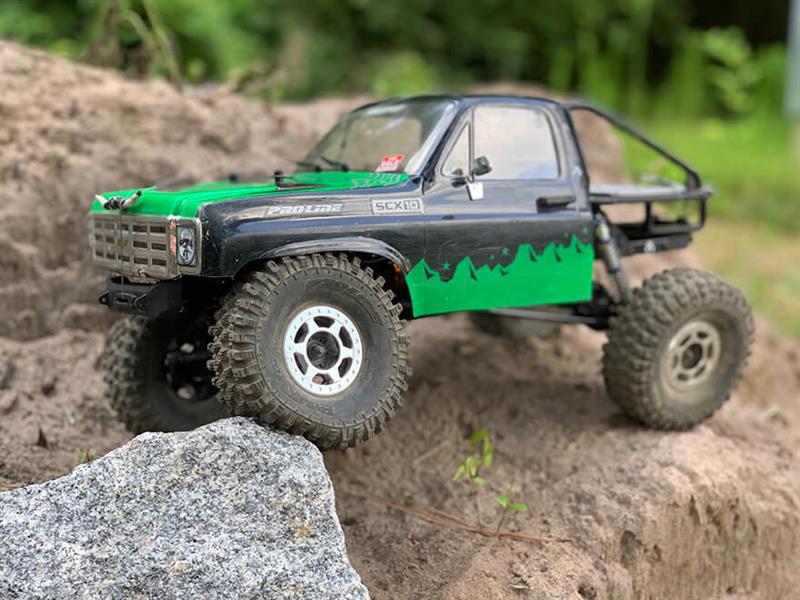


Update
I've a had a ton of fun with this K10 build. It's been to Florida for USTE. It's hit the trails in Kentucky at Beat the Creek. With the exception of comps, where I use my SCX10 Pro, it's been my go-to rig, so it gets used a ton at my home course. And, like any project thata gets used a lot, since first building it, I've made a few more changes.
I knew right away that the metal bumper and winch I chose had to go. The setup looked great and more than fine on your typical trail, but the amount of abuse it was taking on my obstacle course made it clear an improved approach angle was desperately needed. I found the perfect replacement at a company probably best known for their tires and bodies. I'm talking about Pro-Line, of course. The Pro-Line Ridge-Line High-Clearance Front Crawler Bumper provided exactly what I needed. It barely sticks out past the body on my build, includes a hawse fairlead, and is a direct fit on the end of the SCX10 II frame rails. The Ridge-Line is a bit of a universal bumper in that it will fit a few different crawlers out there. It also includes an optional push bar, and the fairlead can be removed and replaced with a 2-inch lightbar.
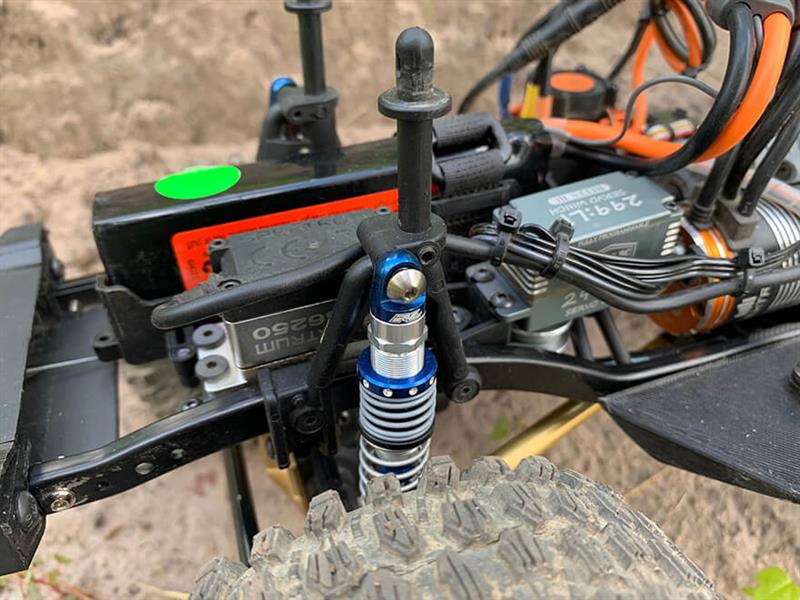


Replacing the steel winch bumper gave me the perfect approach angle, but necessitated a new winch solution. The only real option is a servo winch. There are plenty of good choices out there, but I wanted something fairly light and compact as to not significantly raise the center of gravity. For this reason, I bolted in a Reefs 299:LP Servo Winch. Reefs includes an aluminum low profile spool, 5 ft. of silicone coated steel line and a hook. I kept my DSM Off-Road Multi-Hook, which has proven to be extremely reliable, and went with as much braided winch line as the spool would hold. Even though this winch is smaller, there's no need to worry. With 320 oz-in of torque, the 299:LP is plenty strong.
I had to get a little creative to mount the winch. Older SCX10 II models had accommodations for a winch mount. The kit version I used doesn't, so started pulling together a list of needed parts. Most of the items I needed came from the SCX10 II 2000 Jeep Cherokee kit. In addition to items from three parts trees (see below) related to the battery and servo mount, but I also used Axial's Winch Spool Servo Mounts parts tree, which includes line guides. These line guides are great for any build where the winch line isn't a straight shot out.
I wasn't planning on changing the wheels, but thanks to some discarded fishing line at a crawling spot, I tweaked one of the Axial MW19 1.9 Beadlock Wheel's hexes. I decided to change the look up and mounted the Pro-Line Hyrax tires on some Pro-Line 1/10 Holcomb Aluminum 1.9 Crawler Wheels. Named after the Holcomb Valley Gold Fever Trail in Big Bear, Ca, these beadlock wheels feature an aluminum outer ring and composite internal ring and inner main wheel. If you're looking to save some budget, an all composite version is also available.

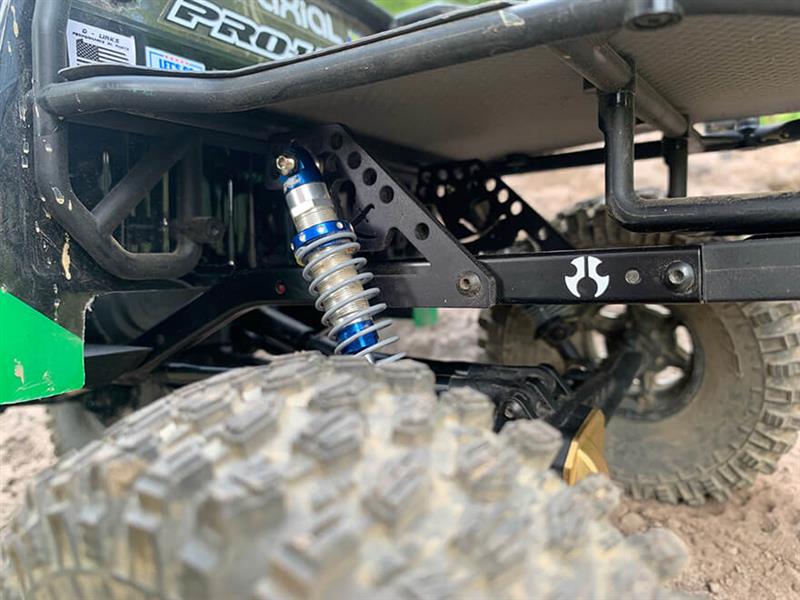


Another casualty, this one my fault, was a rear shock tower that broke on a bad tumble. Should have picked a better line. No big deal. Just an opportunity to try out a new-to-me company, Rock Pirates RC. With skid plates, shock towers, complete chassis kits, and more, California-based Rock Pirates RC has a rapidly growing following. I bolted in a set of their rear laser cut aluminum shock towers. Besides offering the durability I was looking for, these offer a lot of tuning options. I was so impressed with the Rock Pirates RC parts, I got my hands on a bunch more for my next build.
New Parts
- Axial Battery Tray SCX10 II AXI3388
- Axial Frame Braces SCX10 II AXI3386
- Axial Servo Mounts SCX10 II AXI3387
- Axial Winch Spool Servo Mounts AXI3397
- Pro-Line 1/10 Holcomb Aluminum 1.9" Crawler Wheels PRO281000
- Pro-Line 1/10 Ridge-Line High-Clearance Front Crawler Bumper PRO634100
- Reefs RC 299:LP Servo Winch SEHREEFS59
- Rock Pirates RC Rear Shock Towers For SCX10 II Rear Shock Towers For SCX10 II
