Posted: 11/3/17
Two times a year something called Daylight Savings Time really messes with me and so many others. Sure there is a good side of some additional sleep in the Fall, but that kick back in Spring is really like a kick in the… let’s skip that. Daylight savings came about as a way to give people more usable working hours as the earth's axis tilts between seasons which in turn affects daylight time. The practice of DST was also used to conserve power before recent efficient household products came to market.
We’re not here to give you a whole history lesson, we’re here to tell you that this Daylight Savings Time is once again about to encroach upon your trail time and of course we cannot have that! Typically during the Fall Daylight Saving Shift, many lose out on wheel time, the skies darken and that evening run after work, school or other activity gets sidelined. Rigs get shelved and sit begging for use until the next DST shift. Well it’s time to break that cycle!
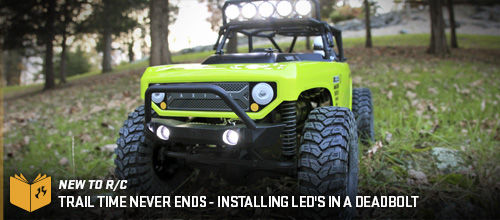
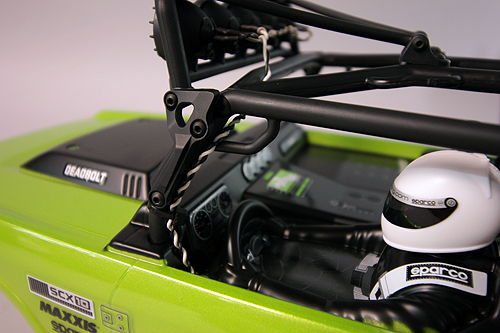
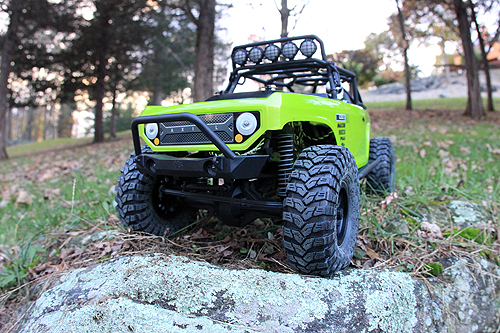
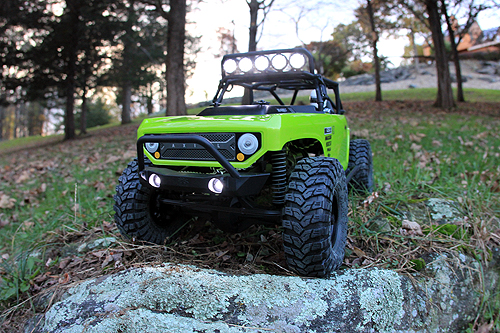
Many trail events have incorporated a evening or night trail run. At Axialfest, the night runs are among the most popular trail times and drivers will flood the trails until the sun rises in the mornings. These evening adventurers have their rigs wired for business so light floods their paths making it fun and challenging to hit the trails for nonstop action. So why can’t the rest of us do that? We’re about to break the mold and beat up the guy that made the mold. We’re going to show the glow on the Axial Deadbolt SCX10 using factory Axial option parts. The Deadbolt comes equipped with a 5-bucket light bar that only requires a few option parts to make them illuminate and so it’s a natural fit to turn into the perfect Daylight Savings Time evening trail runner. But, it’s not going to end with a simple light upgrade. We’re going to take it a step further and show you how to really light up the trails.
PROJECT NIGHT VISION DEADBOLT
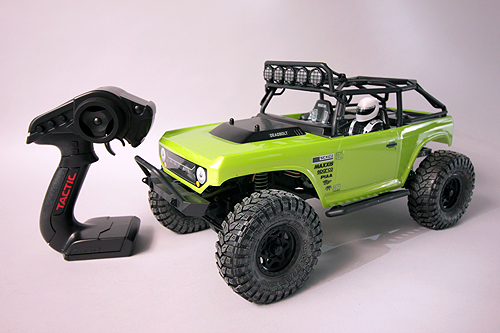
Our project vehicle is a brand new Deadbolt SCX10 ready to run kit. The Deadbolt is assembled from the factory with electronics installed and ready for trail runs day or soon to be night runs. As mentioned, it is already equipped with a 5-bucket light bar on the cage that can be easily fitted with the Axial AX24251 Night Visions System. The NVS actually includes a number of the LED light strings that will fit right on the Deadbolt. Installation is easy, let’s get to work.
OPTIONS USED
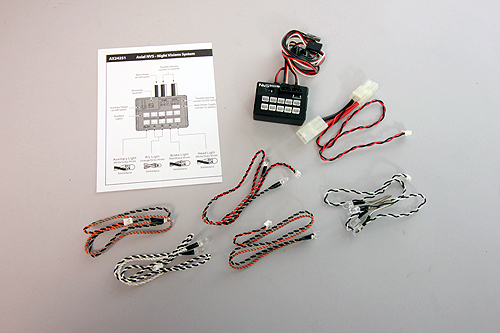
The Night Visions System or NVS is a great for customizing any scale RC machine. This set controls the headlights, tail lights, brake lights, and right/left turn signals, as well as some extra auxiliary lighting. The complete details on this set are: HERE
Includes the following LED light strings:
(1) Double LED light string for headlights (White LED)
(1) Double LED light string for brake lights (Red LED)
(2) Double LED light strings for turn signals (Orange LED)
(1) 5 LED light string for auxiliary lights (White LED)
TOOLS NEEDED
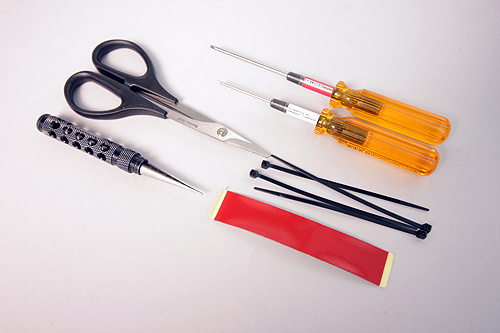
1.5mm & 2mm Hex Driver
Reamer
Small Zip-Ties
2-Sided Tape
Scissors
Soldering iron and solder (possibly)
STEP 1
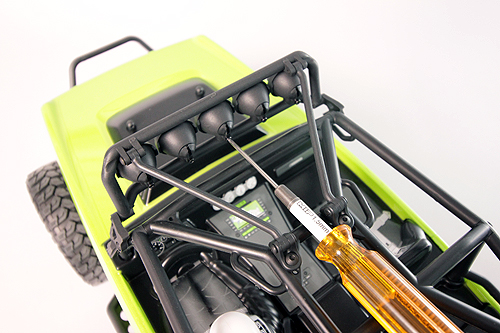
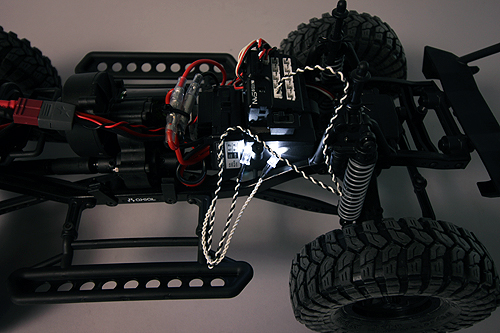
The first step to installing the 5-LED light string (included with the NVS) in the Deadbolt light housings is to locate the LED retaining retainers on the back of the light buckets. There you will see a small screw holding the retainer in place. Using your 1.5mm hex driver, remove all five screws and retainers.
STEP 2
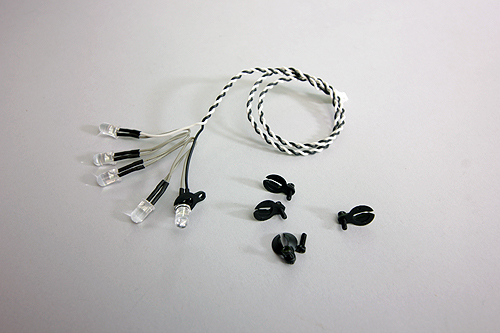
Unpack the LED string and place a retainer onto one of the end LED's and then slip that prepped light into one of the end light buckets on the rack.
STEP 3
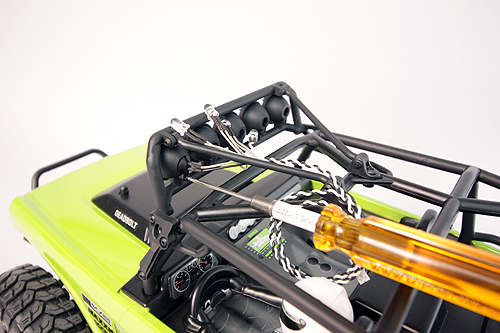
Time to secure that LED. Using the screw and your 1.5mm hex driver attach the retainers to the light housing with the screw.
STEP 4
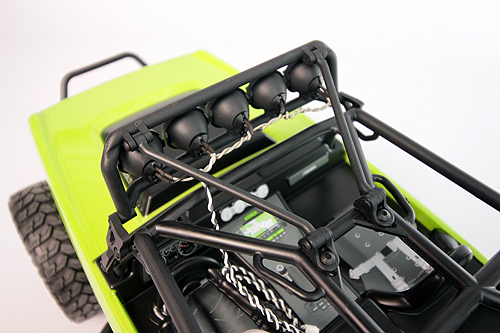
Repeat the process for the remaining lights. We "twisted" the wires as we went along for a neater look.
STEP 5
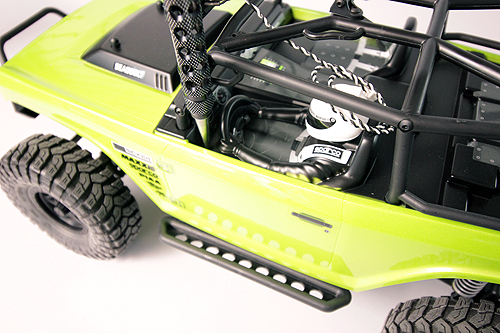
The power wire needs to be run inside of the body. Using your reamer, locate an area to make a hole where you can run the wire inside of the body.
STEP 6
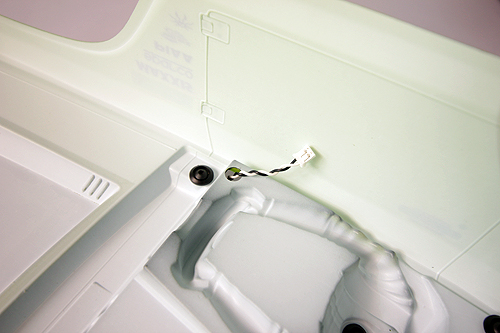
Feed the LED power wire into the body.
TIP: Use zip-ties to secure the wires to the roll bar for a finished look.
STEP 7
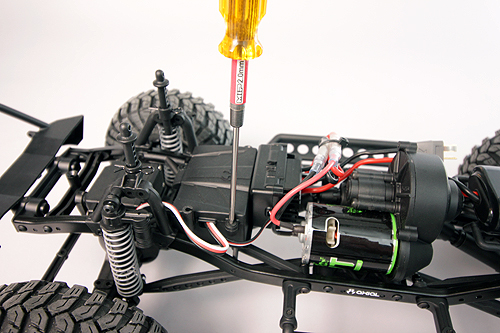
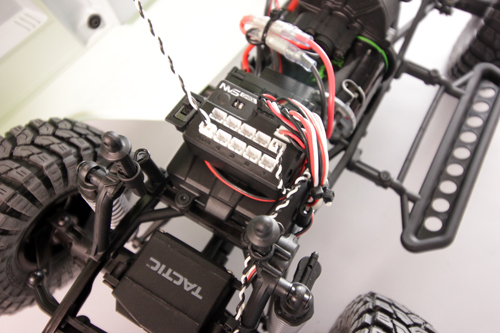
The NVS controller needs to be connected to the receiver to utalize all of its functions. To access the receiver, use your 2mm hex driver and remove the two receiver box lid screws. Pop the top off the box.
STEP 8

Locate the Channel 1 and 2 port on the receiver; unplug your servo and ESC. Remember, the servo is Chanel 1 and the ESC is Channel 2.
STEP 9
Now plug the servo lead into the NVS system in line with the Channel 1 signal lead on the NVS. Repeat for the Channel 2/ ESC lead.
STEP 10

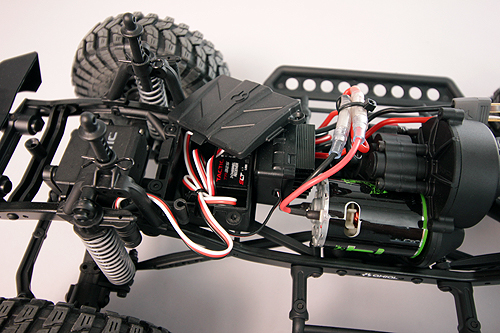
The NVS works inline with your servo and ESC signals. It interprets the signals and can initiate LED functions that work in sync with your vehicle's movement. For example, when you turn, the NVS will make the turn signal blink. If you hit the brake on the radio, the brake lights will illuminate on your truck if you choose to install them. We're keeping it simple here by powering our light bar. To complete the wiring, you'll need to plug the Channel 1 lead from the NVS into the receiver and then follow suit for Channel 2.
STEP 11

It's best to tidy up your wiring. Take a zip-tie or two and neatly bundle the extra wire before tucking it into the receiver box.
STEP 12

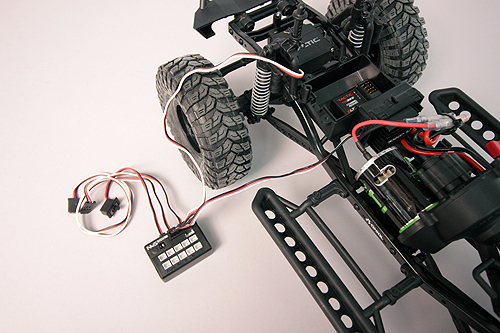
It’s time to find a location for your NVS power controller. We’re going to use a piece of double sided tape to adhere the controller to the top of the receiver box. We've used two additional pieces to fill in the indents on top of the box for a larger area for the NVS to stick to. This location will give us easy access to the wiring.
STEP 13
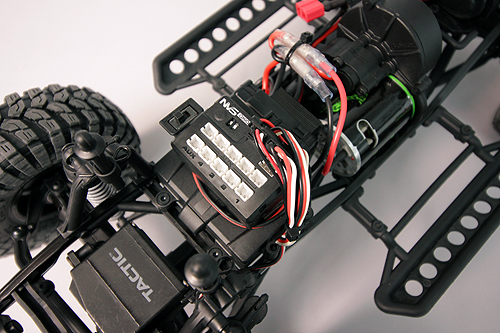
Once the controller is attached to the box, use some zip-ties to neaten up any hanging wires. Secure the NVS on/off switch using 2-sided tape to an easy access location.
STEP 14
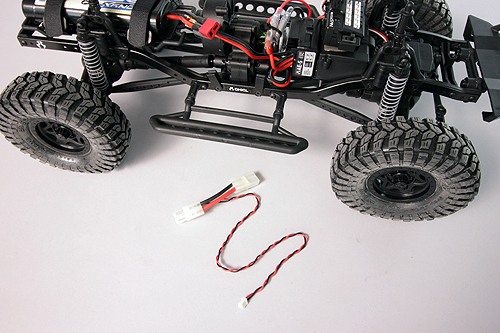
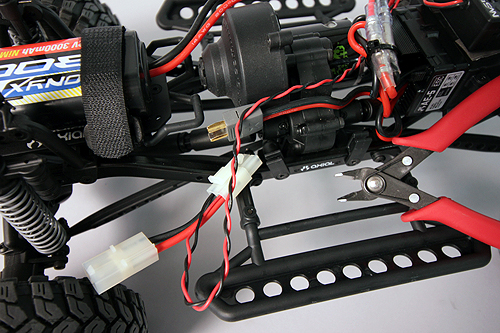
Locate the power harness to power your NVS system, it is included with the set. You'll notice it has two Tamiya connectors with a jumper wire. Insert the small white plug into the power port on the NVS. Since the newest model Deadbolt comes with a Star-Plug, it will not work with the Tamiya connectors. Rather than solder Star Plugs to the harness, we're going to take a neater approach to integrating the connector. We're going to cut the small gauge power wire leading to the NVS and solder it to the tabs of the Star-Plug.
STEP 15
After a quick solder task, the NVS power wire looks at home connected to the Star-Plug and much neater without the additional connectors. If you don't have a soldering iron, you can probably head to the hobby shop where you purchased your machine and they can solder it for you. Some shops might charge a service fee for soldering. Or you can head out and purchase your own soldering supplies, they certainly come in handy for this hobby.
STEP 16
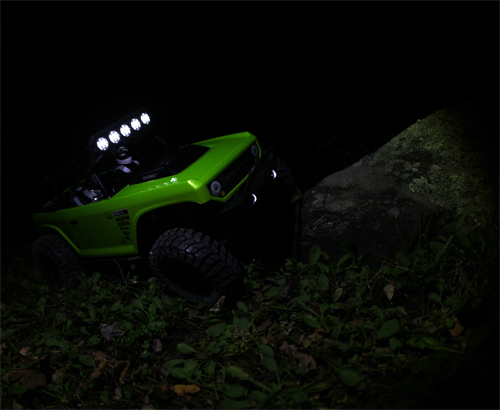
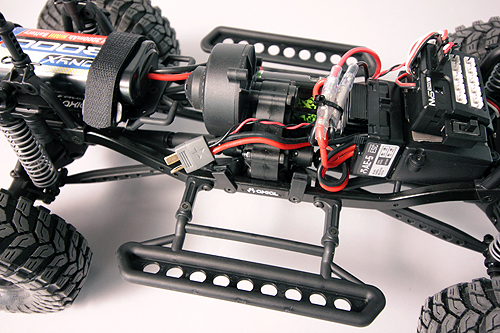
This is probably a great time just to check to make certain the components power up. We're going to use the Auxiliary ports for our rack lights and front bumper/fog lights. Here we've plugged the fog lights into one of the upper Auxiliary ports. First turn on your radio and then plug in your battery to the ESC to power the Deadbolt. Turn on the NVS switch and wait a few seconds. The NVS has to power up and then it will illuminate the LED's. We're Good!
STEP 17
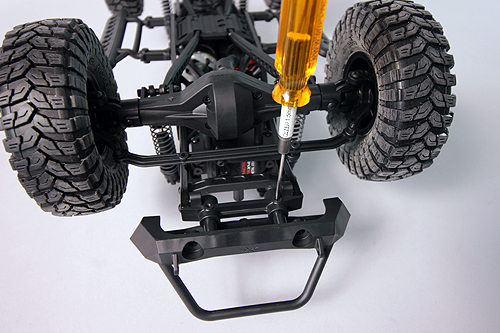
There is a two LED white light string in the NVS (shown above) and two open light buckets in the Deadbolt bumper. Seems like a match to me, let's add them too! Remove the bumper to install the LED lights by removing the two bumper retaining screw pins with a 1.5mm hex driver.
STEP 18
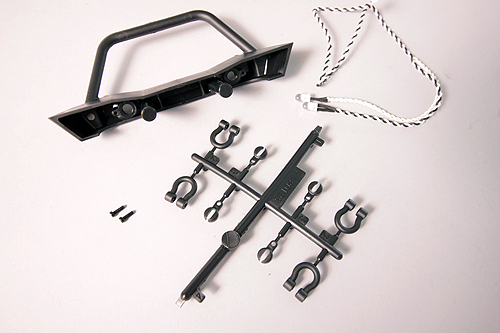
Locate the rest of the parts you'll need. That means going back and finding the additional parts that came with your kit. Here you'll find the two LED retainers you need. You'll also need a pack of AX31066 M2x8mm screws to secure the retainers. Then dip back into the NVS box to find that 2-LED string.
STEP 19
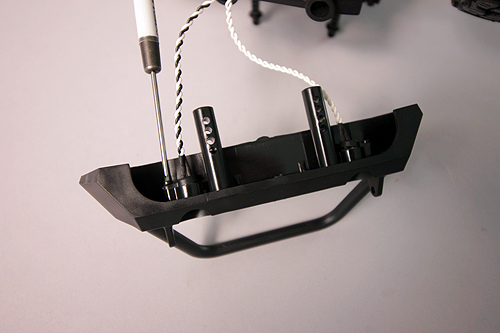
Install the LED light into the bumper in the same manor as you installed the lights in the light buckets. Once both lights are installed, place the bumper back in the cross-brace and reinstall the retaining screw pins. Plug the LED wire connector in to any Aux port on the NVS.
We’re almost done! Place a fully charged battery into your Deadbolt, turn on your radio and then plug your battery in. Now connect the extension wire from the 5-light string into the controller Aux port. You should have working lights! Place the body on the truck, insert your four body pins… And go explore the trails at night!
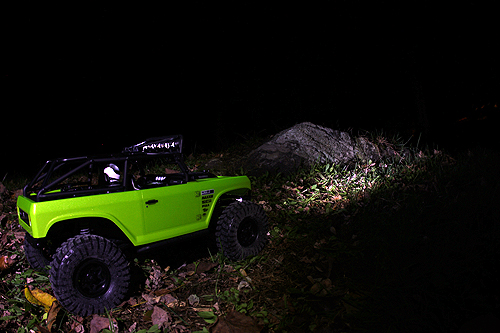
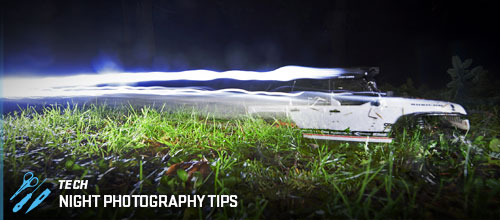
Now your ready to go make some cool images! See our blog post:
Night Photography Tips by Ian Coble