Posted: 9/14/18

Who loves assembling tires? Raise your hand! Stop raising your hand, we can’t see you. Glueing or assembling tires on beadlock rims is not among the favorite build tasks of an RC machine. Perhaps that is why most RC manual writers leave it to the end. But it’s a job that needs to get done. However if it’s not done right, it could lead to problems when you’re out at play or on the course. Here we’re going to go over how to assemble a certain wheel type so it secures the tire properly and that is a beadlock rim. Beadlock rims have some great advantages, they secure the tire without glue and the wheel can even be reused when you want to swap tires. But if you assemble a beadlock incorrectly, your tire may seem out of alignment and cause wheel wobble and erratic handling. Let’s go over some tips to help you install a tire on a beadlock wheel properly.
GATHER YOUR PARTS
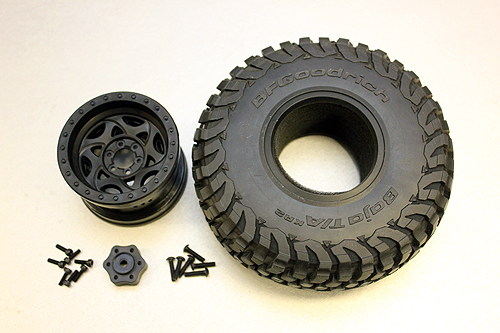
Gather all the parts you need to assemble one wheel and put them together in a pile. Here is the loosely assembled wheel, tire with insert, screws and inner hub.
TOOLS

The tools you'll need will be pretty simple. Pretty much you'll just need a 2mm hex driver for this wheel. We're going to make our lives easier and use and electric driver with 2mm speed bit. You may also need a leather punch depending on how you want to vent your tire.
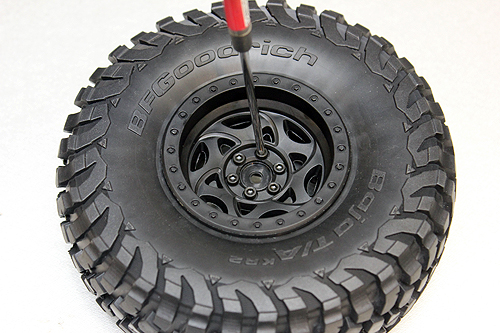
STEP 1
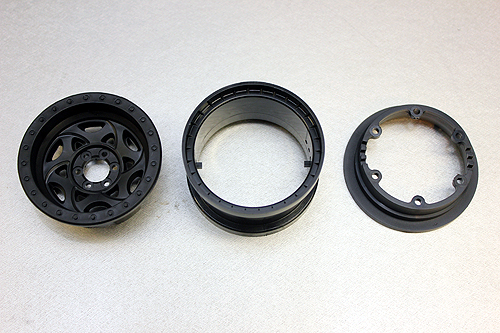
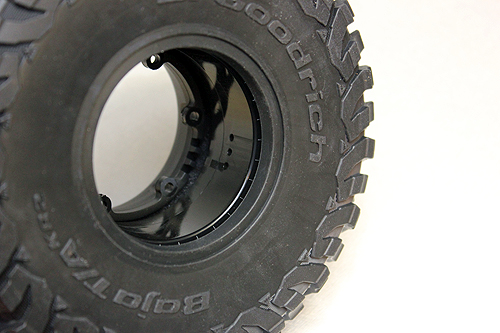
These 2.2 Walker Evans Wheels came loosely assembled from the factory. It is important to notice how they come apart. They have a vent option built into the wheel that allows you to have no vent, a 2 hole vent (1 on each side) or a 4 hole vent or even a 6 hole vent. This vent system is off-set so you'll want to notice the position of the middle ring. To make keeping track of the rim easier, we put the wheel from the factory on the table, backside of the rim first. Then slide out the center hoop and place the back side down next to the rear locking ring. Then we take the face of the rim out and placed it next to the center ring.
STEP 2

Take the center ring and slip it into the tire makeing sure it also goes inside of the foam insert. As you slip the insert in, the "back" of the rim will continue to face down.
STEP 3
Check to make sure your inner ring is perfectly positioned in the center of the foam.
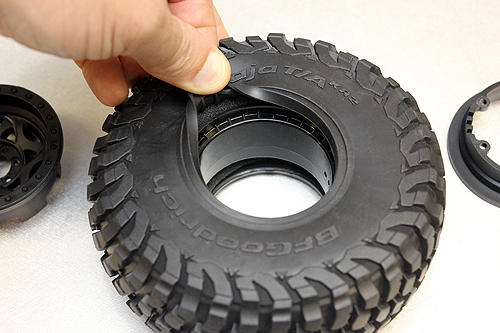
STEP 4
Now pick the tire up, move it over the back side of the beadlock ring and place the tire down. You can flip the tire over now so you can push the outer rim onto the tire. We know the additional steps to keep track of the inner ring off-set sound silly, but trust us, its better to go slow and keep track rather than getting frustrated wondering why your wheel isn't going together properly.
STEP 5
Look inside the wheel, see the notches? This is the venting system. By moving the outter rim so it inserts over the peg in a different location adjusts how much the tire will vent. We have it in the middle so only one hole on this side of the wheel will vent air. Want a softer tire, allow 2 holes to vent. Want to go in the water, shift the wheel ring so none of the holes are open. You get the idea.
STEP 6
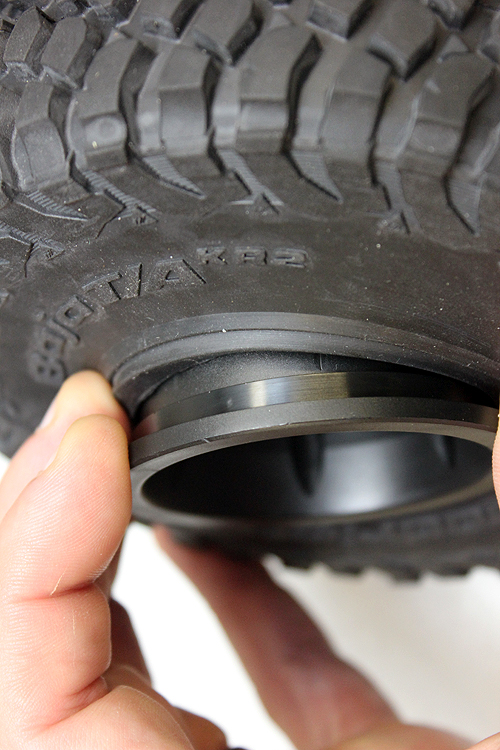
Now take the time to set the tire bead onto the shiny portion of the rim ring, we pulled the tire off of it, so you can see it better. If its on the next lower part of the ring, it may not press on properly later. After slowly pushing in the outter ring, lift up on the tire edge a bit to make sure its seated properly.
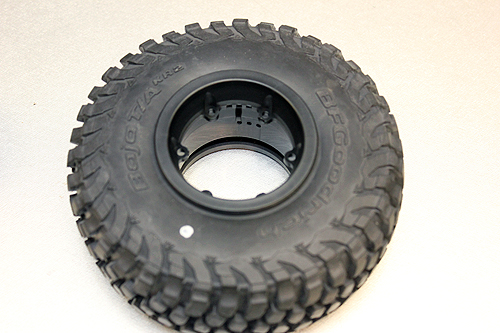
STEP 7
Now you can flip the tire back over and place it on your bench. Slip in the front portion of the rim from the top. Push down on the rim face so the tire bead seats itself just like you did to the back ring.
STEP 8
With the rim face in place, flip the tire over again and make sure the screw holes line up. If they do not, spin the front rim face until the holes line up. Do no turn the back ring, this will change your vents.
STEP 9
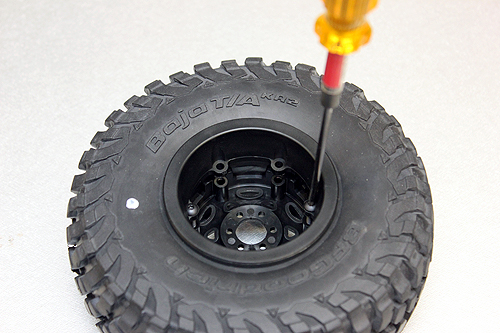
Time to start assembling this thing! Screw two screws into the rim on opposite sides. Only screw them in a few threads.
STEP 10
Now install two more, again across from each other and just a few threads.
STEP 11
Thread the last few screws into the wheel, again just screw them in so a few threads catch. Your wheel should now be aligned and ready to be tightened. But wait!
STEP 12
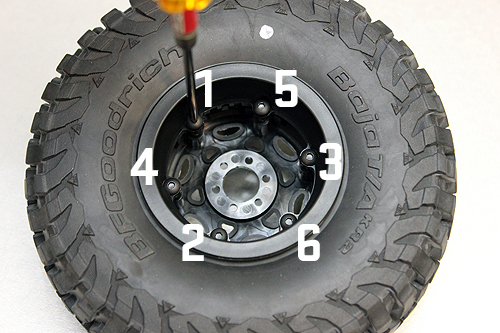
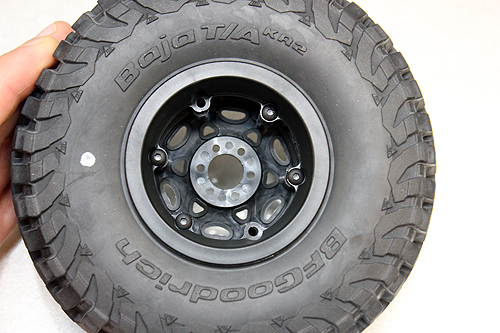
You will need to keep the wheel face and back ring even as you tigthen down the screws. This is achieved by tightening the screws a little at a time in a "star pattern" just as if you were tightening the lug-nuts on a real car. You may tighten the screws down in the star pattern for 4-5 cycles before the wheel has compressed and properly pinched the tire in the beadlock. Tigthen the screws until they are snug and you don't see any gaps between the rim pieces or screws.
STEP 13
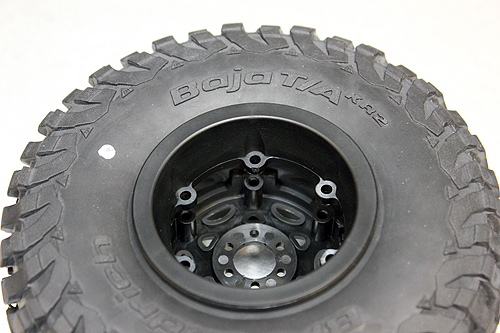
Install your inner hex hub in a similar fashion. You can install all the screws at once, but tighten them into their final position by using the star pattern.
STEP 14
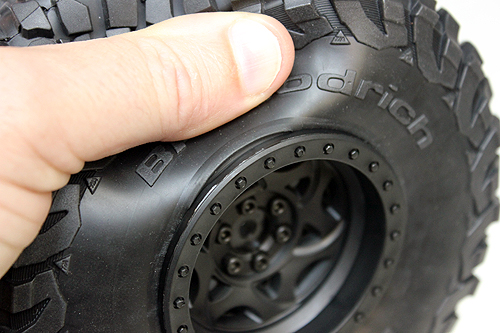
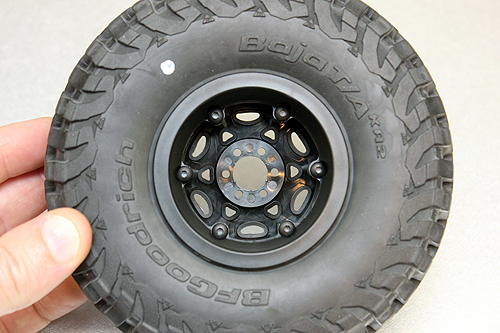
Check your tire overhang. Lift up on the edge of the tire and you should see the rubber overhang edge that sits on the outter edge of the rim. It should look uniform as you turn the wheel and gently pull up on the edge. If you see a large gap or can't pull the edge out at all, there's a chance your tire is not properly seated in the rim and you'll need to disassemble the wheel and repeat the install process. If you don't the tire will wobble. A wobbly tire can cause bad handling and wear other parts on the rig prematurely.
TIPS
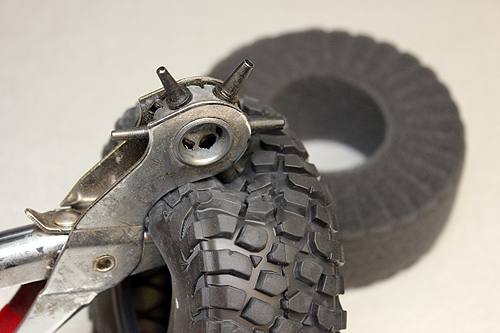
Some drivers choose to vent through the tire. To do this, you'll need a leather punch to punch a hole in the tire. The thought behind venting the tire is that any dirt that gets inside can "fling" out. Or if water gets in the tire, it can drain out. Some think less dirt gets into the tire with this style of vent. It's an option we just want to let you know about and you can decide what style is best for you.
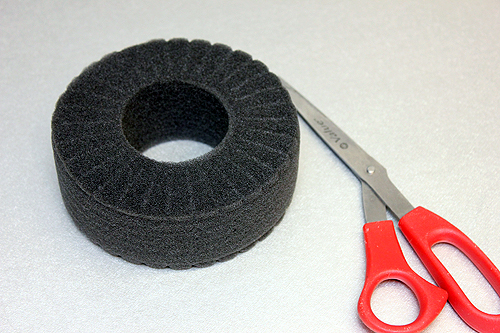
Foam Trimming- There are a number of methods to trimming tire insert foam that will change how the tire acts. Some will cut the outer edges of the foam on a diagonal so the sidewall of the tire will feel a bit softer. If you are just having fun, leave it as is. If you plan to race, see how other racers modify their inserts.
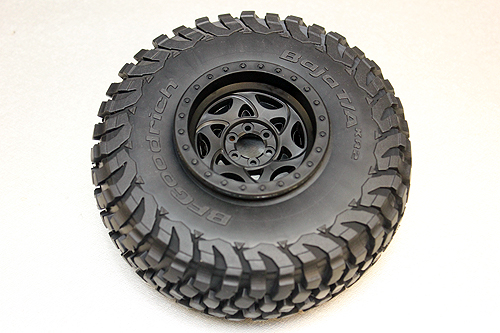
FINISHED!
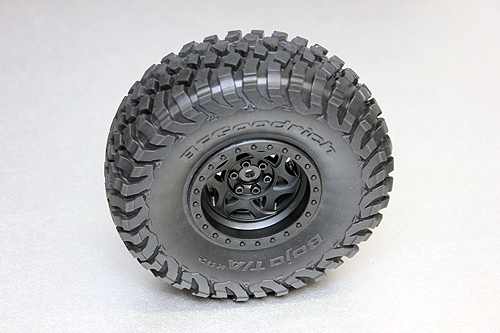
Your beadlock wheel and tire are now properly assembled. Just three more to go! Or if you have a Bomber, just four more to go! Take your time and assembled your wheels properly. They'll stay together and allow your rig to perform better.