Posted: 5/16/18
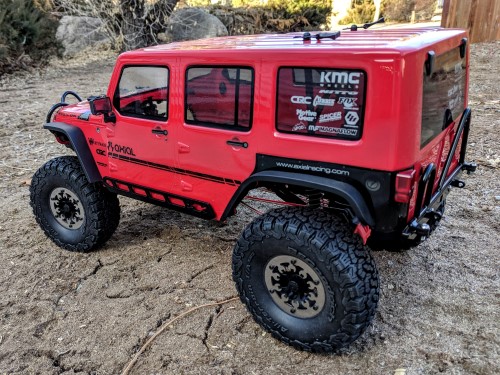
After AXIALFEST2017, I started thinking that I needed to update my trailing rig. Last year, I built a new racer for for the Altra Ultra 5K Enduro, but I needed something new to run on all the trials at AXIALFEST2018.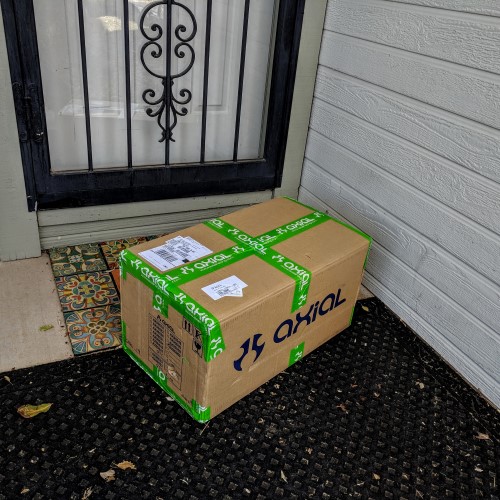
As luck would have it, Brown Santa dropped off some Green Tape just before the Christmas season. Merry Christmas to me!
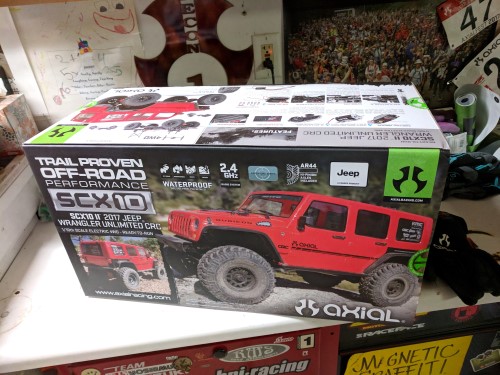
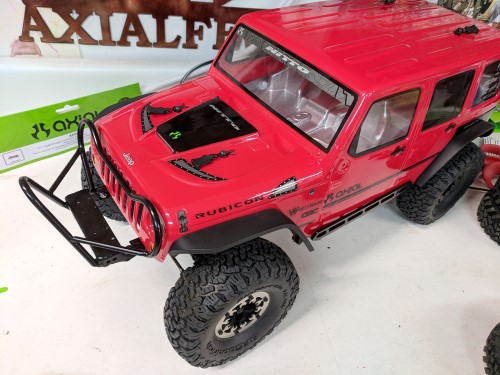
When I opened up the box, it was packed with the new SCX10 2 2017 Jeep Wrangler Unlimited CRC. This would be a great new trailing rig for AXIALFEST2018!
My buddy, Mr. Werty over at WertyMade contacted me as soon as he found out I had the new rig. He wanted to use it as a test mule for some parts he was making; rear bumpers, front bumpers, and rock sliders. Since we've been RC nerd friends for many years, I happily agreed to lend him my new trailing rig.
He returned it to me in even better than tip top shape. All the parts he test fitted, he left on there for me, score! I immediately started thinking about the things I wanted to modify and add to improve the performance and looks of the 2017 Jeep Wrangler Unlimited CRC. First up was to get a spare tire and some RotopaX on the rear bumper.
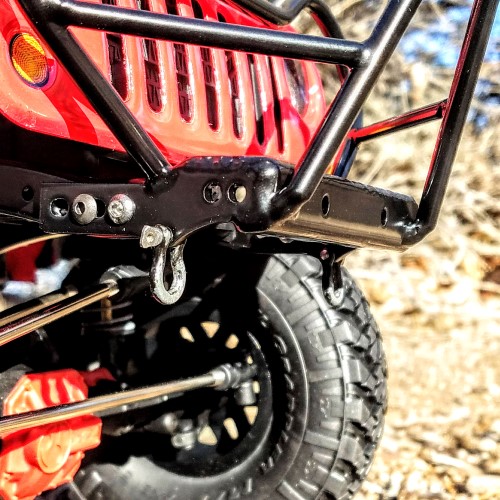
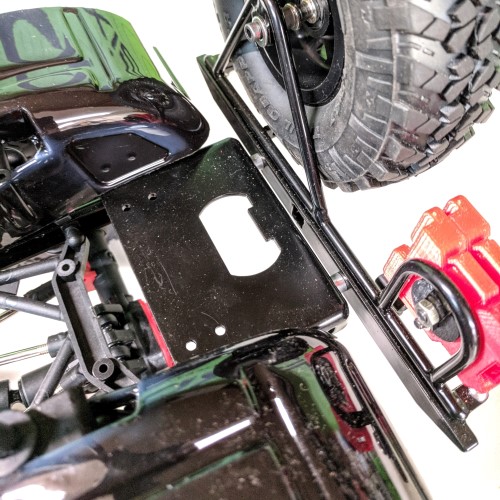
Mr. Werty repossessed those D Rings, so that was one item I wanted to replace on that sweet front stinger.
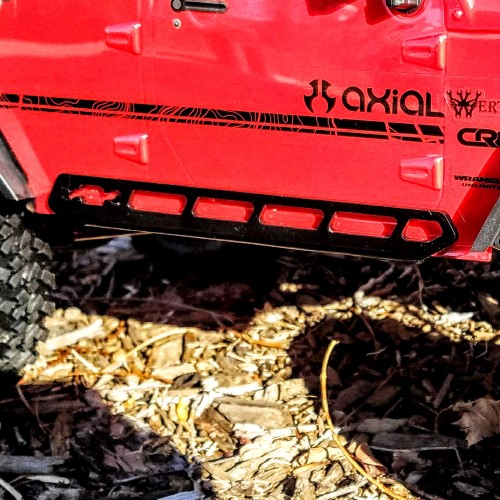
Check out those sweet sliders, indexed to hold the body, just like the stock plastic ones, but these are made out of steel. The wrench logo in a nice touch, too.
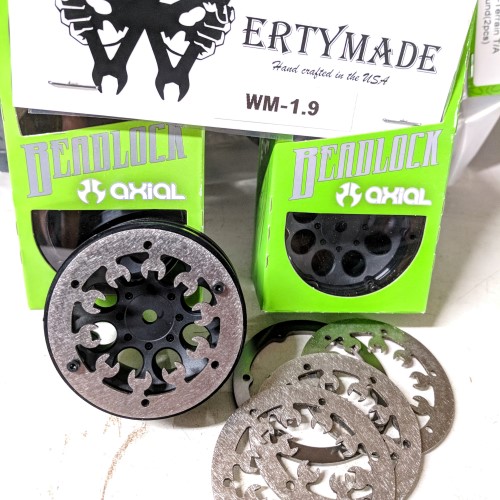
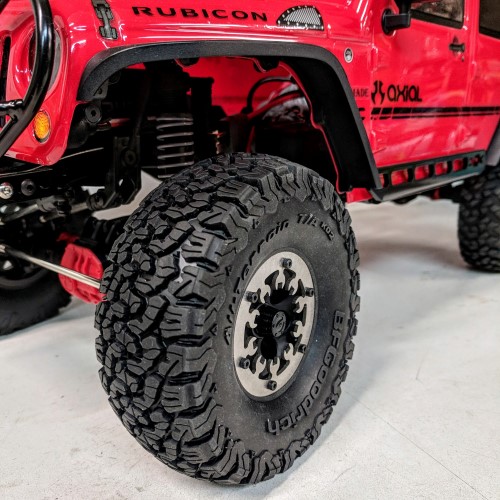
Next up was a new set of socks and shoes. I've always liked beadlocks and the classic Axial 1.9 Beadlocks were my first choice. Just as I got the wheels, Werty annouced these new Wrench Rings, and I just had to have a set.
Look how awesome the rings look.
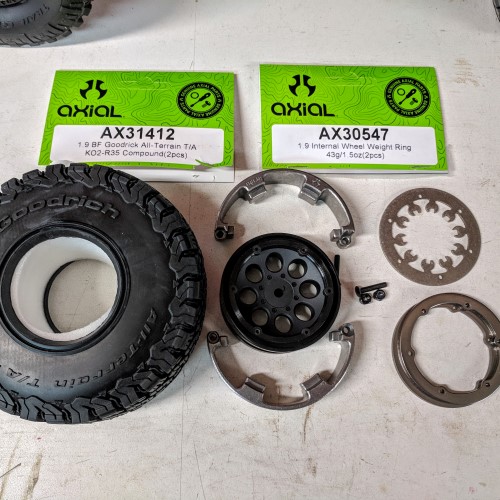
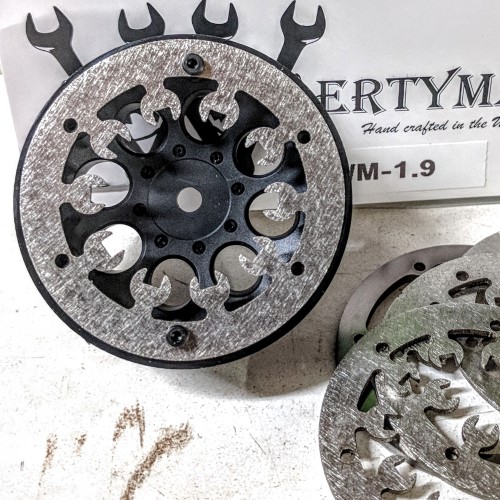
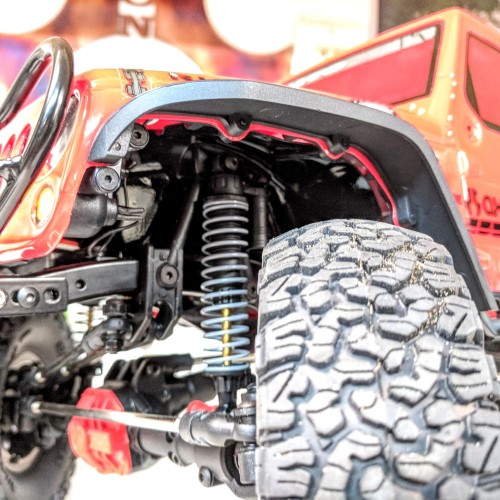
In order to add a little crawling performance, I like to add some weight in the wheels to lower the center of gravity. The Axial Internal Rings are a perfect fit. I also swapped out to a slightly beefier looking tire, the BFG All-Terrains are a classic tire and the KO2 version is even better than the original.
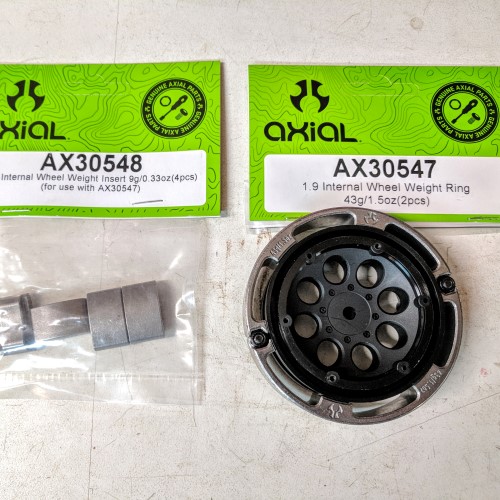
They mount up easily, and you can adjust the weight using the inserts.
At this point, I was loving this wheel/tire/ring combo, but I wasn't digging looking at the electronics through the wheel wells.
It was starting to look pretty good, but I still had a ways to go.
Next up, I needed to add some swag to the rear.

Since I wasn't using the stock Nitto Trail Grabbers, I pressed one into service as the spare tire.
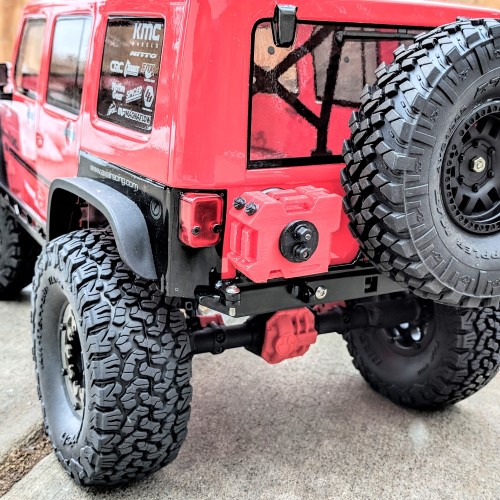
Next, I hit up my local hobby shop, CKRC Hobbies and picked up these RotopaX gas cans from Scale by Chris AKA SBC.
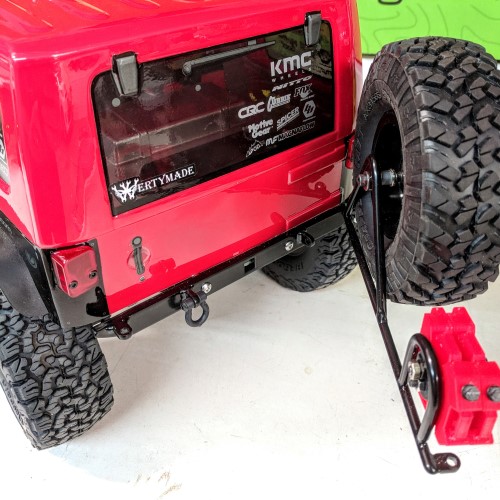
Don't worry, the tire rack swings away, so you can still get into the back of the Jeep.
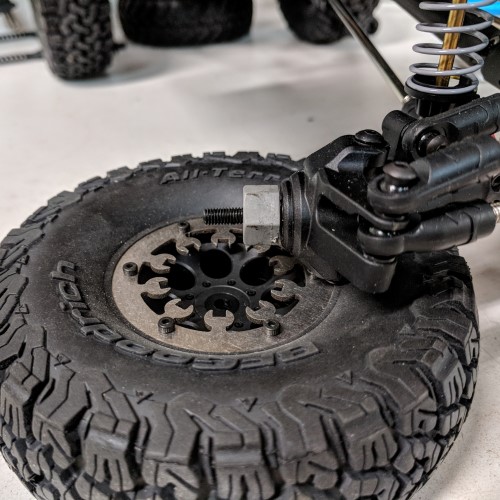
Another modification I like to do is the 3654 Mod to the wheel hexes. Eazy Elio from Two Chainz Scalerz taught me this trick to give any Axial scaler a slighly wider stance. Since the stock hexes are about 3mm, this modification adds about 10mm of width to the SCX10 2.
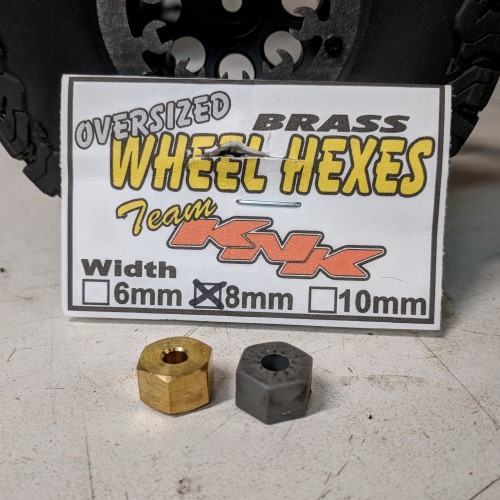
While I was at CKRC picking up the SBC RotopaX cans, I spotted these brass 8mm hexes from Team KNK. It might be slight, but the brass hexes will also lower the center of gravity slighty.
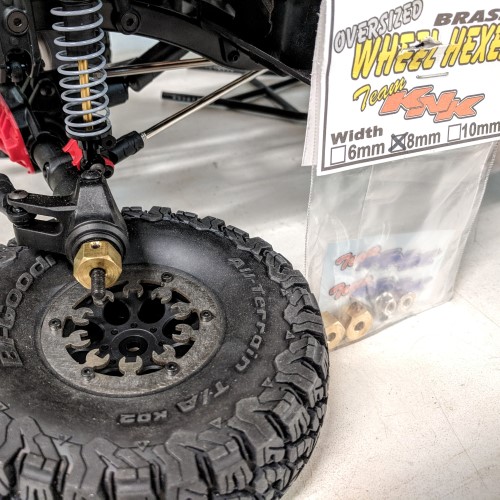
They fit perfectly and come with new wheel nuts and set screws to secure them to the axles.
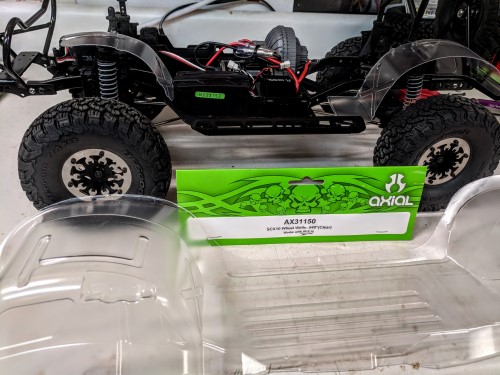
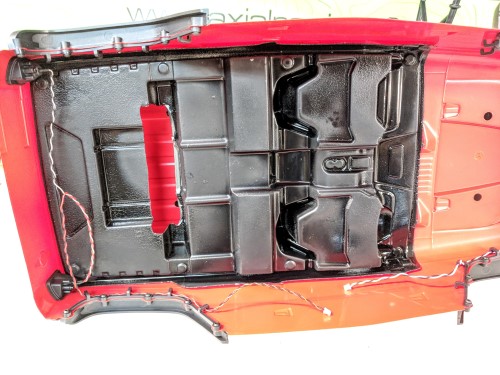
Next up was adding some wheel wells to hide the electronics. I used the wheel wells for the original SCX10.
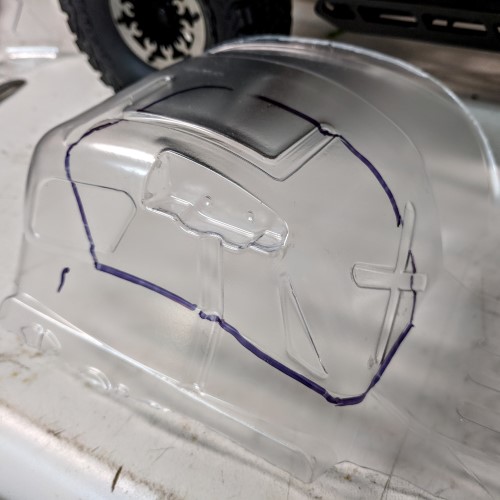
They aren't a perfect fit, but with a little creativity with the scissors, they worked out pretty well.
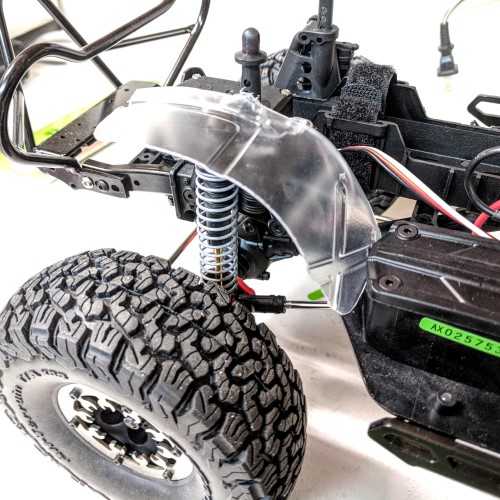
The curve of the Jeep Wrangler body means you have to trim the fronts quite a bit.
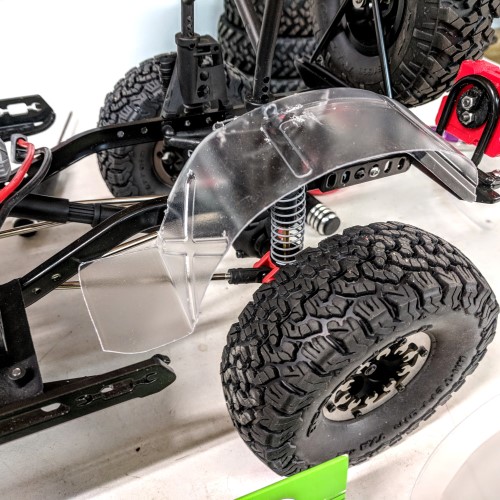
I ended up trimming that front tab off because I was worried it would hang up on twigs and things on the trail.
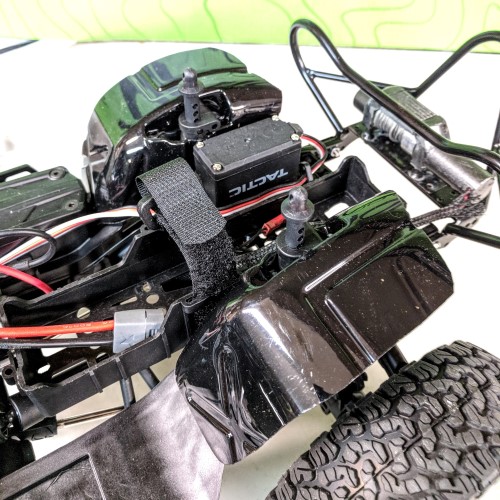
After a little black paint, they look great.
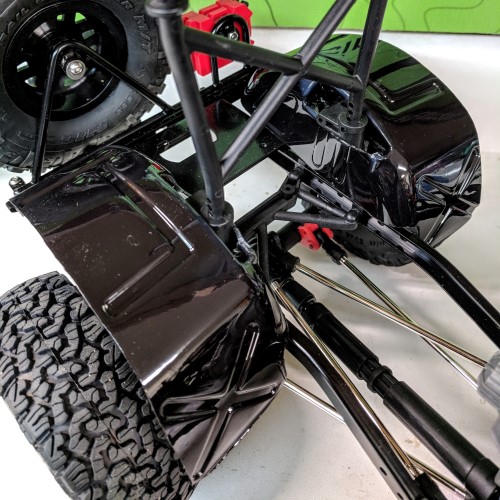
Black helps hide all the imperfections.
That's WAY better than before; no more unsightly wires can be seen under there.
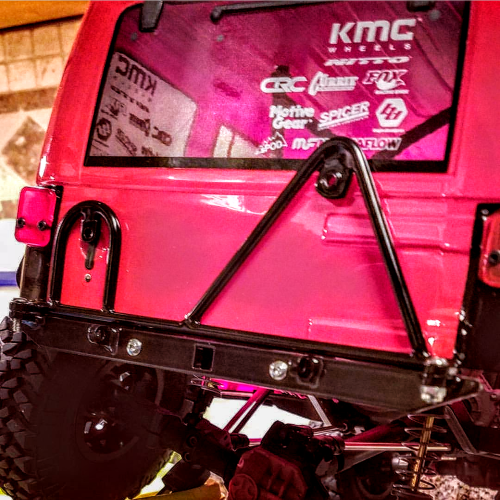
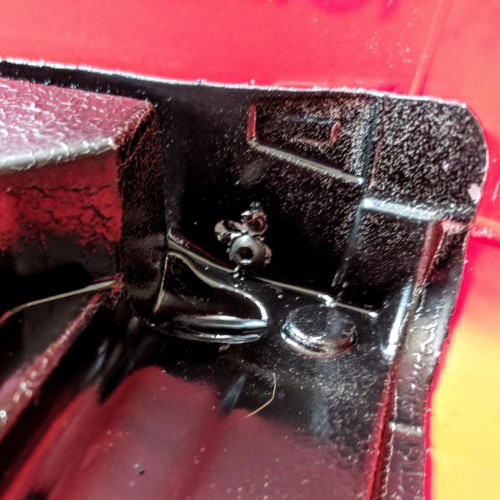
I almost forgot to mention this cool feature on the WertyMade bumper. Those four holes are for mounting a rear winch if you want one...
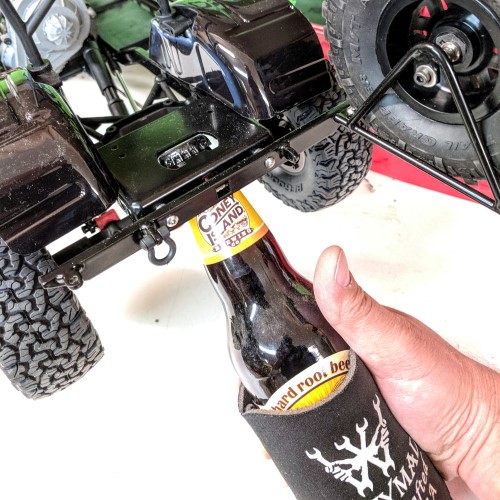
And that hole is a bottle opener for those times when you need to hydrate during wrenching sessions!
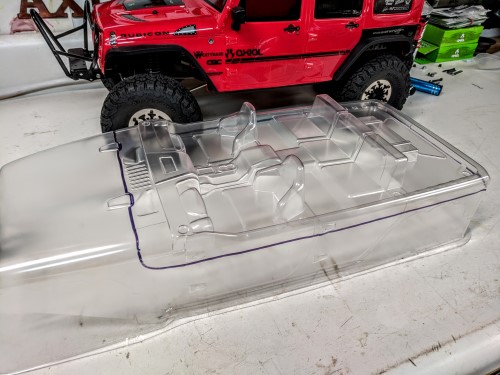
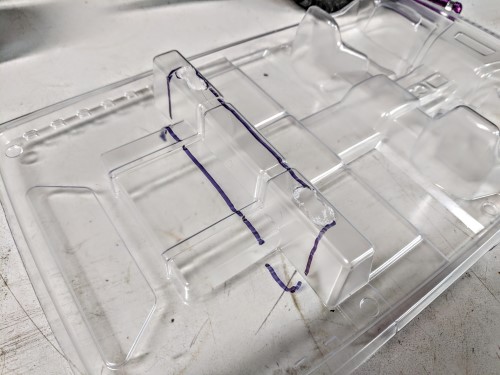
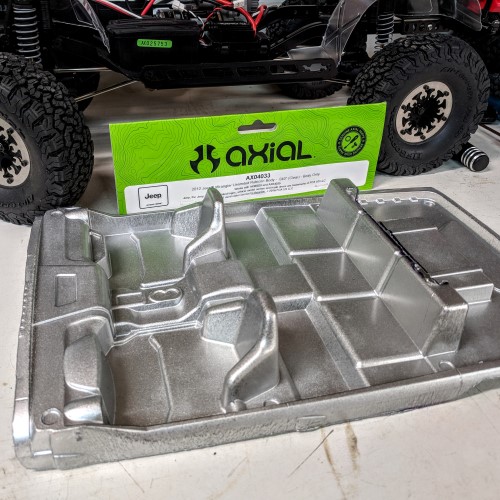
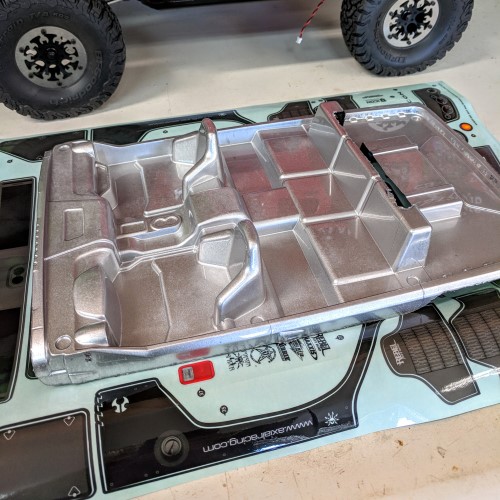
Next, it was time to add a some interior to give it a little more scale look, as well as to hide the electronics a little more. I heard from the Anthony Rivas of Rivas Concepts and Matt Kett from the Scale Builders Guild that the 2012 Jeep Wrangler body was a perfect fit.
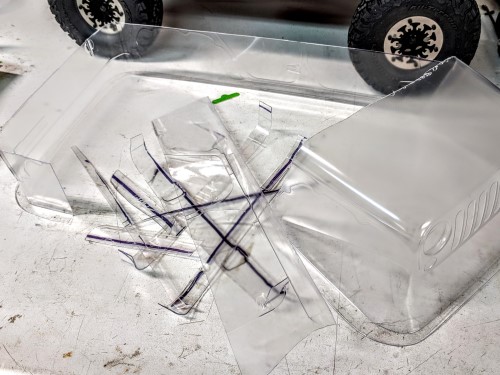
Sadly, I had to kill a perfectly good body. If you want to try this, you can probably find an old body from one of your local RC buddies to cut up.
Be sure to cut around the lights and fender flares.
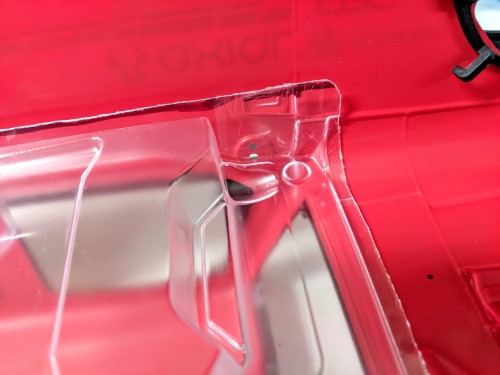
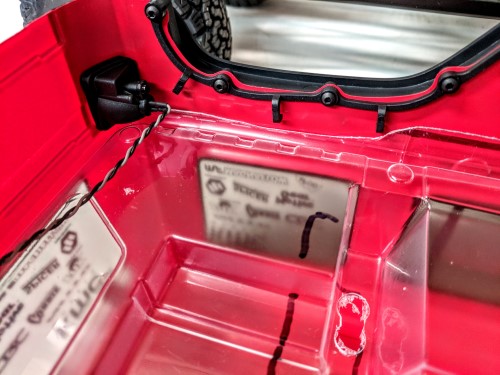
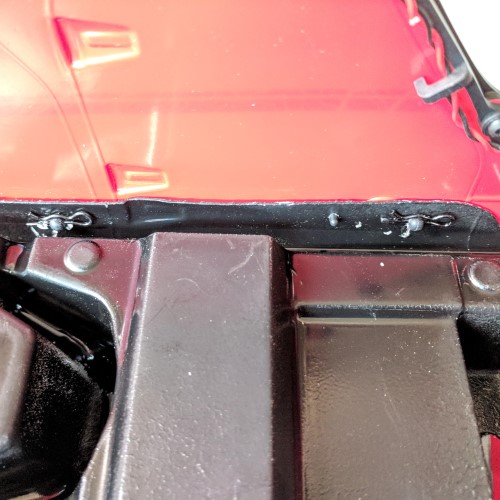
The rear view mirror mounting holes make a great mounting point. The two screws hold the front securely.
I found that the door handle impressions lined up perfectly and made getting it in evenly easy.
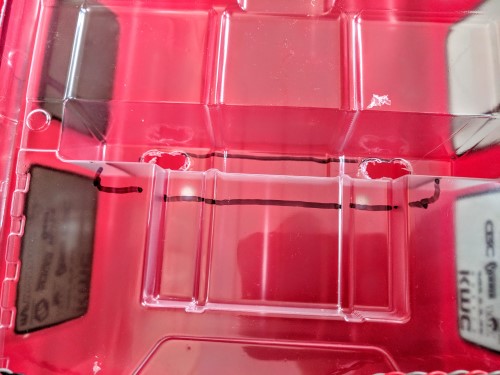
I cut a big hole to allow for the rear body mounts to pass through.
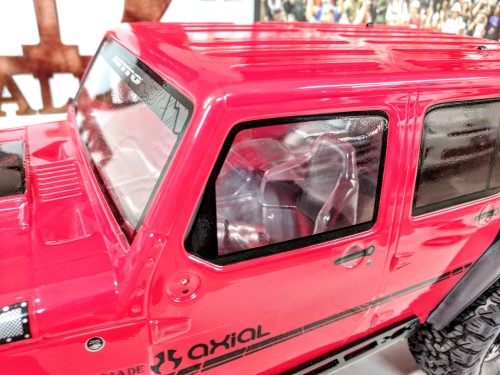
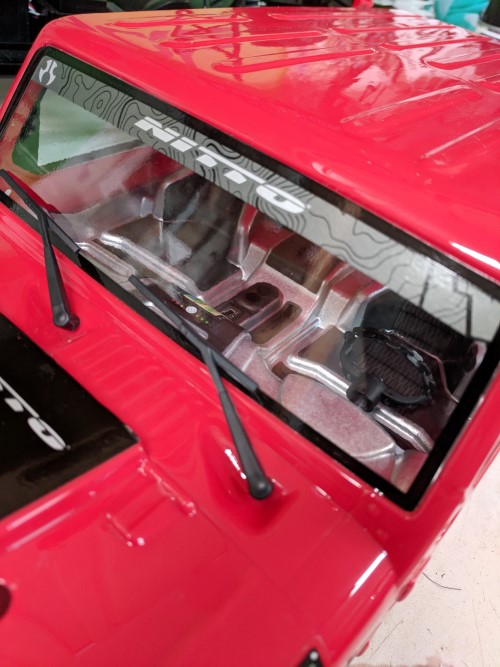
Don't worry, with the tinted rear windows, you can only see it if you are staring directly into the rear windows.
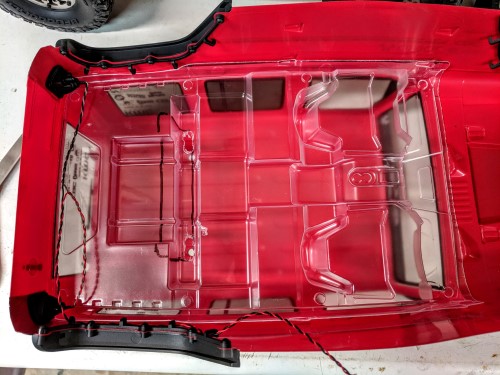
Looking good so far. Time for paint.
I wavered between black, red, and silver before settling on the silver. I was happy with my choice because the bright color makes the interior pop against the red.
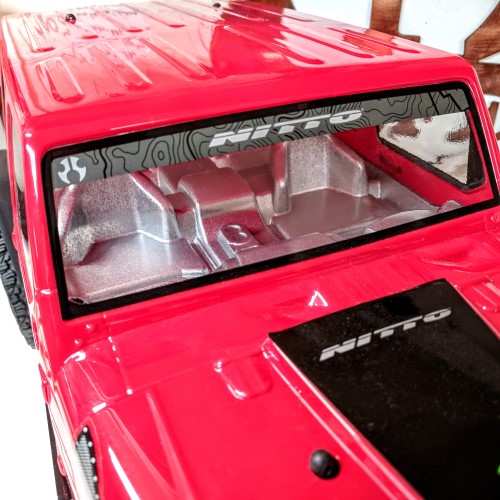
That's what I'm talking about. No more unsightly electrics can be seen in there.
Earlier, I got distracted by that big open space in the front bumper. TIme to remedy that.
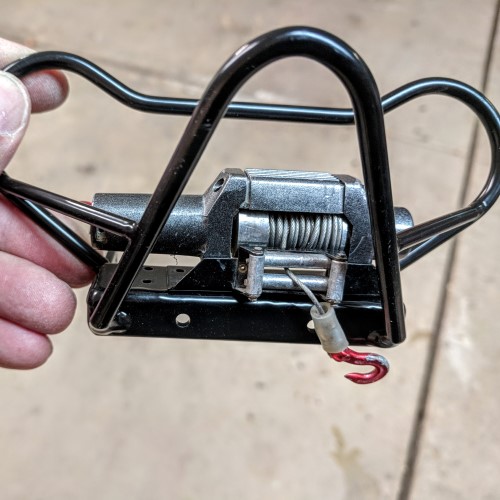
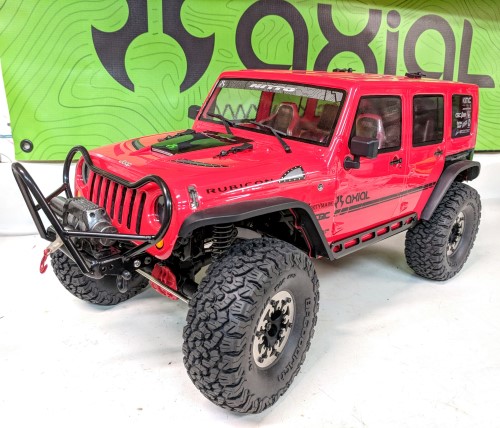
I pulled the winch off my old SCX10 and it mounted up easily. It even had a matching red hook.
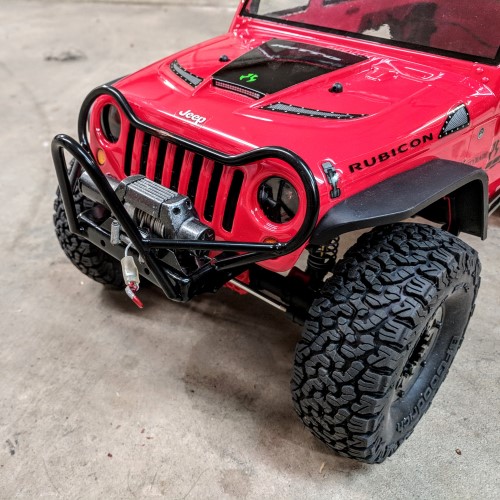
Oh yeah! that looks way better with the winch in there.

I found some D rings on some old parts trees to replace the ones Mr. Werty repossessed. I even put one on the rear bumper.
Back to the interior. Sticker time!

I kept it pretty simple in here. The only thing I added was the steering wheel I had in my parts box. Low Rider Style with the chain ring.
Boom!
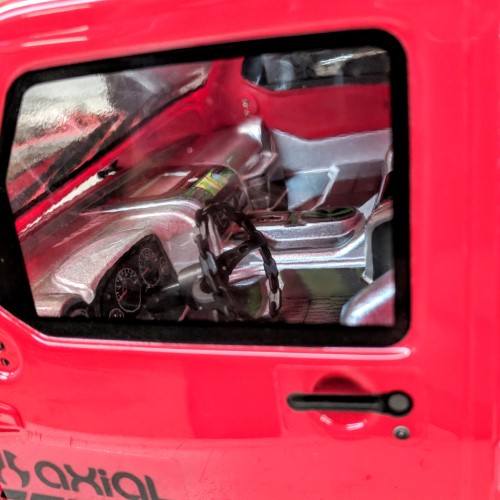
Bam! The silver and black really contrasts well against the red.
There it is mounted up, two screws through the mirror holes and a little tape hold it in.
There's the mirror screws holding the mirrors on and the interior in.
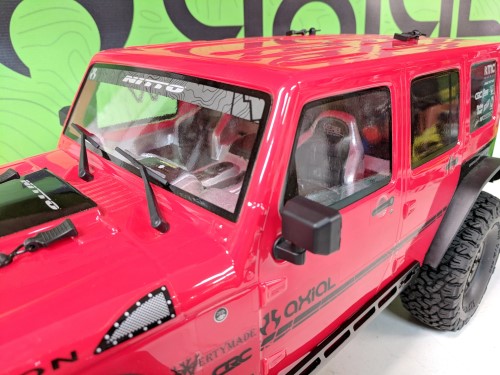
I also found some wipers on the spare parts tree and mounted them up.
I really like the clean looks of it.
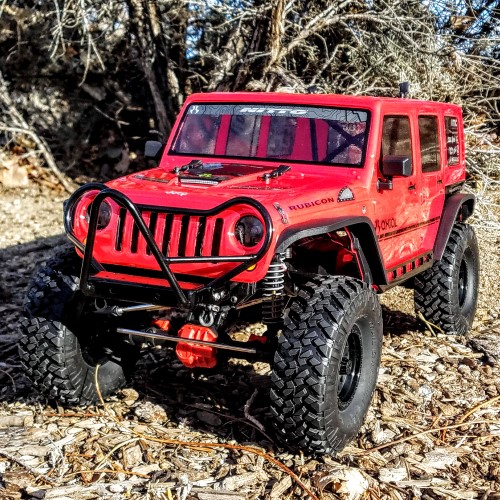
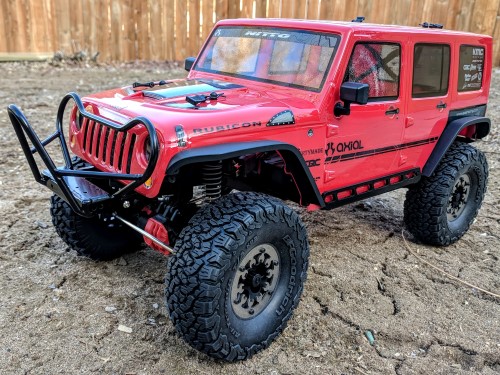
 She's just about ready to conquer all the trails at AXIALFEST2018!
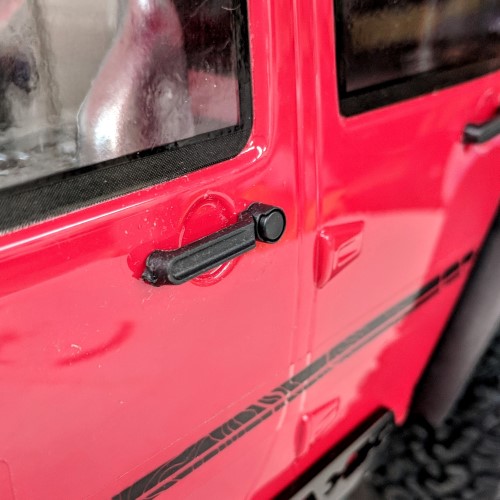
I just wanted to add a couple more scale details. First I added the molded door handles.
A bonus of the door handles is they also hold the interior in place.
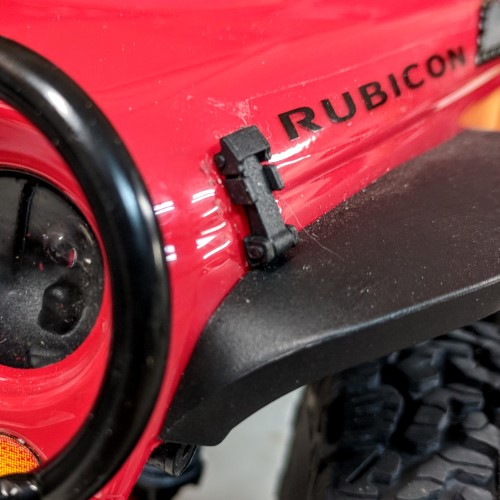
Then, I added the molded hood latches. Both of these come on the spare parts trees in the box.

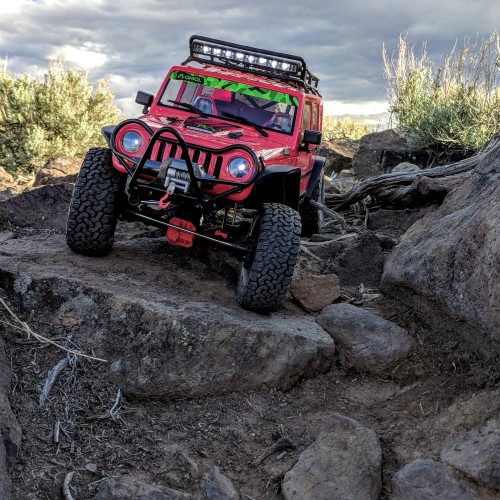
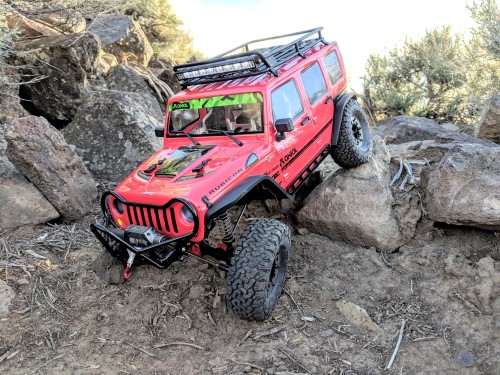
I had to give it a quick trail run to test it out.

I must say, this rig handles amazingly well.
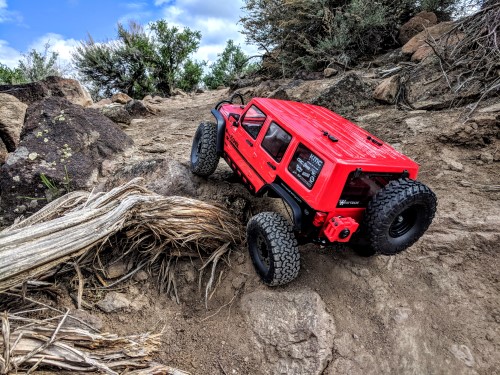 I'm thinking this rig is going to be amazing at AXIALFEST2018!
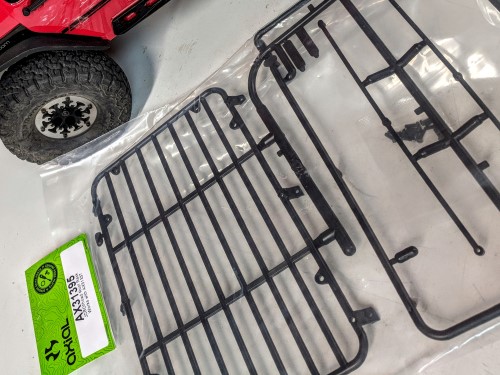
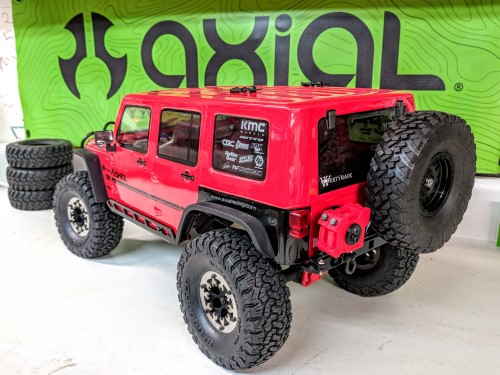
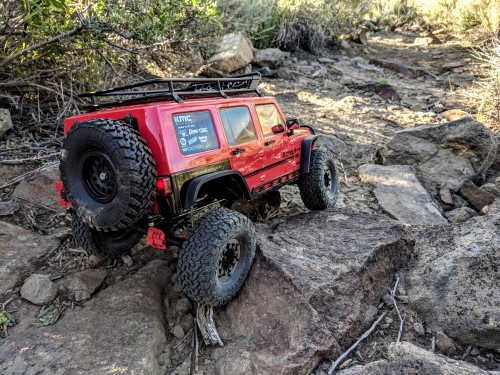
One last item before I wrap up this build. I need a few more lumens than the stock headlights, so I decided to add the JRC Offroad Roof Rack.
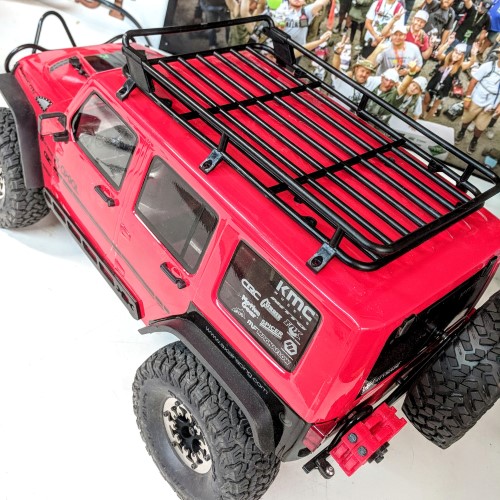
Looks pretty good up there even though it's originally meant for the 2000 Jeep Cherokee.
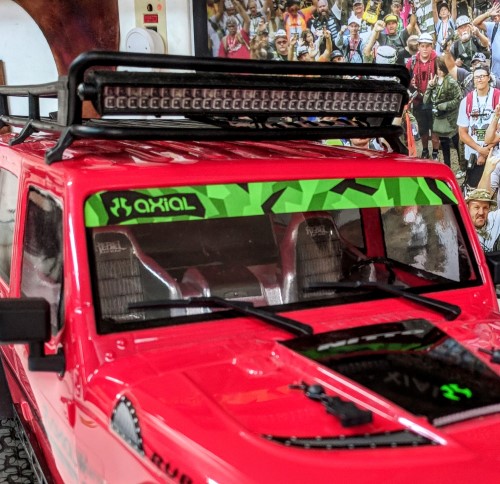
The Rigid Light Bar fits perfectly up there.
I used the 8 String LED and 3 Port High Output LED Controller.
I'm really loving the look and capabilities of this rig.
I'm definitely ready to emark on the adventures that Axialfest 2018 holds. I just wish July 18th would get here already!