Posted: 7/5/18

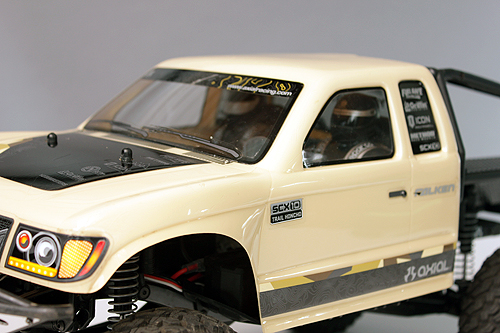
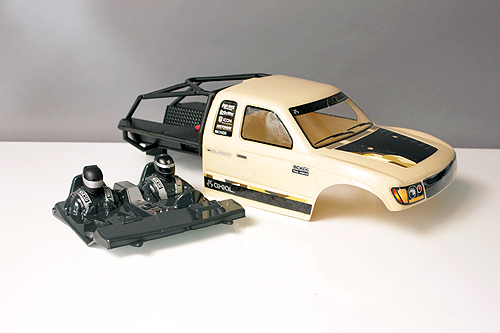
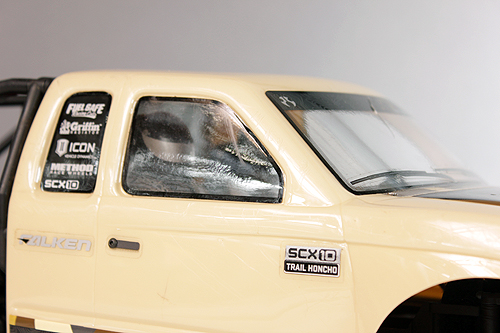
The Trail Honcho has been a long time favorite for RC off-road enthusiasts. It has an all business look with the large plate shielded front bumper, its recognizable cab and it’s tough cage rear section. When the SCX10 II Trail Honcho was announced, drivers enthusiasm again surged for this iconic machine in the scale crawling world. But this writer still felt it needed a little something else. You see, inside of that cool extended cab is, well, empty. You look into the windows and you see wires, a motor and a transmission case. Now the new transmission case does have a cool new scale look to it, however, it’s not something you’d expect to see if you looked into a cab of a scale truck. There should be an interior right? Agreed! So I started sifting through possible options for an interior. Drivers who run the SCX10 II 2017 Jeep Wrangler Unlimited CRC use the 2012 Jeep Wrangler Unlimited Rubicon Body as an interior. But there isn’t anything that is a true close fit such as that example. First I took a Deadbolt Body and held it up to the Honcho. This seemed like an ok option and then out of the corner of my eye was a 1/10 Yeti RTR interior. This interior seemed to fill the space in the Honcho cab a bit better. Interior found! In this Tech how to, we’ll show you just how easy it is to adapt the Yeti interior into the Trail Honcho for a better scale appearance.
PARTS NEEDED
Y-380 1/10th Scale Interior - AX31141
Helmet Set (Black) - AX31049
Misc. Hardware
2-sided Tape
TOOLS NEEDED
Reamer or Drill with bits
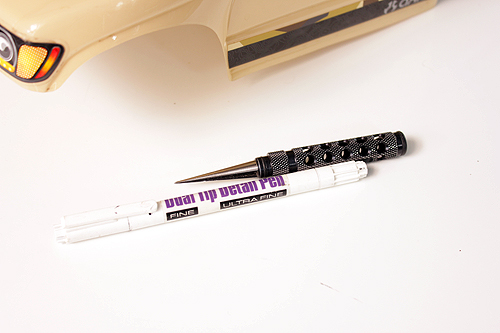
Permanent Marker
Polycarbonate Paint
PREPARATION
In this how to, we’re using an Interior from a 1/10 Yeti Ready To Run which comes painted. If you’ve purchased the Yeti interior as a stand alone part, you’ll need to paint it yourself. Take the time to wash the lexan with soap and water before painting it. Paint in a well ventilated area and take your time and paint the body and or helmets to meet your custom scale needs.
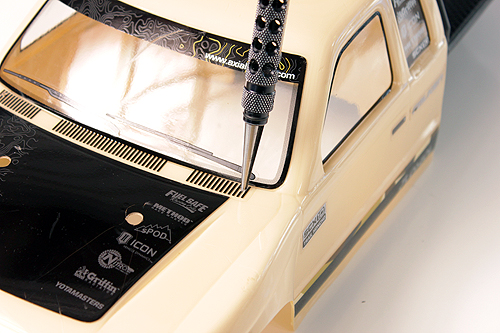
STEP 1
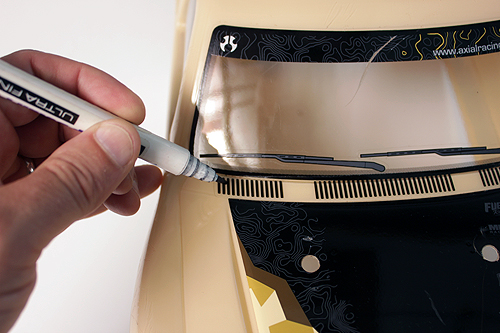
We want to secure the interior to the Honcho with screws so we need to decide where those screws should be located. To hide the screws as best as possible, we’re going to locate the mounting points in the hood vent area. Using the marker, place a dot where you will drill the holes.
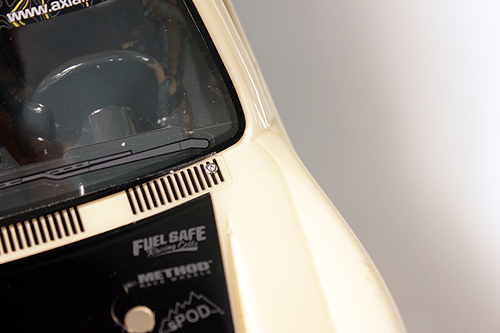
STEP 2
Using your reamer or a drill bit, drill a hole on each side of the body in the vent decal area where your mounting points will be. The holes should be slightly larger in diameter to the hardware you’ve selected to use.
STEP 3

To help position the interior we’ve placed two small pieces of two sided tape on each side of the body to secure the interior. This will allow us to move and tweak its position before we use screws to mount it permanently.
STEP 4
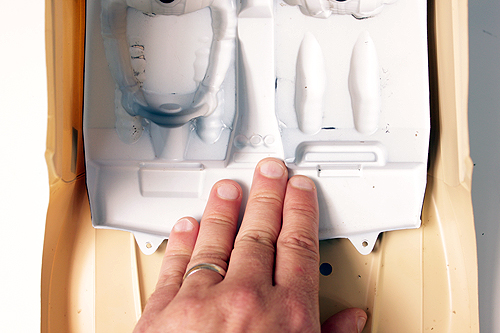
Once the interior is in position, press it down firmly to secure it to the two-sided tape on the body.
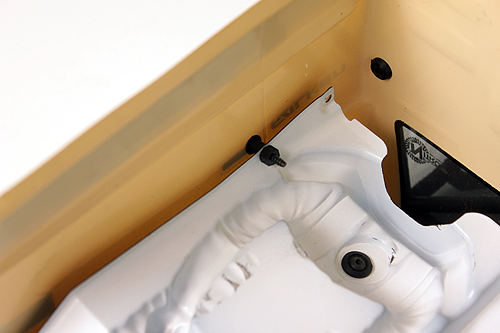
STEP 5

Now that the interior is in place, you can use your reamer or drill bit to open a hole in the interior, using the hole you previously made in the hood as a guide.
STEP 6
With holes in the body and interior, you can secure the two together using the hardware of your choice. We found some small 1.6mm screws and nuts in our spares bin. Using smaller hardware looks a bit more scale.
STEP 7
We’re not going to go through all the motions again to tell you how to make a hole, so we’ll give you the basic rundown on how to secure the rear. We chose to drill a hole through the “Keyhole” on the Honcho’s door handles as the spot to locate the hardware that will secure the interior in the rear. We then ran a long drill bit into the interior and drilled a pilot hole. With some long screws we found in our hardware bin and some plastic nuts and shoulder spacers we found in our Axial spares bag, we secured the back half of the interior on each side.
FINISHED
A few Axial option parts, a little paint and just a few minutes with some basic hobby tools and hardware you probably have lying around, you now have an interior for your Honcho that fills the cab space and hides all of the inner workings of the SCX10.