Posted: 3/13/18
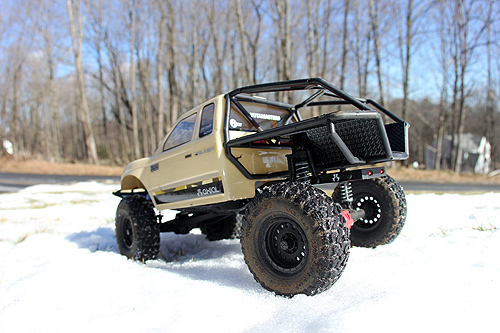
Getting your RC adventure underway has never been easier with the well equipped, affordable SCX10 II Trail Honcho ready to run. This revival of the original Honcho body, from the famed SCX10, now features an updated electronics package combined with improved SCX10 II platform. It’s aimed at getting anyone into the hobby and on the trails with success. It of course is also a great truck for the seasoned enthusiast. But our focus here is on the many who will pick up an RC transmitter for the first time with the Trail Honcho and we want their first adventure to be the best of many trail driving experiences to come. Here we’ll go over all the basics from the unboxing to checking over your rig for its first run, tips for your first drive and tricks to keep it in proper running order.
UNBOX
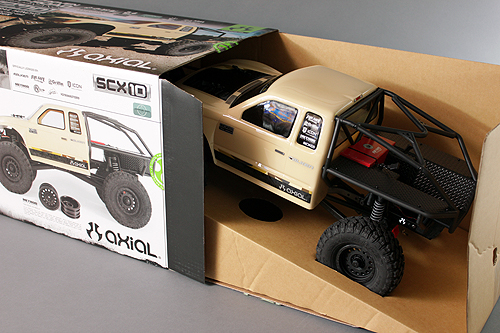
Before just diving into your new RC adventure, take the time to unbox and educate yourself about everything that encompases your new Honcho kit. Inside the box, you’ll need to cut the zip-ties securing the truck to the inner box support. Remove the radio from it’s packaging and dip into the bag with instructions and accessories. The most important step here is to read the manual. Although we’re walking you through the paces here, it is always best to familiarize yourself with the manual in case you have any questions in the future. After your up to par with manual, take a look at what is included with the kit. You’ll find a bag of “extra parts” these parts are unused during the assembly of the kit and may be used for future projects once you get hooked on your Axial adventures and trust us, you will get hooked. There will also be some basic tools in the kit, these should be transferred to your adventure backpack as they make great tools for on-trail repairs. And finally you’ll notice some green “domes” we’ll talk about this later.
GET IT RUNNING
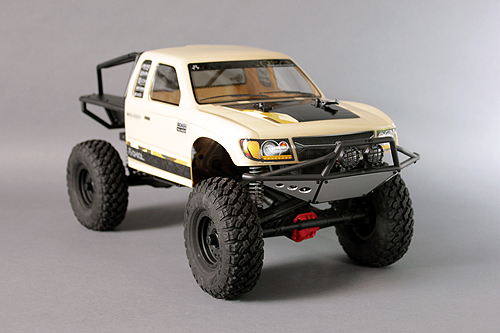
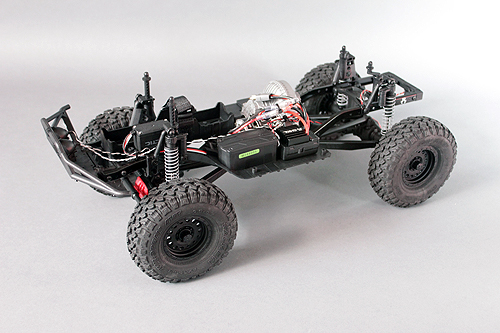
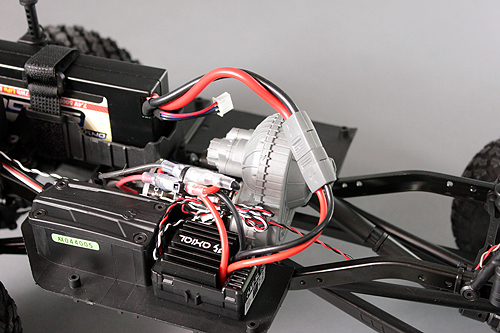
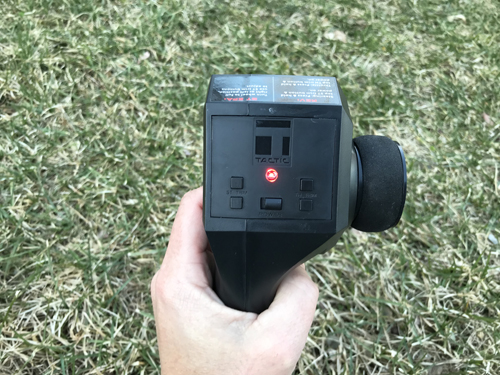
We’re moving onto the fun part; getting your Honcho going. First remove the four body clips that secure the body to the chassis, remove the body completely and set it aside. Now you can access the battery tray. At some point at your local hobby shop or online, you’ve purchased a battery and charger for the rig. Locate the battery tray and unhook the Velcro strap. Slide your charged battery into the tray and secure the velcro back in place to retain the battery. Next move to the transmitter and install four AA batteries that you supply into the radio. Power the radio on using the switch on the face of the radio. Now move back to the SCX10 II and plug in the battery. The battery plug is your on/off switch for the truck. Tip: The radio is always on first and off last. Your SCX10 II is now powered up and ready to go after placing the body back on the truck and securing it with the four clips.

RUNNING CHECK
Head outdoors and place the Honcho on the ground for a quick systems check. The electronics should be dialed in from the factory, but things can happen. You’ll want to check to make sure your trims are set properly. First is your truck moving on its own when you power it up? If so, you will need to use the throttle trim on your radio to reset your neutral point. Use either button for throttle trim to find the neutral. If you tap the trim on one side and the truck starts moving more, it means you’ll need to use the opposite button to get the throttle back to neutral. Keep tapping the button until the car stops (is at its neutral point.) With the throttle set, check to see if the truck tracks straight. With the vehicle pointing away from you, give the truck a little throttle. Note if the truck tends to “drift” towards the left or right. If so, use your steering trim to find the neutral point of the steering in a similar fashion to the throttle adjustment.
GET THE FEEL
Wait! Now that your truck is trimmed, you probably have the urge to pin the throttle and see what the truck can do. We’ll get there. First start by driving slow in a figure eight pattern. This means giving the truck a little bit of throttle trigger input and steering the truck in a figure eight pattern; turn the wheel right, go straight a bit, turn the wheel to the left, repeat. This will help you get a feel for how the steering feels reversed when coming towards you. When the truck is going away from you, steering the radio wheel to the right will always turn the truck to the right, but will feel reversed coming back towards you. Get a feel for the throttle range in both forwards and reverse. Note: the throttle is not an on/off switch and is proportional. In trail truck driving much of your rock crawling adventures will happen at a slower speed.
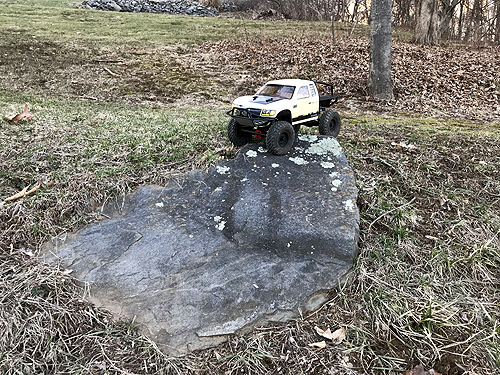
TACKLE YOUR FIRST OBSTACLE
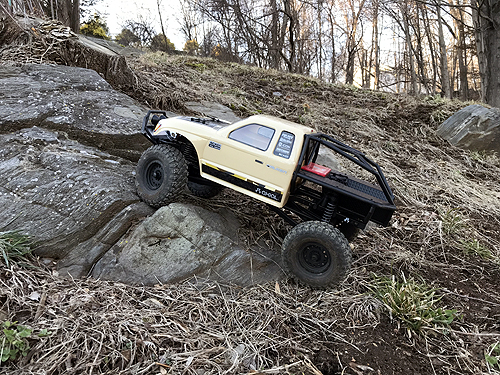
Before going out and driving on the gnarliest terrain you can find, practice on something less harsh. Find small hills or rocks with a slight incline to drive on. First drive straight up and down the obstacle. Note the amount of throttle it takes to make the incline and how the drag brake in the speed control affects the decline. Next drive up on an angle. Like a real vehicle, the trucks center of gravity may want to cause the truck to roll over. Determining the type of angle you can drive on before the truck wants to roll over is all a part of developing driving skill.
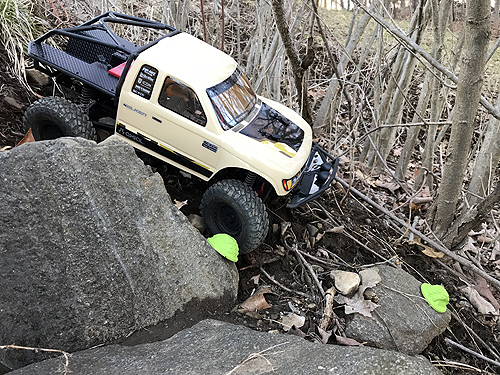
DRIVE POINTS
With a general feel of how the Honcho drives, you can venture out for tougher obstacles. Find steeper inclines, off-set rock ledges, varying rock surfaces and use your newfound vehicle control to try and get your truck over the terrain. Think about where the wheels need to be places on rocks, how much steering you need to use, how much throttle and where will the truck be positioned when you’ve tackled what's in front of you. Remember, you need to set yourself up for the next obstacle too. Then it will become time to refine your lines, challenge yourself and that’s where those little green domes come in that you found in the kit. These green things are gate markers and they are set on trail courses for your rig to pass through. They’re usually placed in positions that will challenge your skill. Find challenging parts on your trial and place these markers so you can practice driving through gates.
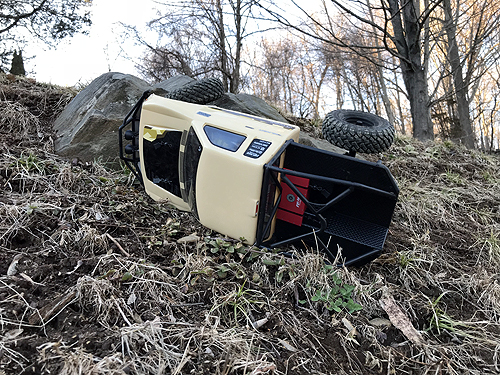
ROLL OVERS
What happens when your truck rolls over? Well, in real life, if a truck rolls over, no big hand reaches down from the sky to flip it back over. So, you need to use vehicle control to try and right the truck. If the Honcho is completely upside down, try using throttle and steering to “wiggle” the truck over. Or towards a nearby object. The point is to get the wheels to grab onto something to help pull it back over. If the truck is on its side, you can turn into the ground and give it throttle. This will oftentimes pull the truck out of the roll over and back onto its wheels.
FIND NEW ADVENTURES
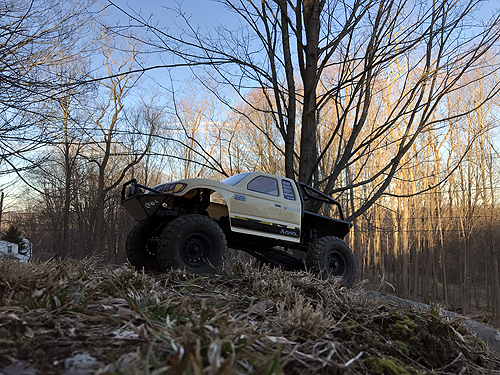
The rest of your driver education is up to you. To improve your skill, try locating nearby parks or even an urban adventure away from the public. Finding new places to have an adventure each time you go out with the Honcho will improve your driving skill. But in the bigger picture, you’re also going out and finding new adventures for yourself. Adventures that will not only build skills and love for a hobby, but will also build memories.
MAINTENANCE
Once your adventure outdoors is over, you’re not exactly done with your Honcho rig. A maintained rig is always a well performing rig. Take the time to remove any dirt and debris from the truck. A simple 2” paintbrush and a little elbow grease knocking off dirt from the truck can clean it up. Compressed air works as well. If your adventure lead you into the wetlands, take a look at our Driveline Maintenance Tips to help you with your clean-up procedures.
OPTIONS
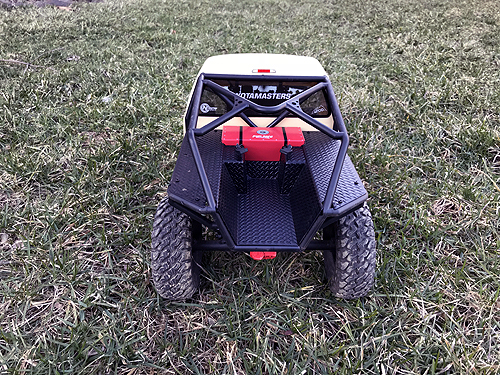
At some point, You’ll want to join the custom club. Installing option parts to make your honcho stand out or to make it more durable for the adventures you’ll put the rig through. Here are five option parts we recommend you take a look at when taking your SCX10 II Honcho to the next level.
Gear Set (48P 28T, 48P 52T)
Part- AX31585
If you read the story of the Honcho taking on the Redonda Ridge Adventure, you saw the rough terrain eventually took its toll on the transmission gears. Luckily this is an inexpensive upgrade up to steel gears if you feel your truck needs it.
Aluminum Servo Horn 25T (Hard Anodized)
Part- AX30836
The steering is among one of the most abused parts of any vehicle. Swapping the stock plastic servo horn for the aluminum option could prevent any unwanted steering issues on the trail.
M4 Serrated Nylon Lock Nut
Part- AXA1046
For obvious reasons the wheels endure a lot of abuse during use. This on occasion can lead to a wheel nut backing off. The locking serrated nuts grab onto the wheels for extra security.
SCX10 TR Links Set - 12.3" (313mm) WB
Part- AX30550
Although the links on the SCX10 II Honcho have been greatly improved over the previous units on the SCX10, upgrading to aluminum links is a popular upgrade for many adventurers.
Steering Upgrade Kit
Part- AX30426
Like the suspension links, the stock plastic steering link can take a lot of abuse and flex during use. In this set, you can use the long link to upgrade your SCX10 II.

KEEP IT INTERESTING
With your new found hobby and new found key to adventure, keep things interesting by continuing to drive on new trails, build new courses in your backyard, continually modify and upgrade your Honcho to reflect you, your likes and interests. Every day is a new adventure behind the wheel of the Honcho and can give you new found enjoyment outdoors while learning new sets of skill. When you do conquer a new challenge, be certain to document your experience with a photo on social media and give it the hashtag #AxialAdventures so other adventurers can see what you’re up to.