Posted: 5/24/18
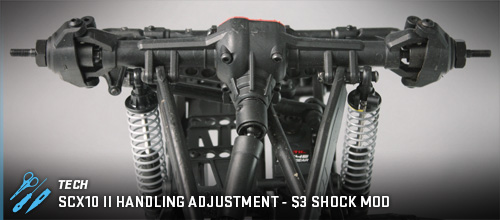
We’re guessing by now you’ve logged a lot of miles on your SCX10 II ready to run rig. The truck has probably served you well tackling new terrain wherever your adventure takes you. So what’s next? How about improving your rig for better handling on those to tough to conquer trails. The stock out of the box SCX10 II is set up for general scale trail use, but the highly capable platform can improve as you improve and the tuning trick we’re about to show you will cost you just a few bucks and will take less than ten minutes of your time to complete. What we’re going to do here is lower the CG of the SCX10 II by simply relocating the lower shock mounting point. The shock end comes mounted to the axle on its own mounting boss. But, by relocating it to the same mounting point as the lower link, it lowers the overall Center Of Gravity of the chassis and a lower COG equals better handling. Let’s get started!
WHAT YOU NEED
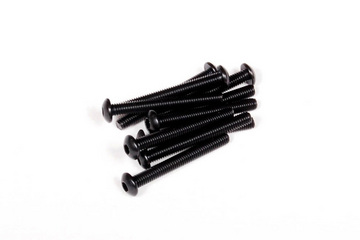
3x25mm Button Head Machine Screw- AXA120
3mm Thin Nylon-Lock Nut- AXA1052 (Optional)
Basic hobby tools- 2.0mm hex driver, wheel nut wrench and long nose pleirs
Step 1
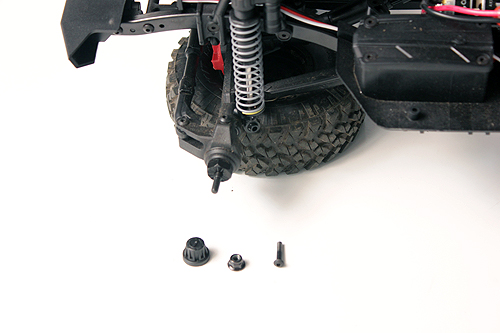
Let’s get the easy stuff out of the way. Remove the wheel nut caps, wheel nuts, wheels and lower shock mount screws from all four corners of your SCX10 II.
Step 2
Now, remove the screw that secures the link to the axle and place it in your spare hardware bin.
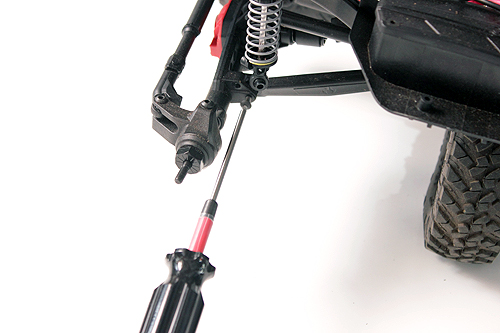
Step 3
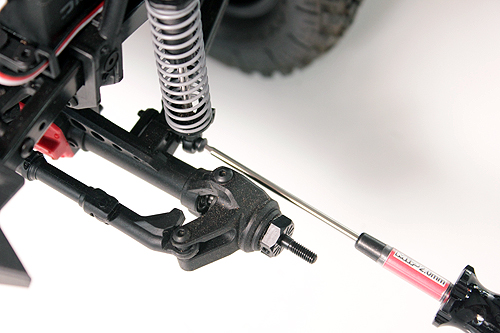
Take the new long 3x25mm button head screw that you spent a whole $3 on and insert it through the shock end, into the axle mount with the link in place and screw it all the way in.
Step 4 (Option)
The screw will be secure as it has been screwed into the plastic axle mounting boss. But if you want to go one step further in security to make sure that screw doesn’t back out, you can add a thing 3mm Ny-Lock nut to the end of the screw. Tighten the nut snug.
Step 5
Repeat Step 2-4 for the remaining shock/ link points.
Step 6
Reinstall your wheels, nuts and caps.
SEE THE DIFFERENCE
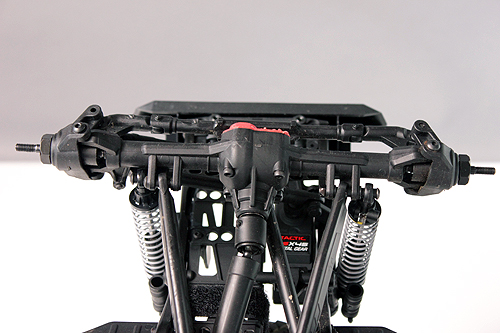
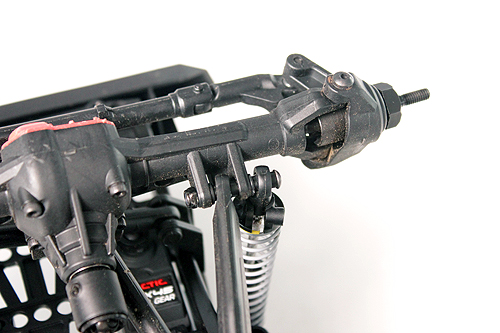
You can see above, the left shock is in the stock location and the right shock has been relocated to the new position in-line with the lower link. The axle is also visibly lowered on the right side in the photo. Once all four shocks have been relocated and the truck turned upright, the chassis will now be lower in comparison to the stock position.
BACK TO THE TRAIL
Now you’re ready to head back out and try and navigate some of those tough terrain features that may have defeated you prior. With the lower CG, your rig will benefit from the modification. Keep in mind, this will not be a night and day difference. You still need to choose your lines and wheel speed wisely. Make sure you keep checking back to the Axial blogs as we’ll continue to offer tuning secrets to help your SCX10 II improve as you improve. #AxialPerformance