Posted: 2/25/16
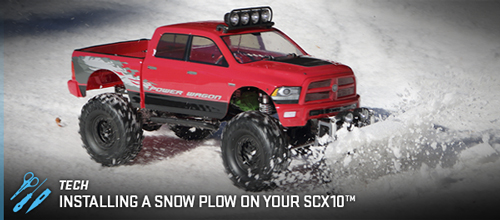
Words and photos by Tony Phalen
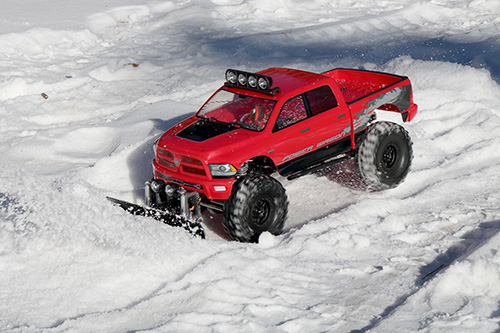
Being a SoCal native, I've never had a reason to build a RC vehicle with a snow plow attachment. After a move to Connecticut back in 2013, it occurred to me why a slew of snow-moving builds pop up in that latter months of the year. Funny thing is I never took advantage of this situation, that is, until I moved BACK to sunny Southern California in 2015. After seeing a bunch of videos on YouTube with guys plowing their front yards, a friend (in CT) hit me up wanting me to build a custom rig for her husband for his birthday.
The entire build was pretty awesome, but for this article I'm going to just run through the quick steps of attaching RC4WD's plow unit on the SCX10 Ram Power Wagon.
Step 1
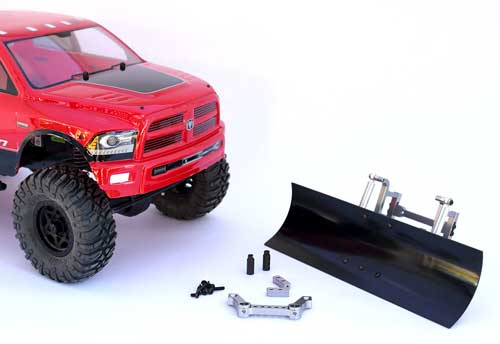
My first step in any build is to lay out the parts so I know what I'm working with. We have our SCX10 and the parts from RC4WD's Snow Plow unit - a pretty simple plow that comes almost completely assembled. A few extra pieces come with the kit to attach it to the frame rails on the SCX10. You'll also need a spare servo, preferably one with a decent amount of torque.
Step 2
 The plow attaches to the SCX10 between the frame rails. To get to this area, we need to first remove the stock plastic cap. Two screws is all it takes, then give the plastic cap a good pull to remove it.
Step 3
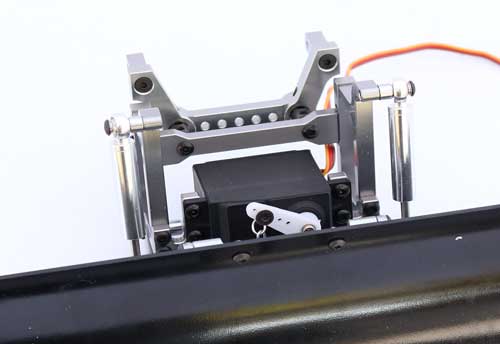
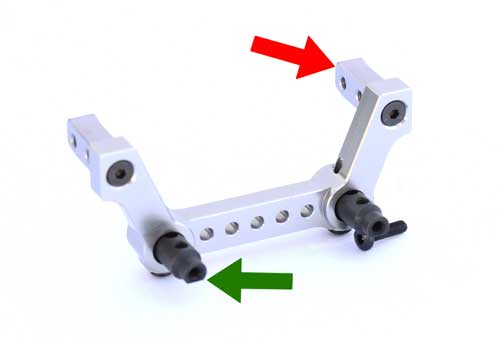 Assemble the bumper mount as shown. You'll want to make sure the two mounting 'tabs' (red arrow) are tilted up; this angles the plow correctly once installed. Also take note of the flat area on the plow mounts (green arrow) - notice the flat spot is pointing down. I suggest using blue threadlocker on all the screws here to prevent them from falling out.
Step 4
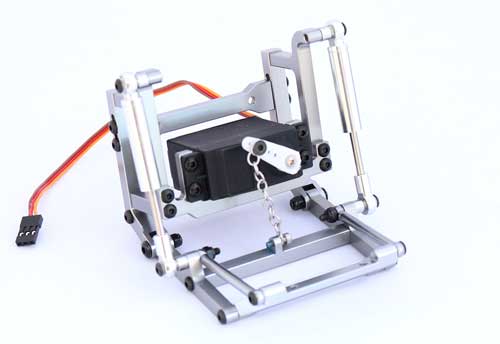 Time to install the servo, however before you do, I suggest removing all of the screws (one at a time) and re-installing with a dab of blue threadlocker. I also advise removing the plow blade entirely during the install.
Moving on - slide the servo into place and attach (don't forget your blue threadlocker). Attach one end of the chain to the servo horn and the other end to the bottom plow pickup. Typically, servos come with the output shaft set at 90°, so let's start by attaching the servo horn angled up a bit like the photo. We can adjust the 'pull height' after we have the entire unit installed. You can re-install the plow blade at this point.
Step 5
 Attach the bumper mount assembly (from Step 3) to the plow assembly. The mount slides into 'keyed' slots in the back of the plow assembly. Blue threadlocker is suggested here.
Step 6
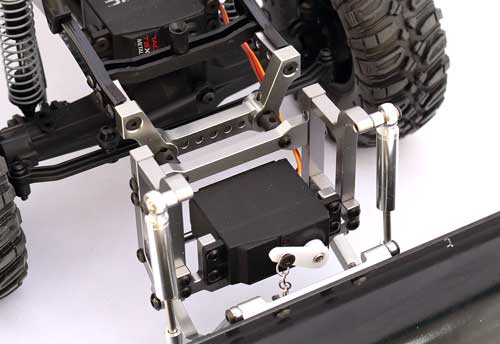 Slide the mounting tabs between the frame rails and secure with the button head screws. Again, blue threadlocker is suggested here as well.
Step 7
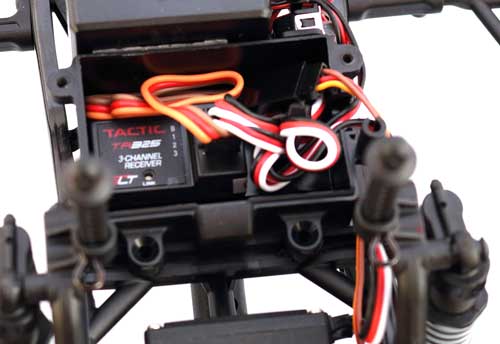
Remove the receiver box top and feed the servo lead into the box. Axial uses a 3-channel Tactic radio system, so thankfully there is an open port for the plug - port 3. Re-install the receiver box top.
Now, before you head on out to remove some snow, we need to test the plow for proper operation. Turn the transmitter on, then plug in the battery and turn the SCX10 on. There are two buttons right under your thumb (on the transmitter) - one raises the plow, the other lowers it. Go ahead and give it a quick test. If the buttons raise and lower the plow, you're good to go. If you want the plow to raise up more, you have 2 options; 1) remove the servo horn and angle it up more or 2), shorten the chain by changing the attachment points.
Good luck and happy plowing!
Here is a list of parts used in this article:
AX90037 SCX10™ Ram Power Wagon 1/10th Scale Electric 4WD - RTR
Z-X0007 RC4WD Blade Snow Plow
36645 Hitec D‑645MW 32‑bit, High Speed, Metal Gear Servo