Posted: 10/11/17
We recently posted a video to Youtube of our favorite tools and parts we bring with us when we hit the trails (see it here: https://www.youtube.com/watch?v=mZxm84NMJr0). With some further brainstorming, we came up with a cool idea that let's your SCX10 II carry it's own spare parts! All you need is a Yeti fuel cell fitted between the trucks shock hoops. Here's how to do it.
TOOLS NEEDED:
1. 2.0mm Hex Wrench
LIST OF PARTS USED:
AXA0113 Axial M3x6mm Hex Socket Button Head Screw
AXA144 Axial M3x8mm Hex Socket Flat Head Screw
AXA1105 Axial Cone Washer
AX31125 Axial Yeti™ Fuel Cell
Let's get started!
Step 1
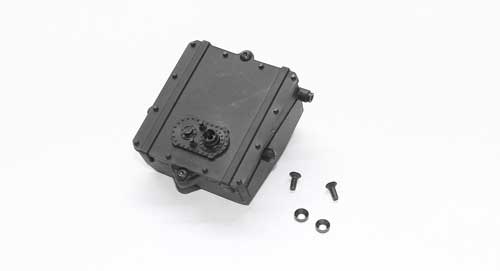
Before installing the fuel cell, I attached the top and added a pair of AXA0113 M3x6mm BH screws to the holes I won't be using. This is not really necessary but does help give the cell a more 'finished' look.
TIP: Prior to installation, paint the fuel cell. This will give your rig a more finished look.
Step 2
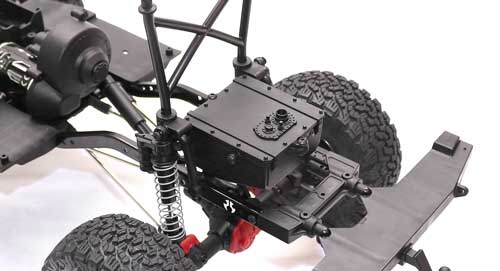
The first install step is to remove the top shock mount screws. This gives us access to the bracing between the shock mount hoops.
Step 3
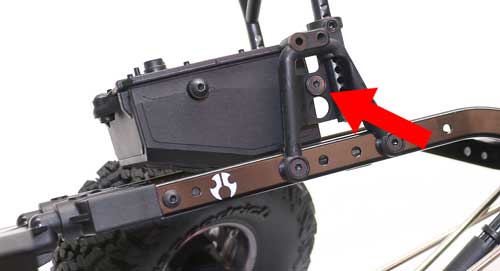
Slide the assembled fuel cell in between the shock hoops as shown and line up the holes with the bosses on the cell. Secure with the AZA144 M3x8mm FH screws and AXA1105 Cone Washers. The red arrow points to the mounting location.
Step 4
Boom! That's it! You can take the lid off, pour your spare parts in there and close it back up. The fuel cell could also be used to house lighting or winch controllers, but be warned that it is not waterproof.
Words and photos by Tony Phalen