Posted: 9/27/18
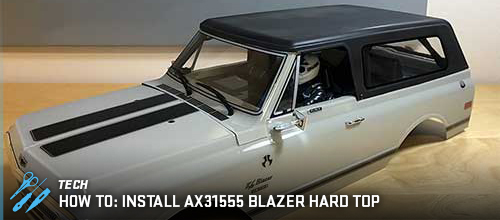 Axial's AX90058 SCX10 II 1969 Chevrolet Blazer is certainly one good-looking ride, but the addition of the AXI31555 Hard Top is sure to catch the attention of many Blazer fans. In this article, we show you a step-by-step procedure on how to mount this cap. But, before we do, let's go over some of the tools you'll need to get the job done.
TOOLS NEEDED:
1. 1.5mm Hex Wrench
2. Scissors (specialty scissors for cutting polycarbonate plastic)
3. Reamer (for drilling holes)
4. Paint (for polycarbonate bodies)
LIST OF PARTS USED:
AX90058 Axial SCX10 II 1969 Chevrolet Blazer RTR
AXI31555 Axial Blazer Hard Top
STEP 1
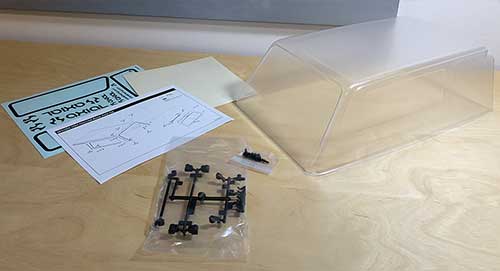 Before we build, let's look at what comes in the AXI31555 Blazer Hard Top package. There's the polycarbonate plastic shell, instruction sheet, window masks, sticker sheet and hardware bags. Easy enough, right?
STEP 2
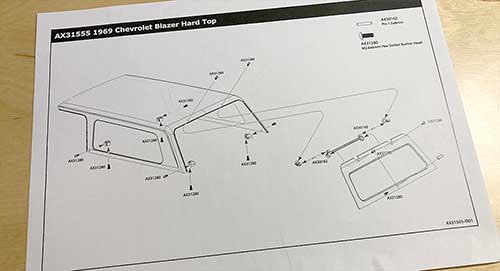 A closer look at the instruction sheet. It also documents the opening rear window, a cool feature but more needed to get to the body clips!
STEP 3
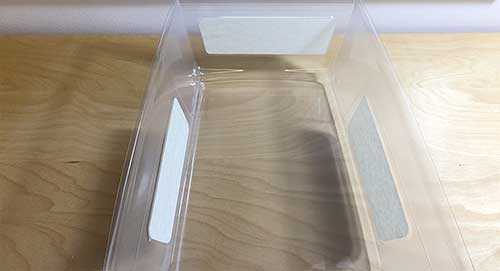
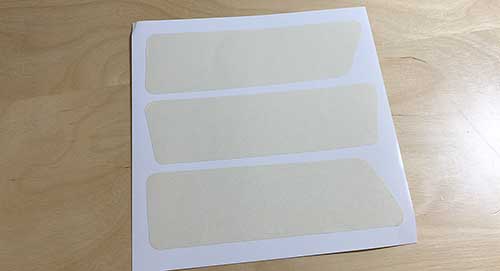 Window masks. I peeled off the excess to make it easier to see the actual window parts. Note the top and bottom are for the side windows, the center is for the rear window.
STEP 4
 Before you stick the window masks on, make sure you wash the Hard Top with soap and water. Dry it completely - you may even want to let it sit out for a little bit to air dry, just to be sure. Peel off the masks and stick them on. They don't have to be perfect as we've included external decals, but you want to get them as close as possible.
STEP 5
 Paint whatever color you want; I did black since I figured it would match the Blazer body well.
STEP 6
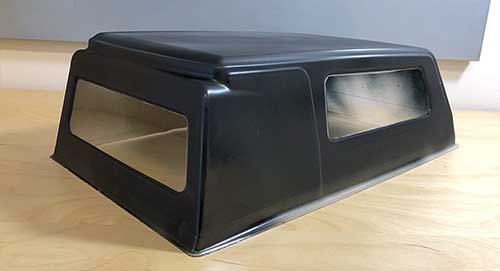
 After the Hard Top is done drying, cut it out, remove the window masks and the overspray film. Now, as an added detail, sprayed the outside of the Hard Top with a matte clear coat to soften up the shine. If you want to replicate this, DO NOT remove the overspray film. First, use a sharp blade (Xacto brand, Olfa, etc) and cut out around the windows, then remove the overspray film. If you don't cut out the windows, you'll clear coat them as well and you won't be able to see through them.
STEP 7
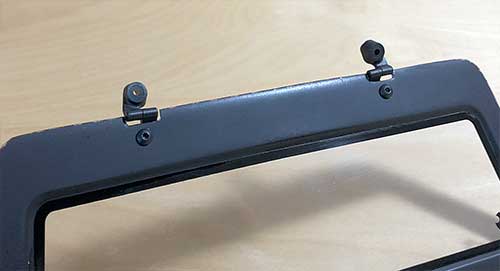
 Using the hardware enclosed, attach the mounts to the Hard Top. Note that there are two different designs of mounts; you don't want to mix these up when you install them. Read the instructions carefully.
STEP 8
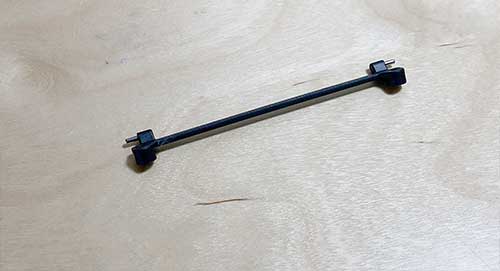 Assemble the swiveling tailgate mount...
STEP 9
 ...and attach it to the tailgate. You'll need to notch the tailgate first; there are scribe marks to show you where to cut.
STEP 10
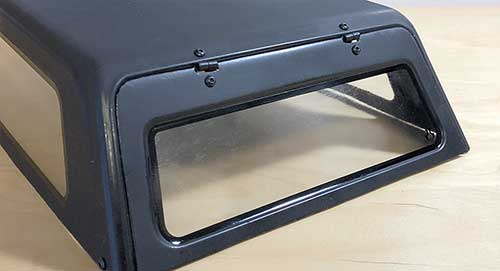 Attach the tailgate assembly to the Hard Top.
STEP 11
 The tailgate should swing freely. If not, you may need to trim the notches until it does.
STEP 12
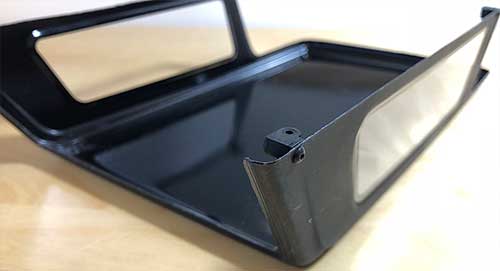
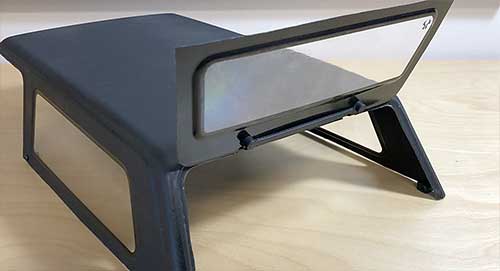
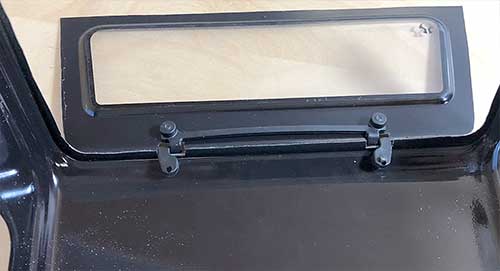 Here's a quick inside look at the tailgate mounted to the Hard Top. You can also, at this time, attach the tailgate lift handle.
STEP 13
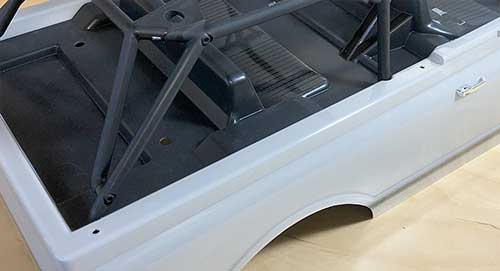 Ream 4 small holes into the Blazer body; there are already dimples in place. Note that you only need to ream the front- and rear-most holes as shown.
STEP 14
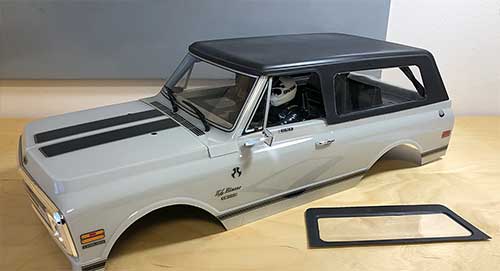
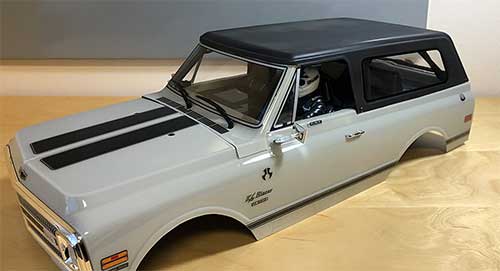 Set the Hard Top in place and attach with the supplied hardware. Set your completed Blazer down, step back and revel in your masterpiece!