Posted: 1/26/16
Words and photos by Tony Phalen
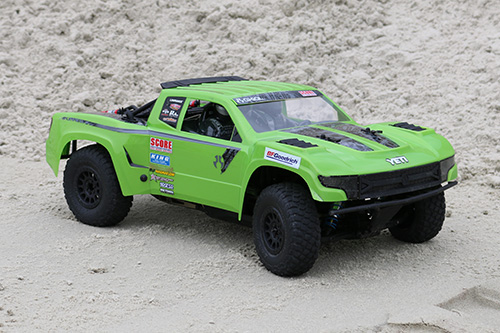
Whenever I get a new vehicle, I like to take the first couple weeks to just drive it in box-stock form to learn about its traits; how it handles, any quirky nuances, etc. During this time I also take some time to review any hop ups that might become available, giving me an idea on how my long-term upgrade process is going to play out. Thankfully, the SCORE Trophy Truck shares the same platform as the Yeti Rock Racer, which means that there are a slew of performance goodies already available. Armed with a bag of aluminum bits, I decided it was time to install them prior to getting this rig all dirty. Not only did that make it a lot easier to deal with (read: no dirt!), it also looks much prettier in pictures. Time for an Axial Yeti SCORE Trophy Truck Full Option Build!
Step 1
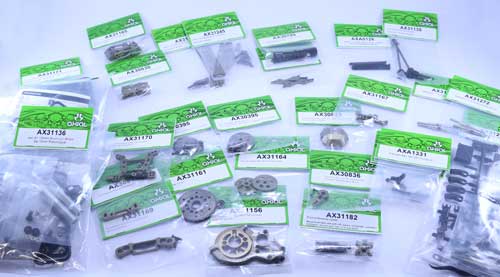 Here are the parts I’ll be installing in this article. I’ve got quite a bit of work ahead; shocks, gears, machined parts and turnbuckles. A full list of the parts I installed is included at the bottom of this article.
Step 2
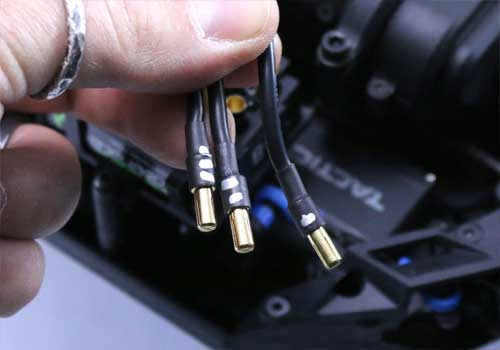 Since I’m going to need to remove the center transmission for upgrades, I disconnected the motor wires from the ESC. Pay attention to how the wires connect; if you have a photographic memory, you’re good to go. If not (like me), you can mark them to keep things straight. I put one silver mark for the A wire, 2 for the B and 3 for the C.
Step 3
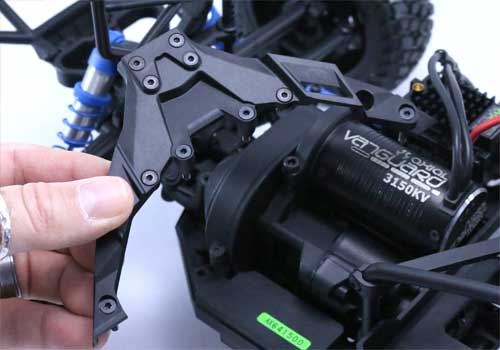 I’m going to be working on the front end of the SCORE TT first. I started by removing the top deck support brace. It requires the removal of 10 screws in two different lengths so, to keep things organized, I put them back in the holes after removal.
Step 4
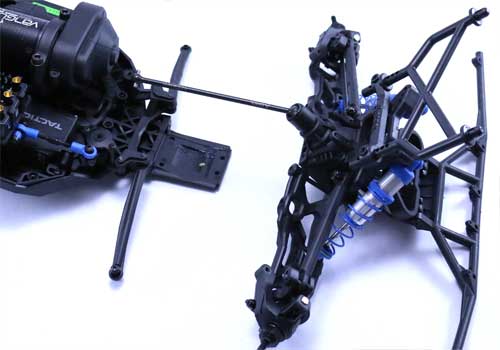 Once the top deck support brace has been lifted off, removal of the front clip is easy. There are 4 screws underneath the chassis and the two hinge pin screws. I also disconnected the fixed-length steering turnbuckles as well – I’m replacing them with adjustable ones.
Step 5
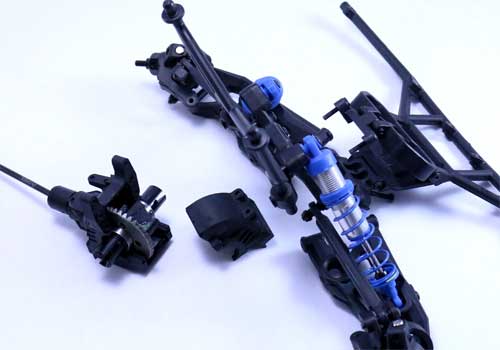 Separate the gearbox from the shock tower by removing the 4 screws holding them together. I’m only working with the differential at this time so I set the rest of the front clip assembly aside. Note the orientation of the diff in the gearbox. You'll want to make sure you re-install it the same way.
Step 6
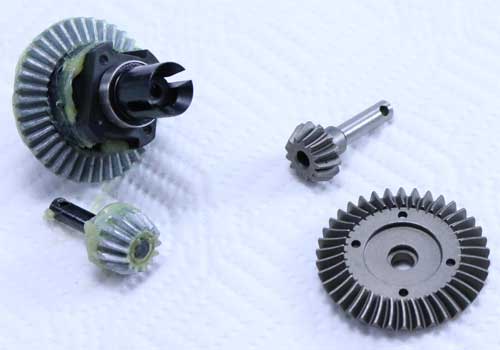 Next, I removed the differential and bevel gear assemblies from the gearbox. I’m replacing them with the AX30395 Heavy Duty Bevel Gear Set shown in the picture. One thing to notice is that the assemblies have straight cut gears; this design is pretty strong and easy to machine. The new HD versions are helical cut, or machined with a slight angle in them. These are great for high-torque applications like crawlers or, in this case, hardcore trophy trucks! To replace, remove the 4 screws on the diff to release the gear, set the new gear in place and re-install the 4 screws. If you’re the tinkering type, you might think about adding some optional fluid to the diff prior to putting it back together (I did, 1000wt). The HD bevel gear is a one-piece unit so replacing the stock part is a simple pull-and-replace operation. One final step I performed was to remove the rubber stops that are installed in each diff outdrive. If you hold the diff on its side, you’ll see them down inside there. These are used to keep the dogbones tight and prevent them from ejecting during a hard crash, however they hinder the up and down suspension movement slightly. Since I’ll be replacing the dogbones with universals, they’re not needed anymore.
Step 7
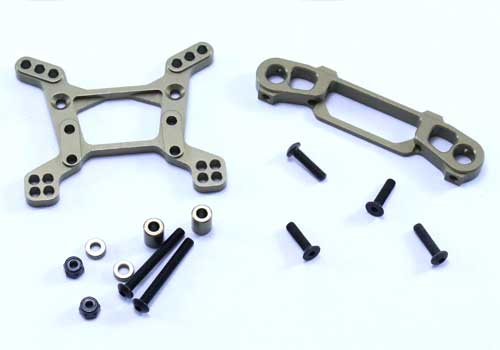 Next up was the AX31170 Machined Front Shock Tower and AX31169 Machined Body Post Mount. These parts are a direct bolt on and work the same as the stock parts, however as you can see there are a few extra pieces. I’ll get to those in a bit.
Step 8
 I disassembled the front clip down to the front shock tower assembly. The only part I’ll be reusing from this is the plastic body post.
Step 9
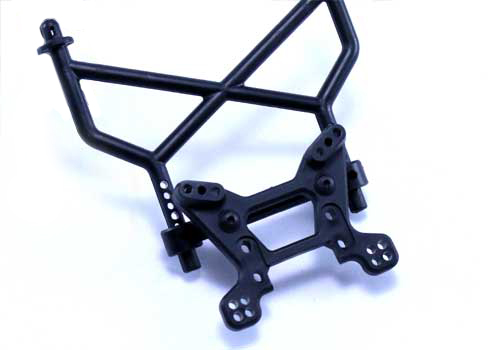
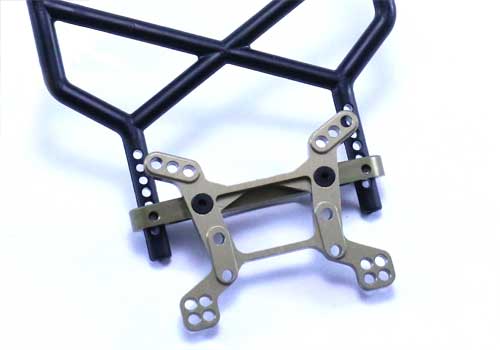 I attached the AX31169 Machined Body Post Mount to the AX31170 Machined Front Shock Tower. Since this is an aluminum-to-aluminum connection, I used a dab of threadlocker on the screws to make sure they don’t loosen up. I slid the plastic body post into the mount and used the screws provided to secure.
Step 10
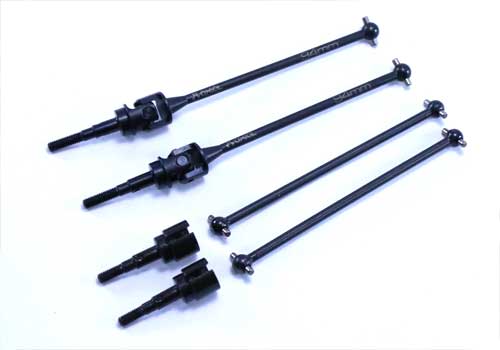 I’m ditching the stock dogbone setup for a set of Axial’s AX31135 94mm Universal Axle Set. These come as a pair, are pre-assembled and slide right into place.
Step 11
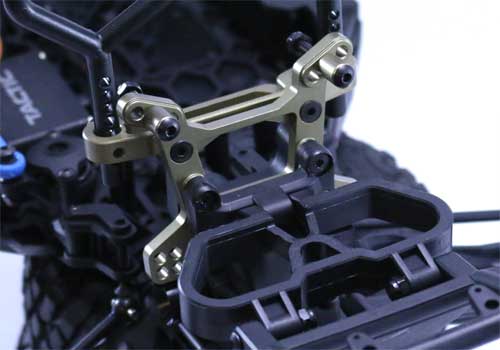 I re-assembled the front clip – the new shock tower to the gearbox and the front bumper to the tower. I left the shocks off for now since I was replacing them with a full set of Axial's Icons. You can also see the aluminum upper shock mounts that are included with the aluminum shock tower.
Step 12
 For strength and additional tuning, I’m adding a full set of front adjustable turnbuckles (AX31249 Yeti Turnbuckle Set). This kit includes an excellent build sheet, so assembly is very easy. Just build the turnbuckles to the appropriate lengths and you’re good to go. I would suggest keeping them separate during the build so you don’t mix up the steering links with the camber links; the two are different.
Step 13
 Before attaching the front clip back on the TT, I need to do a little work on the transmission. I pulled it from the TT and removed the gear cover, motor, plastic backing plate and plastic motor mount.
Step 14
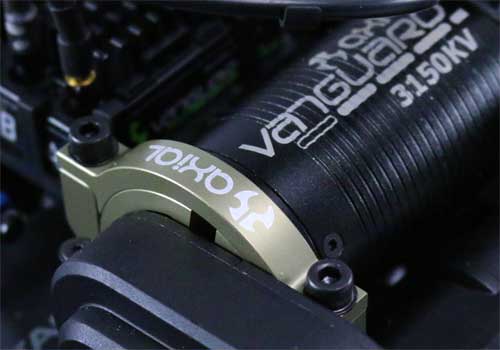
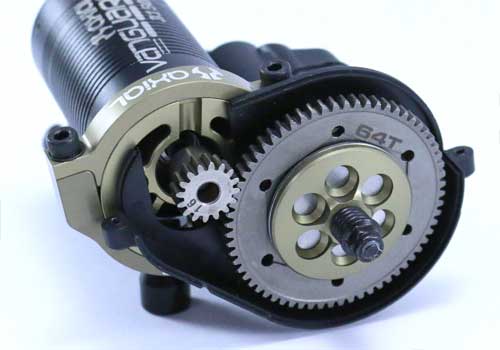 I installed Axial’s AX31156 Machined Adjustable Motor Mount, a 2-piece unit that includes the main mount that attaches to the gearbox and a mount that attaches to the motor. The motor mount part swivels to adjust the gear mesh and uses an upper clamp to keep it securely in place. Because it’s aluminum, this system is SUPER strong and helps pull unwanted heat away from the motor. I re-attached the plastic backing plate followed by the spur gear assembly (I used Axial’s AX31161 32P 64T Steel Spur Gear and AX31164 Machined Slipper Plates in place of the stock parts). These upgrades look awesome and should make the gearbox virtually bulletproof. After I tightened everything up, I went ahead and re-installed the gearbox into the TT.
Step 15
 Time to get the front back together, so I started by sliding the front clip onto the chassis and securing with the 4 screws from underneath as well as the two hinge pins. I made sure to key the center universal into the outdrive located under the transmission. It’s a little tricky, so I would suggest rotating the transmission gears (using the back tires) until you see the slots in the outdrive; this will make it easier to key the universal. Next, I slid the front axles through the steering blocks, attaching the wheel hexes to keep them in place. I installed the steering and camber links, making sure to key the axle bones into the outdrives. A little care has to be taken here to make sure the axle bones stay inside the outdrive.
Step 16
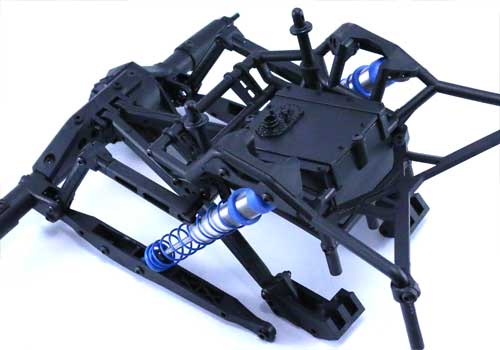 Now that the front is back on and looking good, it was time to move on to the rear clip and the installation of a lot of performance parts. The first thing I needed to do is separate the rear clip from the rest of the chassis; front cage screws, rear cage screws and the 4-link mounts. If you did it right, this is what you should be left with.
Step 17
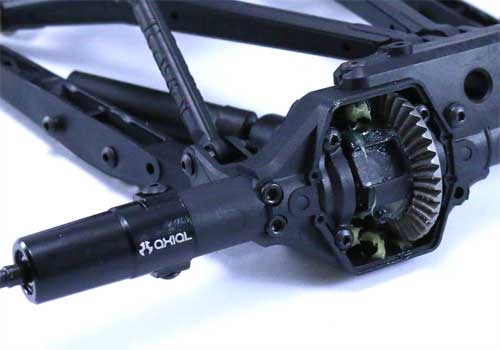
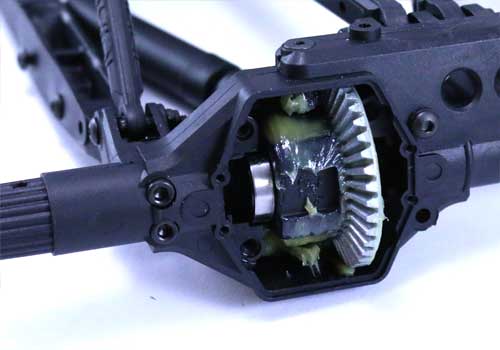 My first plan of attack is the rear differential. To extract it, I needed to remove the diff cover, the straight axle hub carriers and the axles (just pull them out slightly). I also removed the two plastic diff-capture plates that hold the diff in place. Note the orientation of the diff gear inside the housing.
Step 18
 Replacement of the diff gear and bevel gear is the same as the front. Once completed, re-assemble by inserting the diff gear, diff-capture plates and axles (key and slide back into place). I installed the optional AX30789 AR60 OCP Aluminum Straight Axle Hub Carrier.
Step 19
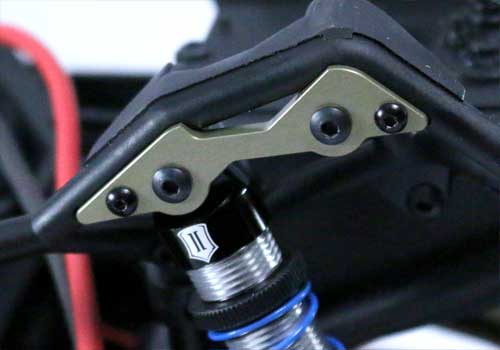
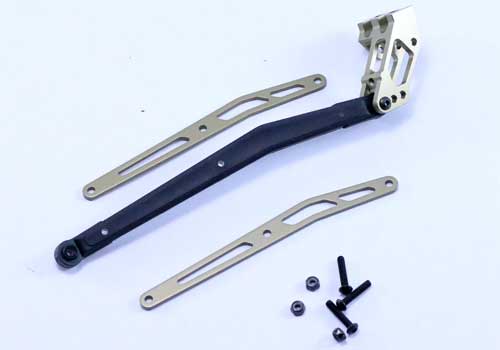 To strengthen the rear end, I replaced the stock plastic 4-link mount with the AX31165 Machined 4-Link Mounts as well as added Axial’s AX31244 Upper Link Plate Set. Both are direct bolt ons; the Upper Link Plate Set uses existing holes in the plastic links.
Step 20
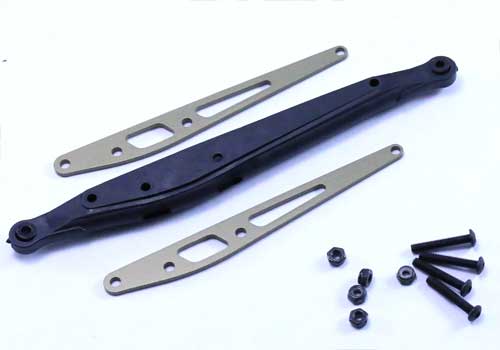 I also installed Axial’s AX31245 Lower Link Plate Set. These also bolt right on using existing holes in the plastic links. I would suggest installing and tightening the two end screws while leaving the centermost pair loose. They can be tightened up when you re-install the shocks and anti-roll bar.
Step 21
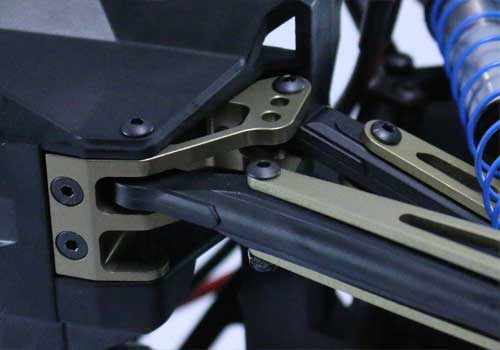
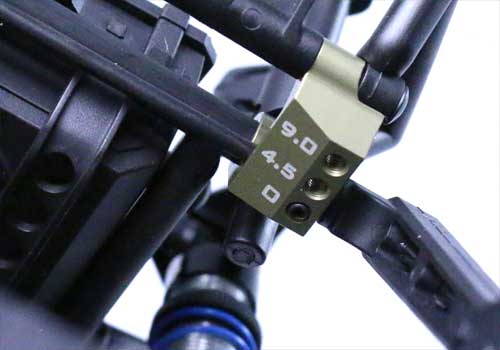
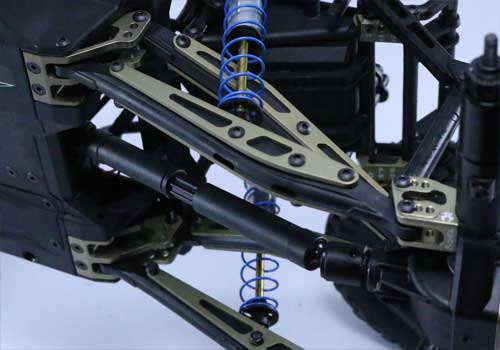
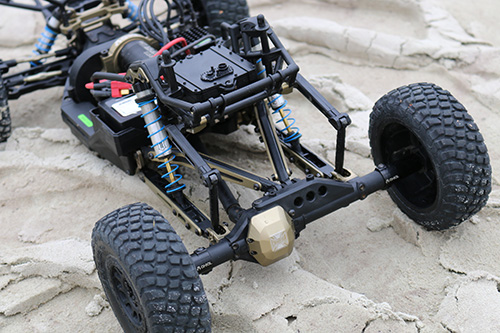
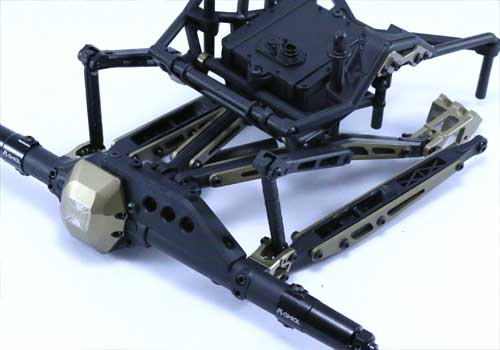 Here is the rear clip assembled with all of the aluminum parts installed. You can see I’ve also added the AX31166 Machined Shock Mount Plates, AX30830 AR60 OCP Machined Link Mounts and AX31167 Machined Sway Bar Clamps. The Machined Sway Bar Clamps are a little hard to see, but I’ve added some additional pictures at the end that help show their install. When re-attaching the rear clip back to the chassis, add some threadlocker to the screws that secure the aluminum 4-link mounts. This will help prevent the screws from backing out when you’re out having a good time.
Step 22
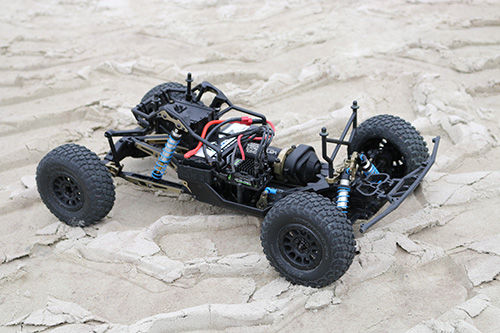
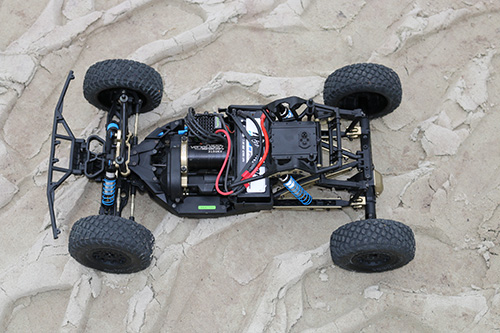
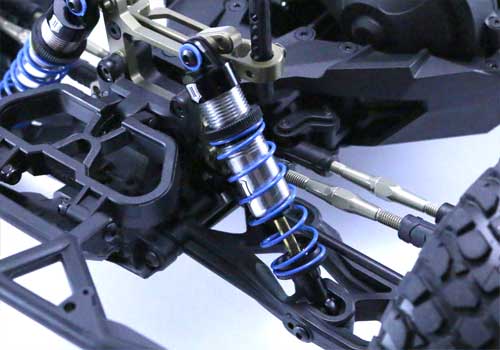 While I loved the look of the King shocks, I couldn’t pass up installing a full set of Axial's Icons. Per the included instructions, I built a set of front and rears and installed them in place of the Kings. I have an additional set of shocks to create a dual-shock setup, but I’m going to give it a whirl with the single shocks first. The dual-shock install (and tuning) will be for a later article. As you can see from the pictures, the aluminum parts look awesome and will provide additional strength as well as give the truck a bit more of a ‘factory’ look. Time for me to get outside and get this thing dirty!
Here’s the list of parts used in this article.
AX30395 Heavy Duty Bevel Gear Set – 38T/13T (x2)
AX30789 AR60 OCP Aluminum Straight Axle Hub Carrier
AX30829 AR60 OCP Machined Low-Profile Differential Cover
AX30830 AR60 OCP Machined Link Mount
AX31135 Universal Axle Set 94mm
AX30836 Aluminum Servo Horn 25T
AX31136 Icon 87-125mm Aluminum Shock Set
AX31156 Machined Adjustable Motor Mount
AX31161 Steel Spur Gear 32P 64T
AX31164 Machined Slipper Plate
AX31165 Machined 4 Link Mounts
AX31166 Machined Shock Mount Plates
AX31167 Machined Sway Bar Clamp
AX31169 Machined Body Post Mount
AX31170 Machined Front Shock Tower
AX31172 Icon 67-90mm Aluminum Shock Set
AX31244 Upper Link Plate Set
AX31245 Lower Link Plate Set
AX31249 Yeti Turnbuckle Set
Additional Photos