Posted: 3/28/12

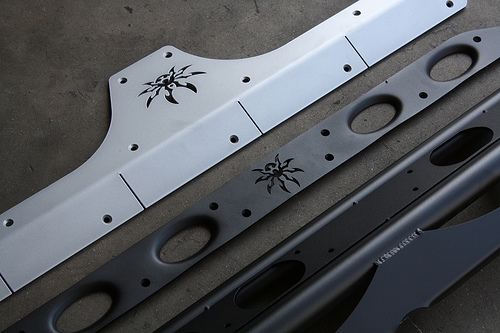
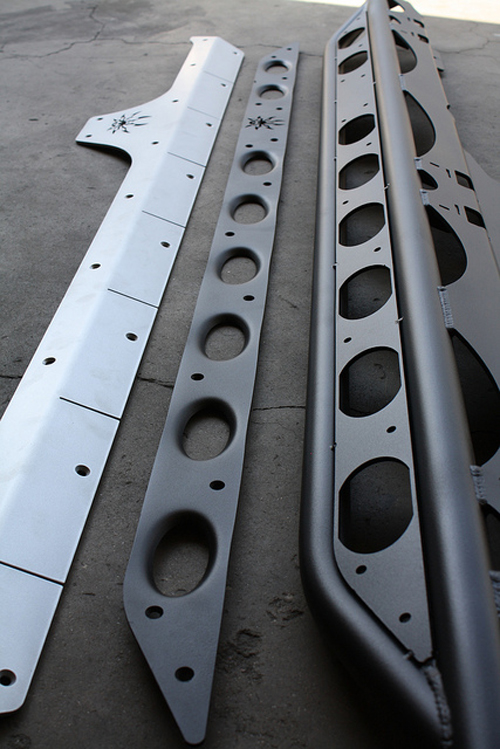
We are starting to get extremely excited about Project "SCX10JK" . We have been at Rebel Off Road almost every day checking out the progress of the build. Those guys really make quick work of the parts install. Standing there watching them in action is pretty cool, it is like a well oiled machine. Every person there has a job to do, and they all seem to work really well together. Yesterday's progress included adding some much needed armor to the side of the Jeep in between fenders. The rocker panels are one of the most vulnerable parts of the vehicle when out on the trail. Just because the Jeep can climb over something, doesn’t mean it should. For those moments when Jeff is faced with climbing over a huge rock, we needed some rocker protection for when it comes down on the other side. I know from experience with my SCX10, that the sliders are very important, same goes for the full size action. Unlike my Lexan bodied SCX10, failure to install proper sliders on this rig, will result in very expensive damage. To handle protection of this vital area of the vehicle we once again turn to the Jeep masterminds over at Poison Spyder. This time we will be installing the Aluminum Rocker Armor (found here) and the Rocker Knockers or sliders (found here).
Of course we need to stick with the same theme that we started with, so Rebel sent both components out for powder coating. We decided to make the Aluminum rocker protection match the corners in that silver powder coat, and do the Rocker Knockers in black. That way any protection bolted to the body surface will match the silver paint, and the Rocker Knockers will look great with the Crusher Flares previously installed.


The first part of this process involves stripping the stock rocker panels down to bare metal


This would be another one of those moments where you cringe seeing the drill hit the fresh paint, but I imagine after the corner install, this would be a little easier to swallow. The process is very similar to the rear corner install as it requires the drilling of several holes in which you install threaded inserts to bolt the parts on.


After all the holes are drilled, the threaded inserts are installed. These threaded inserts also known as "Riv-Nuts" and are just like rivets in how they are installed. I need one of these tools!


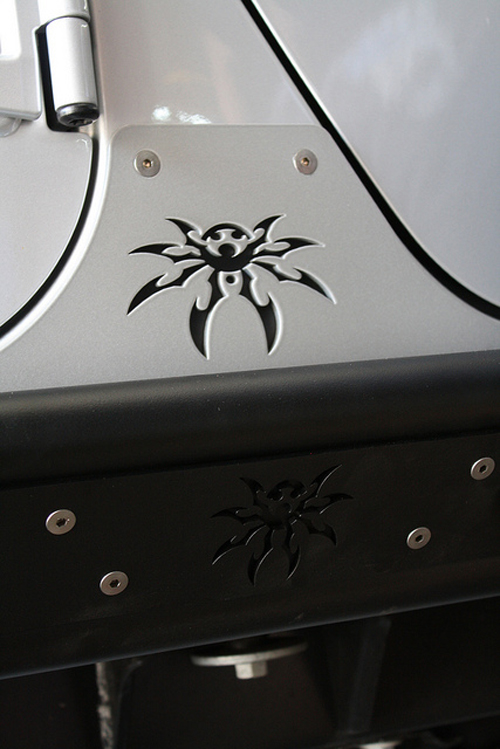
After all the threaded inserts are installed, it is as simple as bolting the parts in place. The fitment of the Poison Spyder parts is spot on, that or Rebel Off Road really makes it look easy :)

All of the hardware is countersunk, so the result is a completely smooth surface, very clean!


Once the rocker protection is in place the crew at Rebel got to work installing the Rocker Knockers Rock Sliders. These are really cool, and look very similar to the sliders that come as standard equipment on the SCX10 line of vehicles, so they definitely fit the theme of this build!


We are very pleased with the result of the Poison Spyder Rocker Knockers, I am sure Jeff will hit the rocks with confidence with these bad boys installed!

The next step is the front bumper and rear bumper with tire carrier. Be sure to stop back by and check out the progress over the next few days! The guys at Rebel Off Road are working extremely hard to get this rig ready for action, Thank you Rebel!
If you are new to our blog, and want to see where this project stems from, be sure to check out our past blog postings listed below
The Full Size Connection
Axial 2012 Jeep Wrangler Rubicon Unlimited
Axial Visits Rebel Off Road
Axial "SCX10JK" - Icon Suspension
Axial "SCX10JK" Armor - Poison Spyder Crusher Flares and Crusher Corners
To learn more about Poison Spyder and the very high quality products they produce, be sure to visit their website here