Posted: 12/18/17

A radio control transmitter should be a device used to control the fun of your vehicle and never the device that controls you and scares you away from using your machine. The transmitters that come with Axial Ready To Run vehicles are simple by design so they are user friendly and comfortable while using the control. These radio systems will come preset from the factory so you can instantly use your machine. But even with the simplified radio systems, there will still be a few things you should to know to get the most out of the radio. Simple things like servo reversing, trims or even how many batteries it takes. In this Radio System Cheat Sheet article we’ve gathered up all of the radios used in Axial ready to runs in one spot for your convenience and simply list out the important functions of your radio and how to use them. Think you’ll get hung up when making adjustments on your radio? This is certainly one blog post to bookmark.
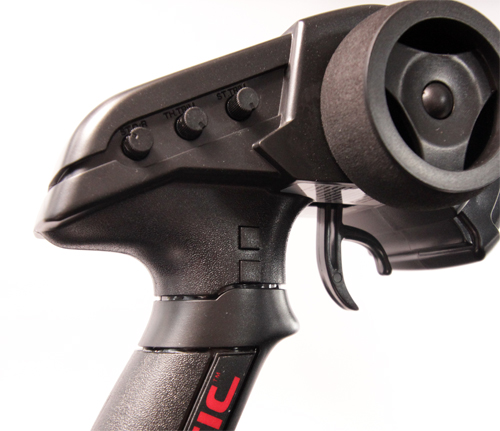
TACTIC TTX200

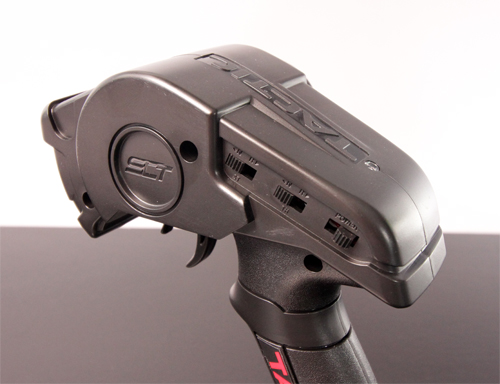
This radio packs a punch for a compact radio system. It is loaded with digital trim functions that make it a great radio for general hobby use. These digital trims can set advanced features like end point adjustments and dual rate, however you need to know how to use the radio properly to access these features. Here are a few tips to get your radio set up and Axial rig dialed in.
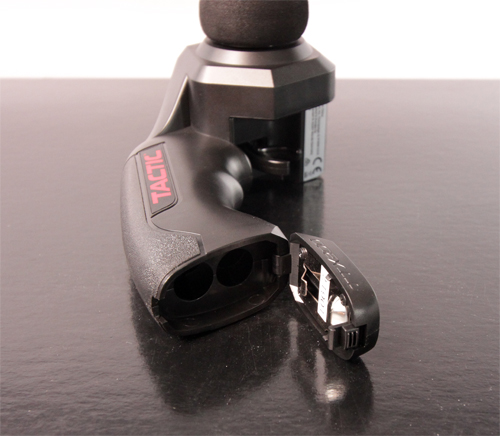 Batteries- First things first, you need to install four AA batteries into the radio for power. This is done by accessing the battery slots located at the bottom of the radio. Make certain to note the orientation of the batteries. A small diagram is molded into the back lower portion of the handle.
Binding- Your TTX200 radio and reciever will come linked with your RTR model, but in case something happens and the two components are not "speaking" to each other, here is how to link the them. Turn on your TTX200 and then connect power to the receiver by turning on your ESC. If the LED light in the receiver blinks once and stays on, it is linked. If not, you'll need to use a small hex driver to depress the receiver Link button until the LED blinks and shuts off. Then you can let go. The LED should now come on constantly indicated the system is linked.
BINDING VIDEO
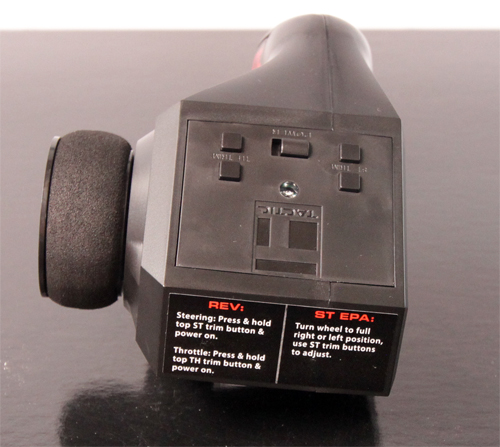 Steering Trim/ Throttle Trim- Accessing the trim functions of the radio are an easy task. The buttons are located at the top of the radio and are clearly labeled. If an adjustment needs to be made to center the steering or adjust the neutral point of the transmitter, it can be done by depressing the marked trim. The center of the trim can be idendified by depressing the either button of the trim until you see the LED flash indicating the center point.
Steering Reversing- With the transmitter off, hold the top ST Trim button and power the radio on. The LED will flash once and then turn off. Release the button. The LED will then turn on to confirm the steering channel has been reversed.
Throttle Reversing- With the transmitter off, hold the top TH Trim button and power the radio on. The LED will flash once and then turn off. Release the button. The LED will then turn on to confirm the throttle channel has been reversed.
Steering End Point Adjustment- To set the maximum limit of rotation for steering in both left and right direction, turn the radio on. Turn the wheel to full left direction and hold. Press the ST Trim buttons to increase or decrease the travel limits. Follow the same procedure to then set the right turn limits.
TACTIC TTX300

The Tactic TTX300 comes with a number of Axial ready to run models and is a radio many seasoned RC enthusiasts trust. This radio has all the basic trim functions you’ll need for your model and more. This radio is a three channel radio which means you can even add additional functionality such as setting it up for winch control later on. But let’s not get too far ahead, let’s go over it’s functionality.
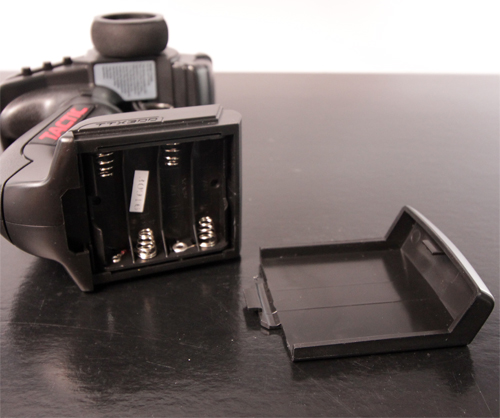
Battery- The battery door slides out form the bottom of the radio. Insert four AA batteries to power the radio making certain the batteries are installed according to the diagram in the battery cradle.
 Binding- With the radio on, power up the receiver as well. Push and hold the receiver’s “BIND” button until its LED glows red and then turns off after about one second. Release the bind button. If the binding is successful, the LED will flash once and then remain on.
BINDING VIDEO
Steering Reversing Switch/ Throttle Reversing Switch- These switches are located on the back of the transmitter next to the on/off switch.
Steering Reversing Switch- Use this switch to correct the direction of the steering servo. Remember when the vehicle is pointing away from you, steering the transmitter to the right should turn the wheels to the right and vice-versa for left.
Throttle Reversing Switch- Use this switch to correct the direction of movement of the vehicle when the transmitters throttle trigger is moved. Remember forward movement is achieved when the trigger is pulled towards the transmitters grip and away for reverse.
Steering End Point 1. Enter programming mode. 2. LEFT EPA: Turn wheel full counterclockwise, use 3rd channel push buttons to adjust. 3. RIGHT EPA: Turn wheel full clockwise, use 3rd channel push buttons to adjust.
Throttle End Point 1. Enter programming mode. 2. Throttle EPA: Pull trigger to the full throttle position, use 3rd channel push buttons to adjust. 3. Brake EPA: Push trigger to the full brake position, use 3rd channel push buttons to adjust.
EPA VIDEO Channel 3 - Multi-Position- The TTX300 3rd channel can be programmed to function as 2 position, 3 position, 4 position or proportional control switch. Selecting each position and end points for each position are performed simultaneously. The default position of CH3 is 2 position. To change the function of CH3, follow these steps:
1. Enter programming mode: Press and hold the top push button, power ON transmitter. Continue to hold until the LED flashes five times. Release the top push button.
2. Use CH3 push buttons to adjust CH3 accessory/servo to desired 1st position. Turn steering wheel clockwise (right) to confirm position1. The LED will flash one time to confirm position 1 has been saved. Note: Press and holding CH3 push buttons will adjust rapidly. Press and release will finely adjust positions. First use CH3 buttons to set. Then turn wheel clockwise to confirm.
3. Use CH3 push buttons to adjust CH3 accessory/servo to desired 2nd position. Turn steering wheel clockwise (right) to confirm position 2. The LED will flash two times to confirm position 2 has been saved. If programming for two position switch, skip to step 6. Otherwise, proceed to step 5 to program 3rd or 4th position.
4. If programming as 3 or 4 position switch, follow the procedures in steps 2 and 3 and select additional positions (3 and/or 4). Turn steering wheel clockwise (right) to confirm each individual position. The LED will flash in relation to the position that is being saved. Three flashes is 3rd position, 4 flashes is 4th position. Proceed to step 6 when programming as 3 or 4 position switch has been completed.
5. To program CH3 as proportional, enter programming mode and select desired position 1 as listed in Step 2 above. Use CH3 push buttons to adjust to desired end point and turn steering wheel clockwise four times. The LED will flash five times to confirm the position has been saved.
6. After programming of CH3 is completed, turn off transmitter to save settings.
Reverse- Press and hold the bottom push button and power ON transmitter. The LED will flash one time. After 3 seconds, the LED will flash two times when performed correctly. Release the bottom push button.
AX-3

The Axial AX-3 Transmitter came with many early Axial kits. Current Axial kits come with the Tactic brand transmitters. However the AX-3 is still used by many drivers today. If you have a model equipped with this radio system, here some usage notes and the details for making adjustments.

Battery- The AX3 requires four AA batteries for power. To access the battery cradle, slide the battery door out and insert the batteries. Be aware of the polarity as indicated by the positive and negative moldings in the cradle.

Steering Reversing Switch- This switch is located under the control cover. Use this switch to correct the direction of the steering servo. Remember when the vehicle is pointing away from you, steering the transmitter to the right should turn the wheels to the right and vice-versa for left.
Throttle Reversing Switch- This switch is located under the control cover. Use this switch to correct the direction of movement of the vehicle when the transmitters throttle trigger is moved. Remember forward movement is achieved when the trigger is pulled towards the transmitters grip and away for reverse.
Steering Trim- Use the steering trim dial to fine tune your vehicles steering. When the steering wheel is in the neutral position, your vehicle should track straight. If it does not, adjust the trim until the vehicle drives in a straight line.
Throttle Trim- If the vehicle is rolling forward while the trigger is in the neutral position, adjust the trottle trim until the vehicle is at a standstill at neutral.
Steering Dual Rate- This knob adjusts the amount of steering throw equally for both left and right. If you have too much steering, dial the Dual Rate down. If you have too little steering, turn the Dual Rate up.
Binding- 1. Make sure the transmitter and ESC are off. 2. Plug the Bind plug included with your Axial Racing vehicle in the receiver’s third port (labeled “CH3) 3. Turn on speed control. The receiver’s status LED will blink. The blinking indicates the AR-3 is in Bind mode. 4. Open transmitter’s cover located on the top of the case. 5. Using the included pin-shaped tool, press and hold Bind button on the AX-3 transmitter 6. Turn on the AX-3 transmitter. 7. When blinking stops on the AR-3 receiver, remove Bind plug from receiver.
BINDING VIDEO
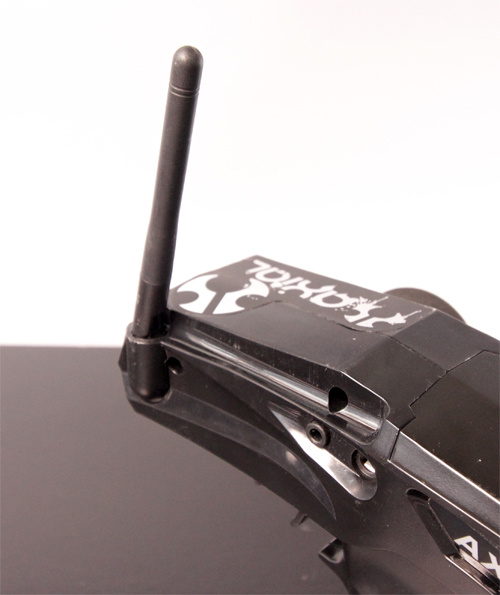
Antenna- This particular radio system has a folding antenna that neatly folds down onto the radio when not in use. However when it is in use, it is best to position the antenna up for maximum radio range. Don’t skip this step when running.
RADIO SYSTEM NOTES
ON/ OFF SWITCH- The radio should always be turned on first (before the vehicle) and off last.
STEERING- When the wheel on the radio is facing you, turning it to the right should result in the vehicle steering to the right when it is pointing away from you. Steering the wheel to the left should turn the vehicle left.
THROTTLE- Forward movement is achieved when the trigger is pulled towards the transmitters grip and away for reverse.
RECEIVER CONNECTIONS- If you have removed the servo and ESC plugs from the receiver, remember to reinstall them in the correct slots. The steering servo is always plugged into channel 1 and the ESC is always plugged into channel 2.