Posted: 12/15/16
Words and photos by Tony Phalen
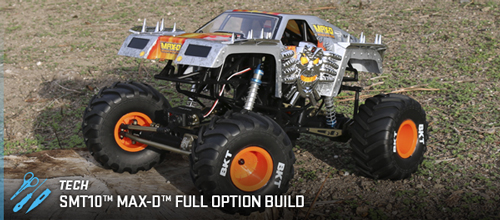
I've been looking forward to getting one of Axial Racing's SMT10 Monster Trucks, so when the MAX-D landed on my doorstep (thanks UPS guy), it was literally a matter of seconds before the box was open and the truck was out. I was even more stoked, however, when I found a big ol' box of Axial's aftermarket goodies included so I could do an upgrade article.
Below is a step-by-step guide, walking you through the disassembly and re-assembly of the SMT10 with all of these parts.
STEP 1
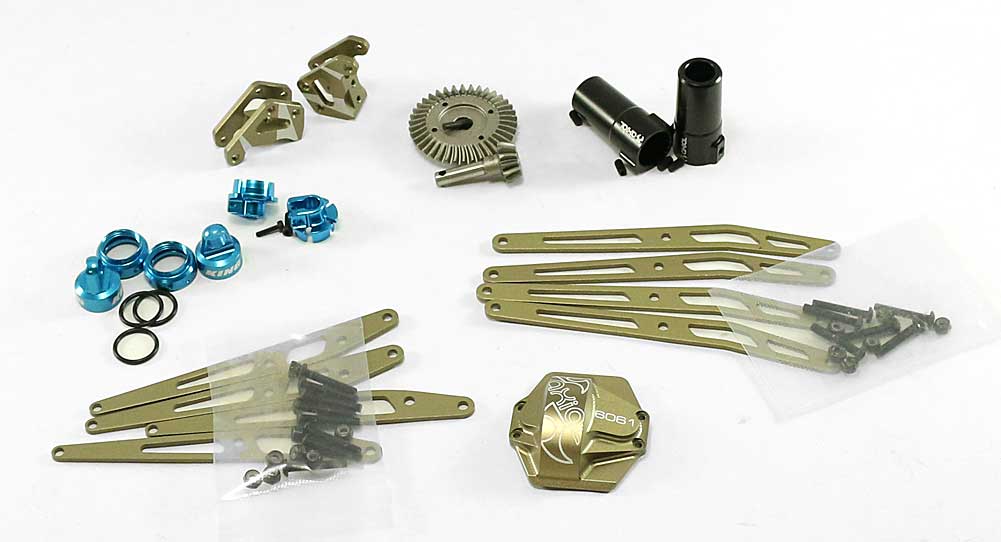
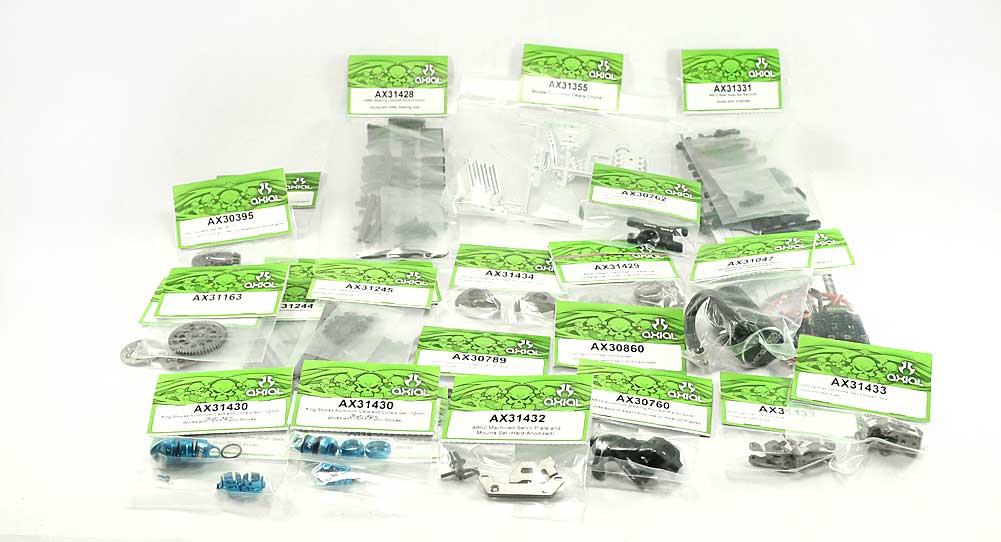 Here's a overview shot of all the parts I'll be installing on the MAX-D. A list is included at the end of the article complete with part numbers and links.
STEP 2
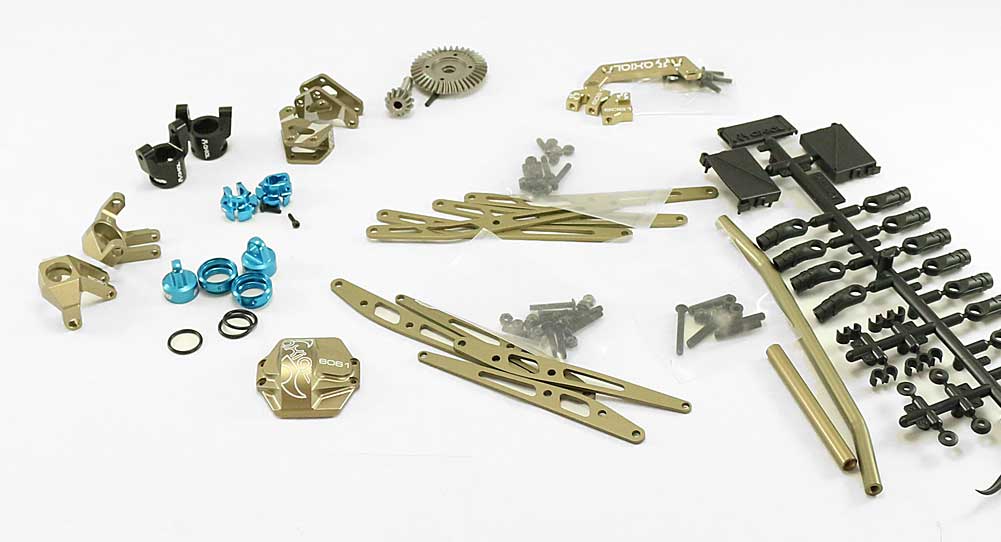
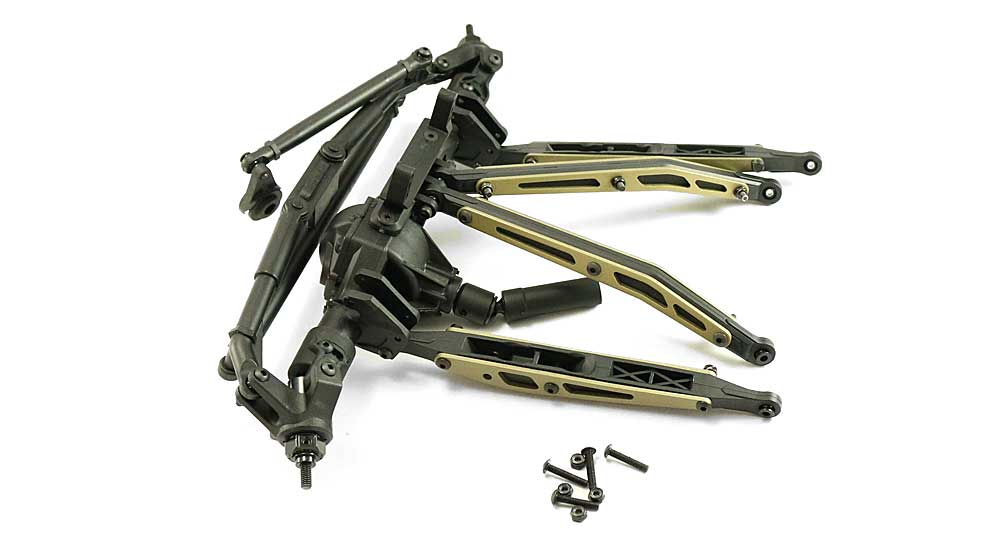
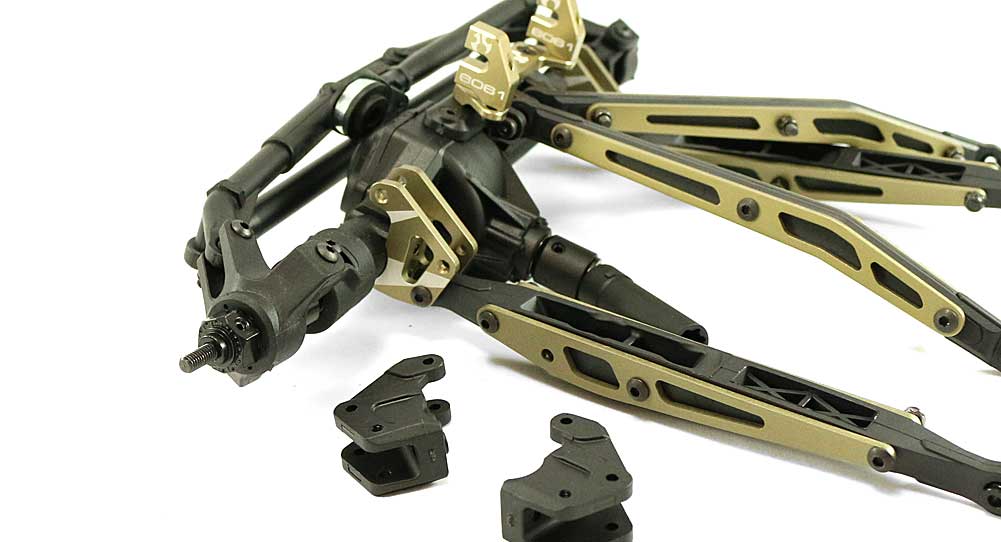
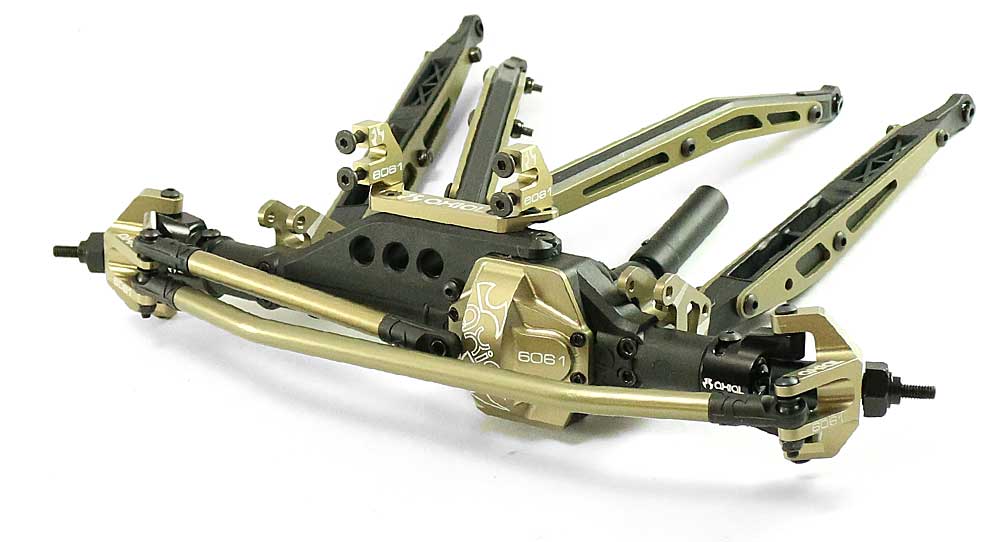
I'll be splitting the build up into three sections; front, rear and mid. Here's a pic of the parts I'll be using for the front end rebuild; steering parts, upper and lower link plates, link mounts, shock parts, gears and the diff cover.
STEP 3
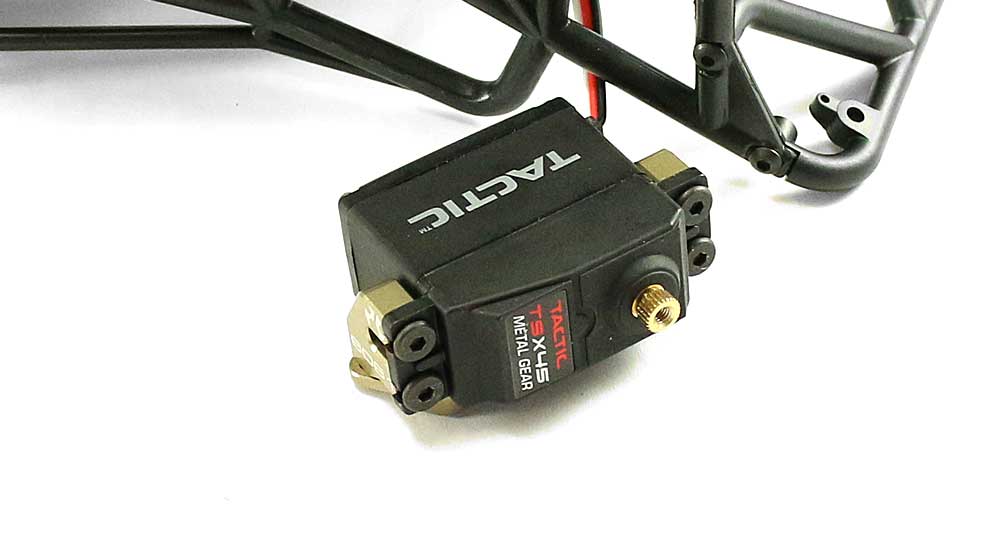
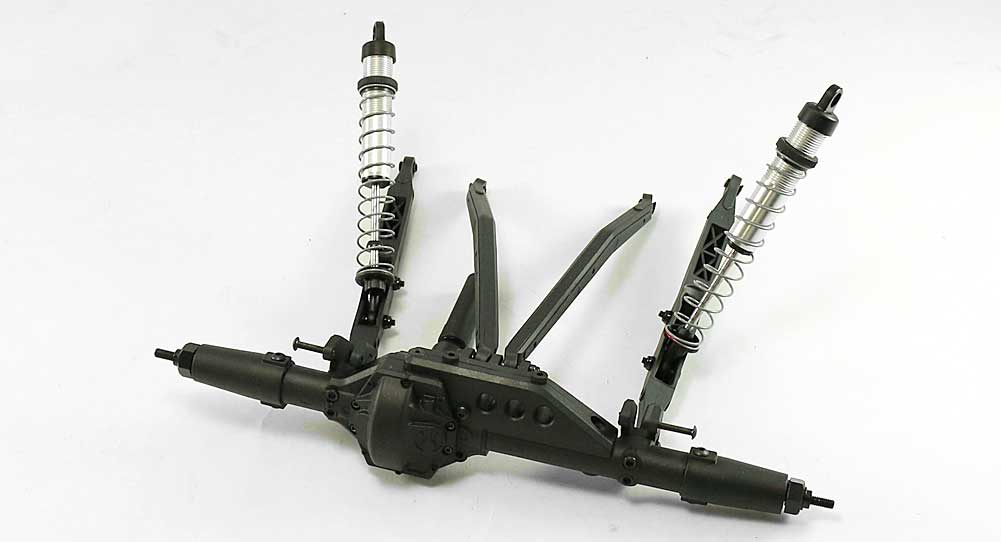
Since the SMT10 is modular in design, I need to remove anything that will keep the front from coming off easily - that being the front tires and servo. Once the servo has been disconnected, you can let it dangle down and under the center transmission.
STEP 4
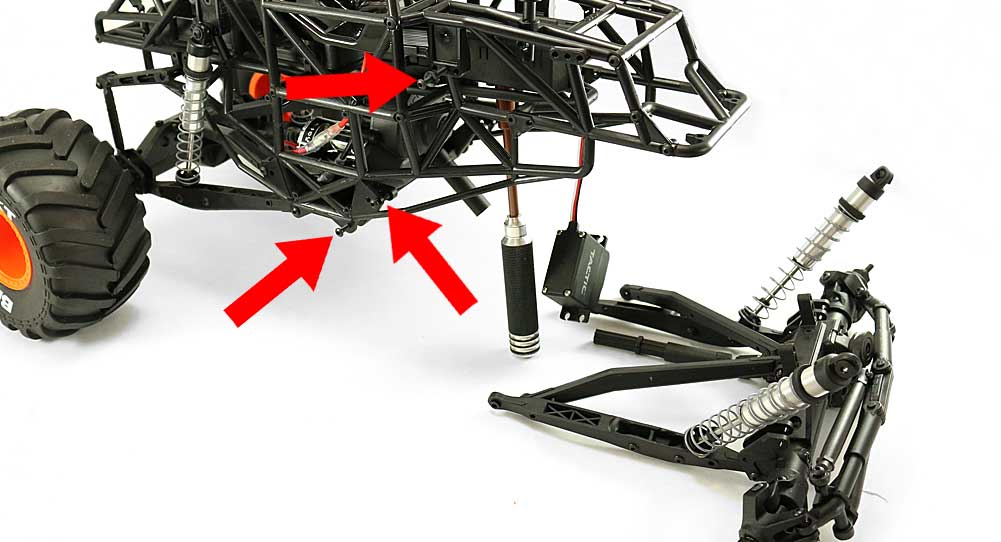
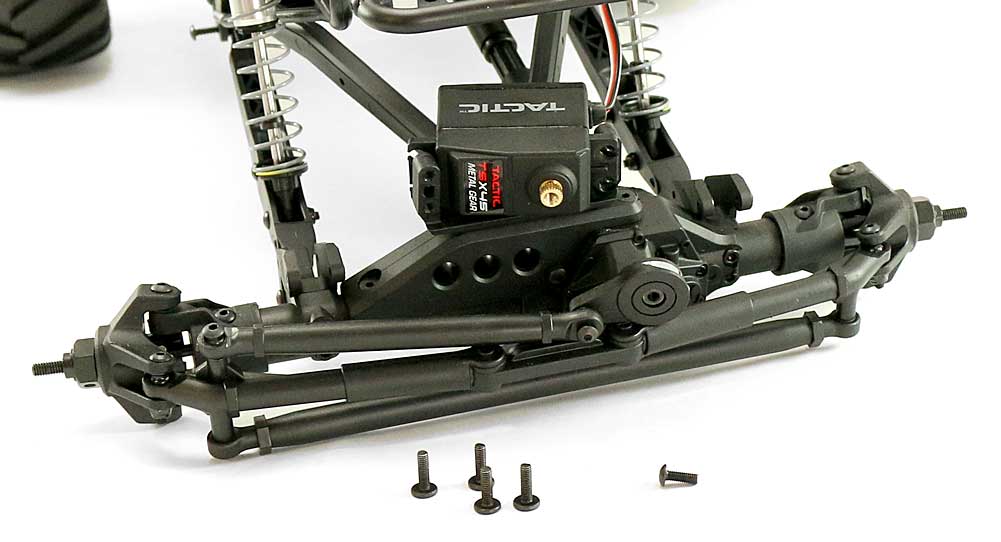
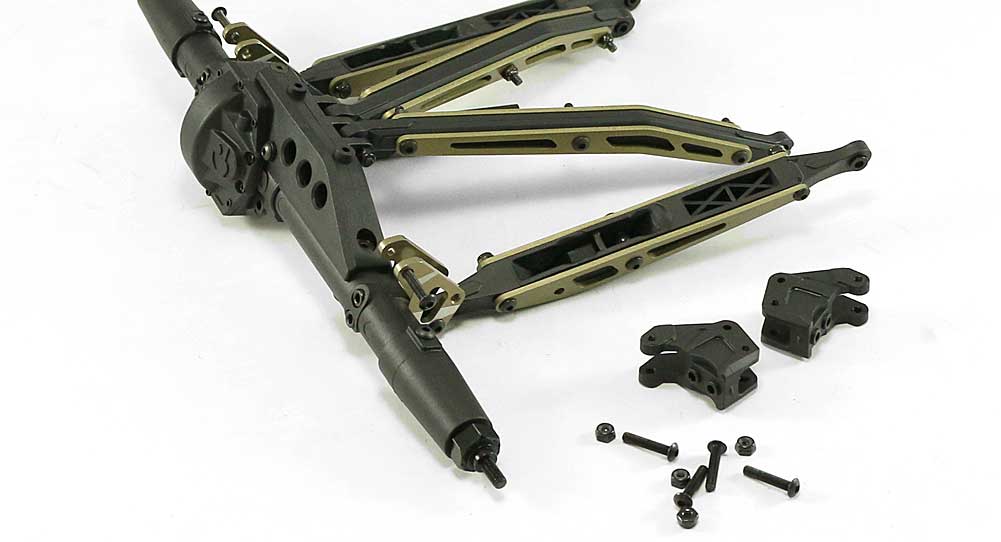
To remove the front 'clip', simply unscrew at the three attachment points designated by the red arrows. Do this on both sides and the front end will drop right off. Pay close attention to the WB8 center driveshaft coupler; it fits between the front and center driveshaft sections and, once the front clip is removed, this piece can fall out.
STEP 5
Attach the AX31244 Axial Upper Link Plate Set and AX31245 Axial Lower Link Plate Set. Because of the design, I didn't need to remove anything other than the shocks; that's fine because I need to work on those at a later time anyway.
STEP 6
The AX31432 Axial AR60 Machined Servo Plate and Mount Set is up next for install, but before you do that, assemble it and attach the servo to it. This ensures the two side upright pieces line up with the servo. I would also suggest using a dab of blue threadlocker on the two screws going up and into the aluminum side uprights. Once everything is aligned, remove the servo.
STEP 7
Remove the stock plastic servo mount and replace with the aluminum assembly from STEP 6.
STEP 8
Remove the lower links and replace the plastic link mounts with the AX31433 Axial AR60 Machined Link Mounts. Re-attach the lower links.
STEP 9
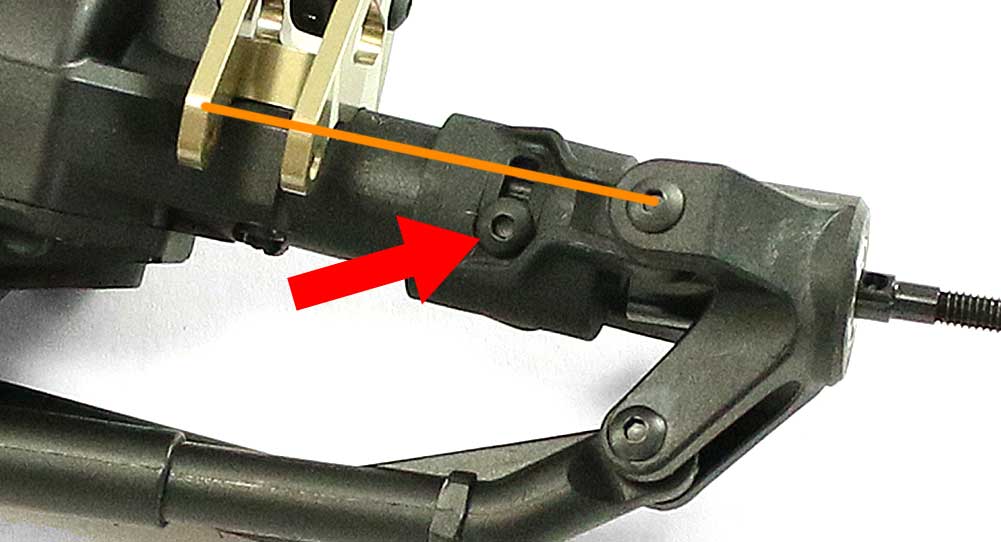
Before moving on, I suggest paying close attention to the orientation of the steering blocks in relation to the lower link mounts. The upgrade C-hubs I'll be using have more adjustability than the stock plastic ones, so if you just throw them on and clock the C-hub like the original (red arrow), your caster will be WAY off. So, my suggestion is not to assemble to match the C-hub (red arrow), but to assemble to match the top kingpin screw (orange line).
STEP 10
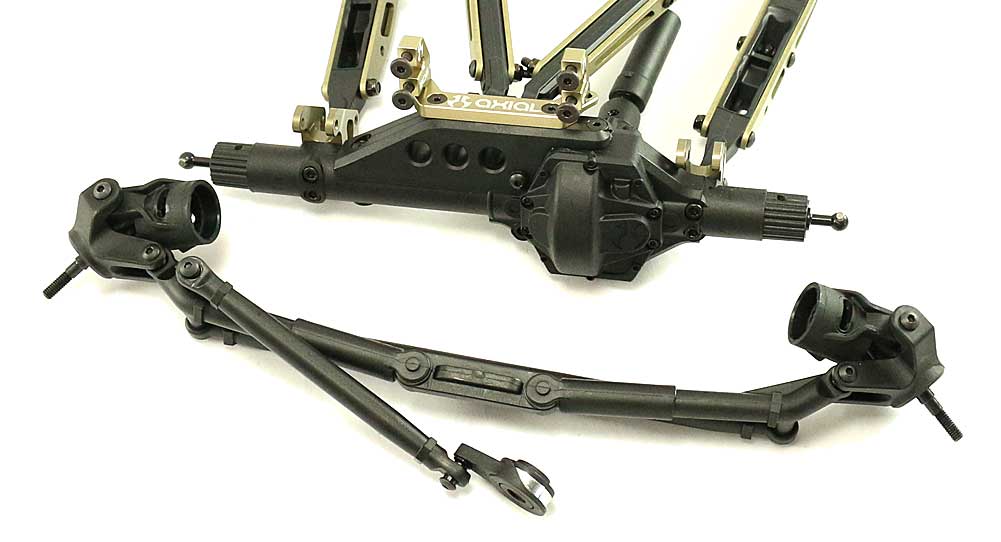
But first, remove the steering system. Four screws will do it.
STEP 11
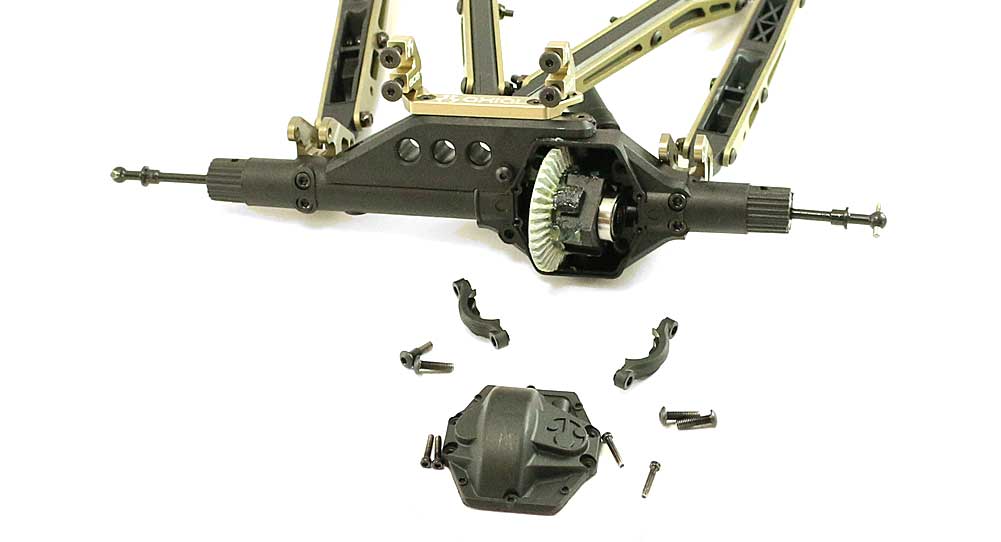
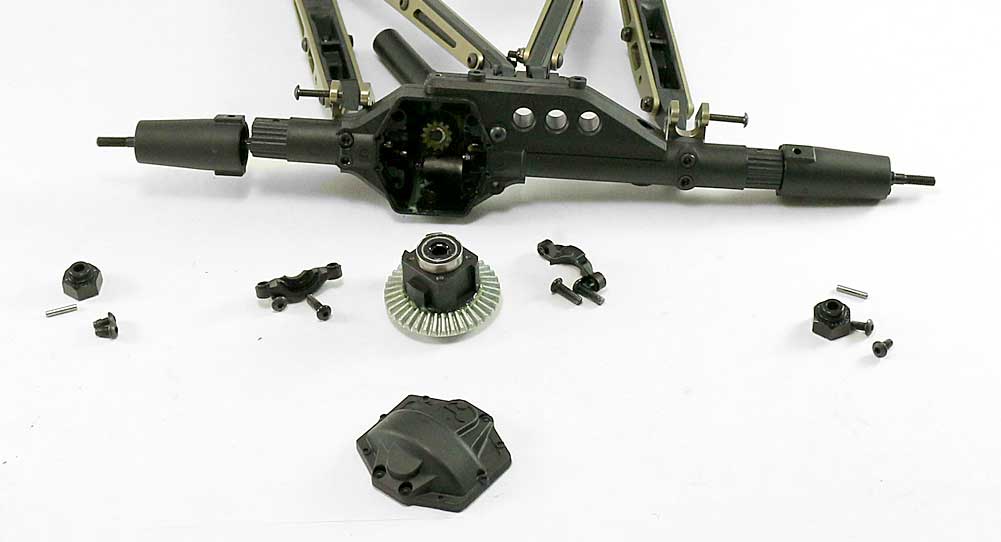
I'm also going to replace the diff gears while I'm at this point. Remove the four screws holding on the diff cover and the four screws holding the diff in place. You'll need to pull the axles out a bit to disengage them from the diff.
STEP 12
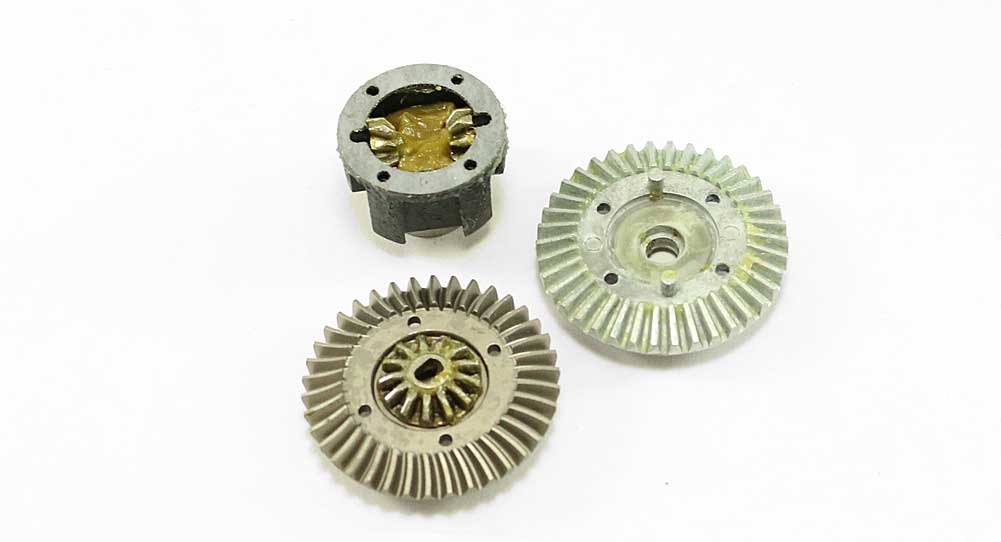
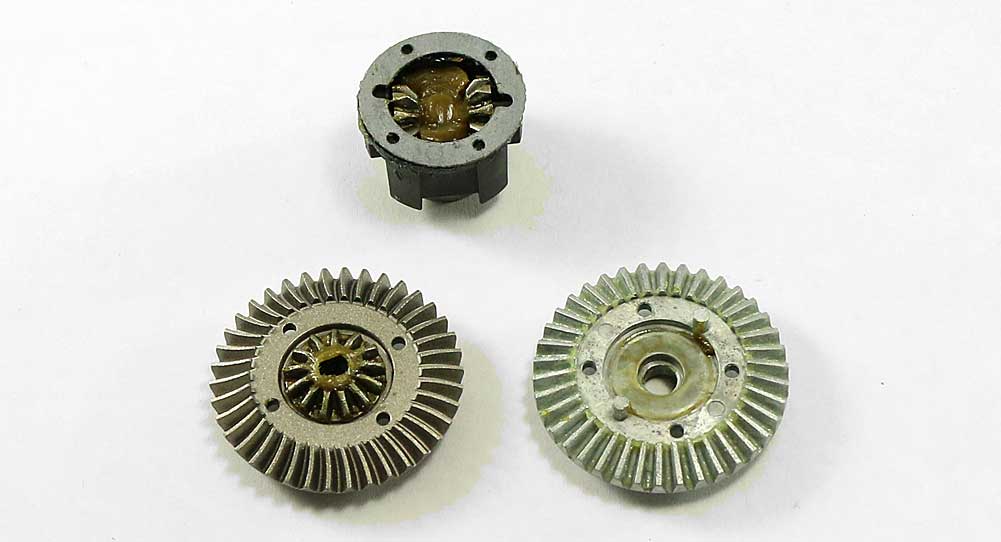
Remove the four screws to release the stock diff gear and replace with the AX30395 Axial Heavy Duty Diff Gear. Make sure the gasket is in place and not still attached to the original diff gear. A keen eye will notice the planetary diff design instead of a locked unit. This type of differential is actually a better fit for Monster Trucks.
STEP 13
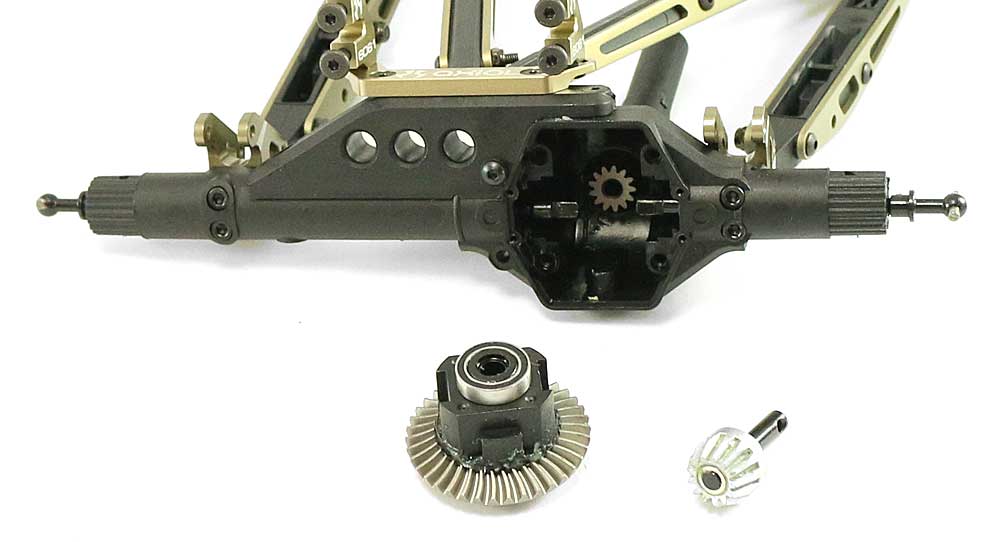
You'll need to replace the stock input gear as well; that can be done on the opposite side of the axle. Replace with the AX30395 Axial Heavy Duty Input Gear, re-install the differential and slide the axles back into the housing. You may need to rotate the axles to key them into the differenial.
STEP 14
Replace the stock plastic cover with this beautiful AX31429 Axial AR60 Machined High Clearance Differential Cover.
STEP 15
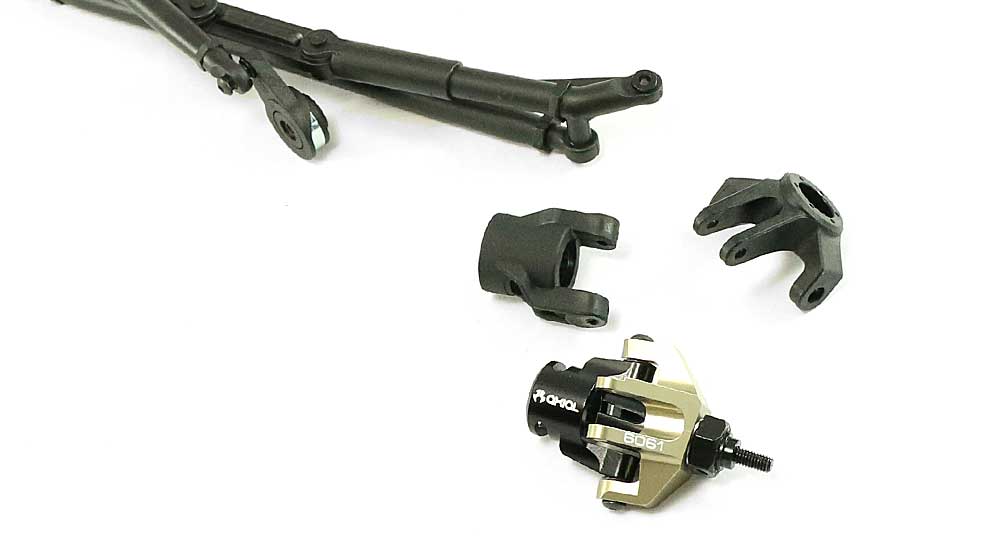
Ok, now it's time for the steering. On one side at a time, pull the plastic parts off, keeping the bearings and hat bushings handy. Re-assemble the the AX30762 Axial XR10 Aluminum C-Hub Carrier and AX31434 Axial AR60 Machined Steering Knuckles. Note the orientation of the parts; if you get confused, look at the opposite side of the steering to make sure you've assembled it correctly (the reason why I suggest removing only one side at a time).
STEP 16

The AX31428 Axial AR60 Steering Upgrade Kit comes with a small build sheet in it. Use that to assemble the steering links, then attach them to your steering knuckles. The final assembly should look like this.
STEP 17
Using STEP 9 as a guide, slide one C-hub onto the axle and secure. Now slide the other C-hub onto the axle and secure.
STEP 18
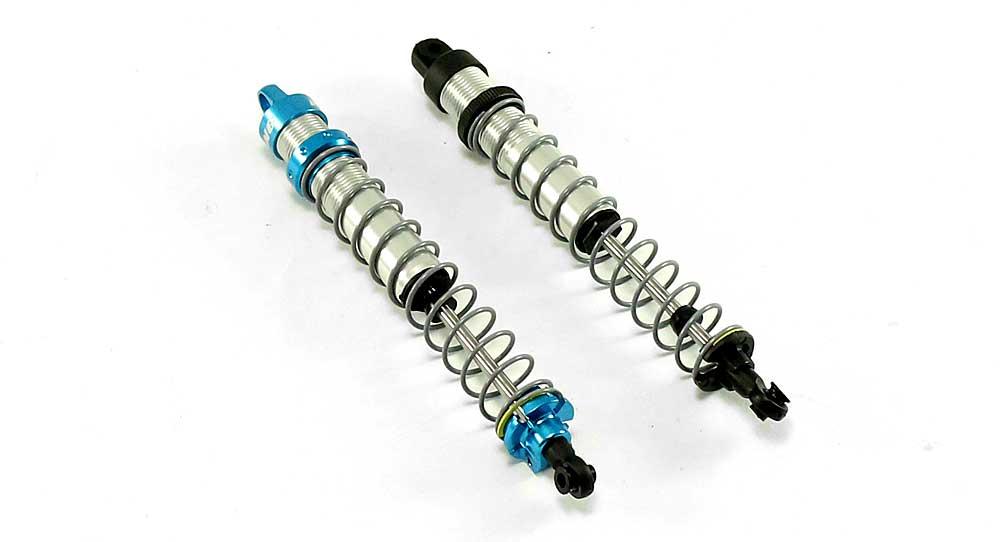
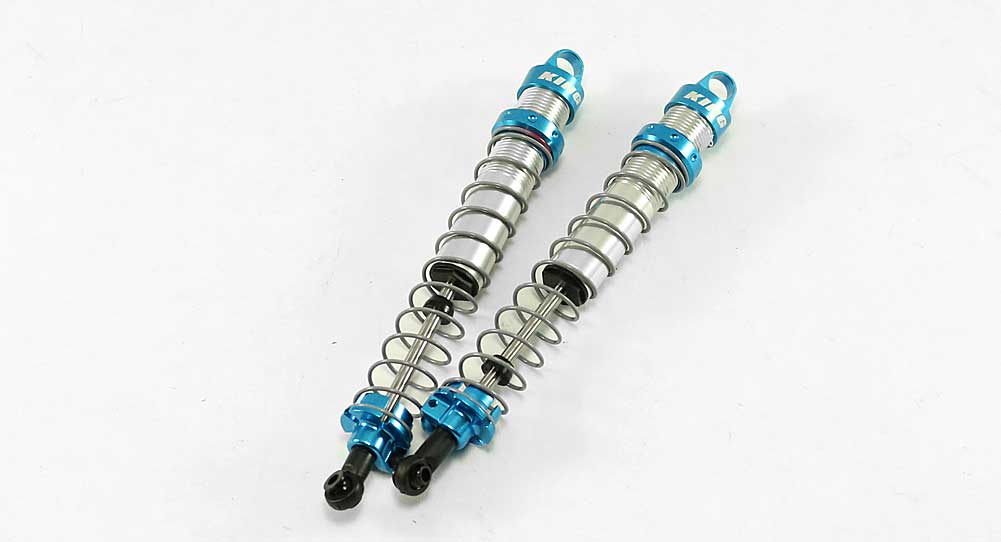
At first, I thought the shocks were going to be a pain; replacing oil, bleeding, etc. However, if you complete this step carefully, you won't have to do any of that!
Start by inserting the rubber o-ring into the AX31430 Axial King Shocks Aluminum Collars; set aside. Grab your shocks and remove the lower spring retainer and spring. Carefully remove the shock cap and set the shock off to the side in some sort of stand. Pull the bladder out of the shock cap (if it's up in there) and install it into the AX31430 Axial King Shocks Aluminum Cap; set aside. Grab your shock again and spin the plastic collar off; it can only be removed from the top. Spin the King Aluminum Collar on followed by the King Aluminum Shock Cap. Install the spring from the bottom and the AX31431 Axial Aluminum Shock Spring Retainer. These retainers utilize a small screw to keep them from popping off in the event of an crash. These are, after all, Monster Trucks - there will be plenty of crashing.
STEP 19
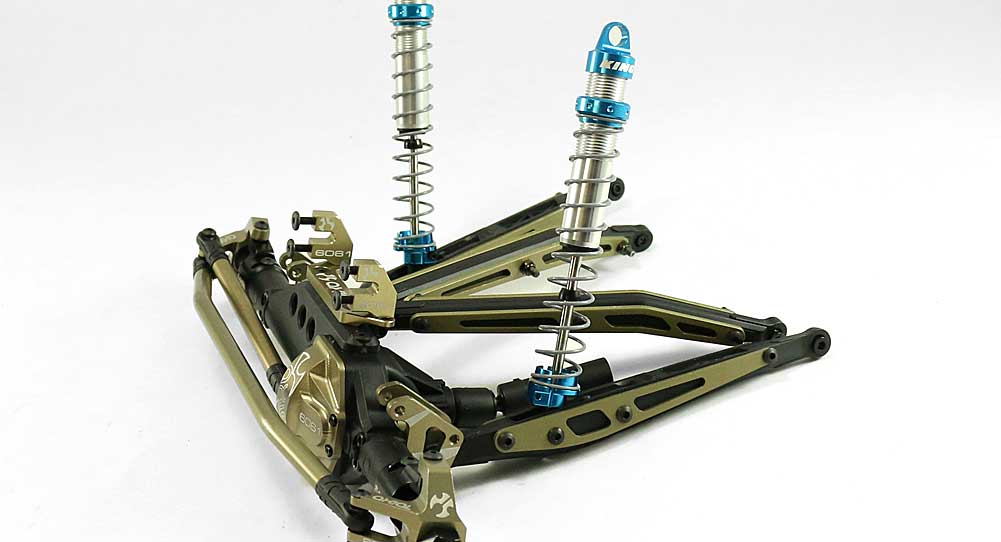
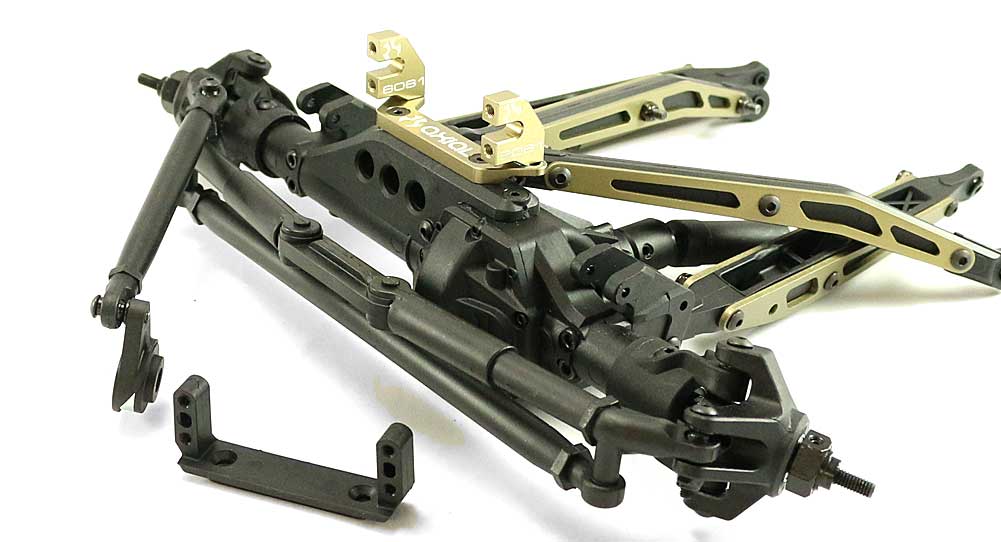
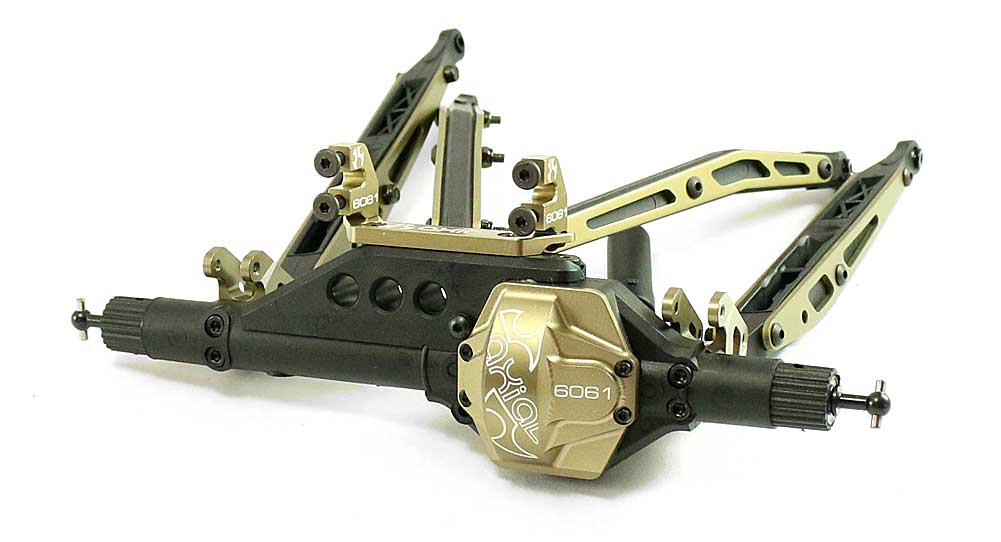
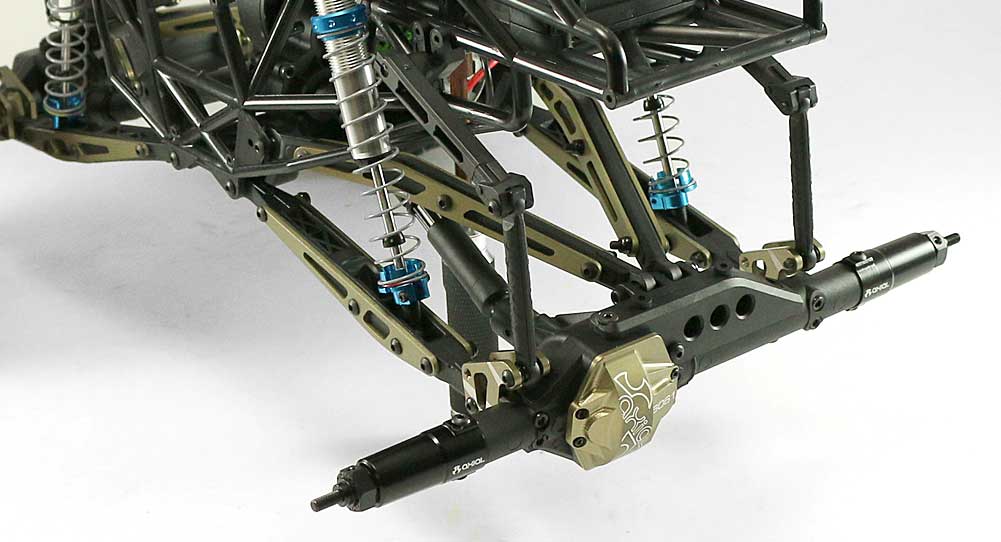
Re-attach the shocks to the lower links and, wah-lah. Your completed from clip should look like this! Ain't she pretty?
STEP 20
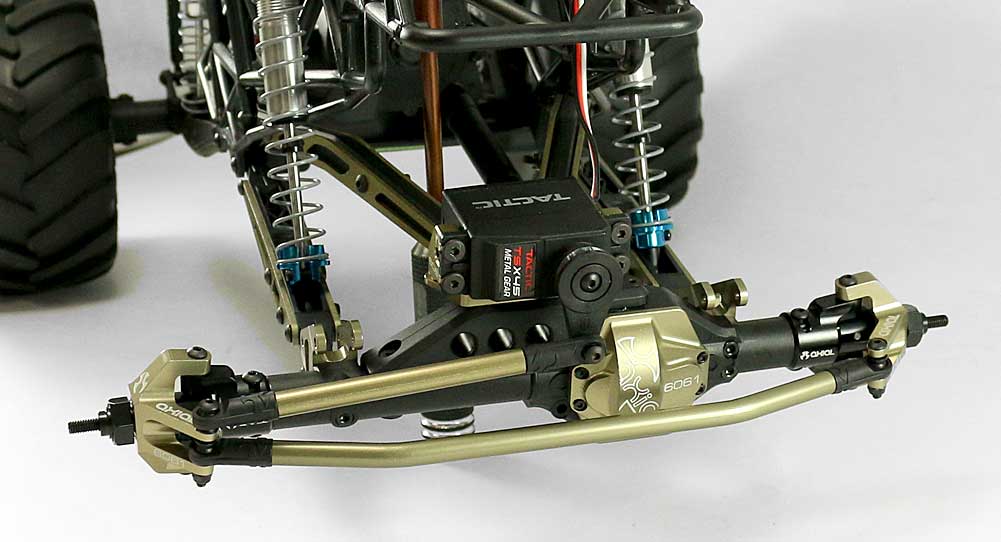
Attach your front end to the chassis; if you're unsure, use STEP 4 and the three red arrows to remind you. This is also the time to re-attach the servo and servo horn. Use a dab of blue threadlocker on the four screws that attach the servo to the aluminum mounts to make sure they stay put.
STEP 21
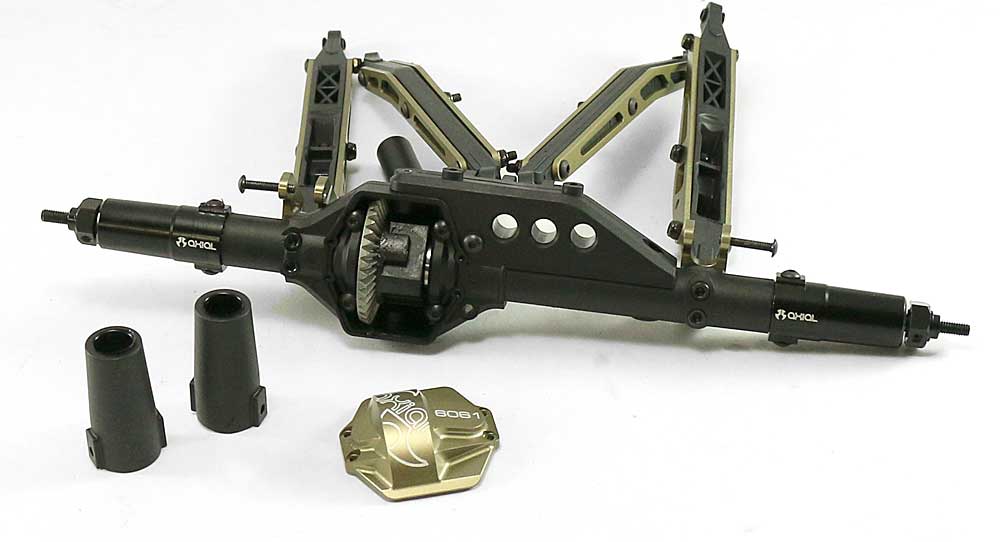
I'll be moving to the rear of the MAX-D, installing the parts shown here. The procedure will be pretty much the same as the front end; the only minor difference will be the lockouts. Be sure to pay attention to the WB8 center driveshaft coupler as well.
STEP 22
Remove the rear clip; STEP 4 and the red arrows will help you out here. You'll need to remove the anti-roll bar connections that attach at the lower link mount.
STEP 23
Attach the AX31244 Axial Upper Link Plate Set and AX31245 Axial Lower Link Plate Set as well as the AX31433 Axial AR60 Machined Link Mounts.
STEP 24
Remove the lockouts and pull the axles out slightly; this will allow you to remove the rear differential.
STEP 25
With the same procedure as the front, replace the stock gear with the AX30395 Axial Heavy Duty Diff Gear.
STEP 26
Remove and replace the AX30395 Axial Heavy Duty Input Gear from the other side of the axle, then re-install the diff gear. Cap the opening off with the AX31429 Axial AR60 Machined High Clearance Differential Cover. Key the rear axles into the diff gear, then slide the AX30789 Axial AR60 OCP Aluminum Straight Axle Hub Carriers into place. These are an easy install; they are a straight fit and can't be clocked like the front C-hub.
STEP 27
I replaced the plastic bits with the aluminum upgrades like I did with the front shocks.
STEP 28

Boom - the rear clip is done! Your final assembly should look like this.
STEP 29
Re-attach the rear clip and connect the anti-roll bar. Since we replaced the plastic link mounts with aluminum, you'll want to add a small drop of blue threadlocker to help keep the anti-roll bar links in place.
STEP 30
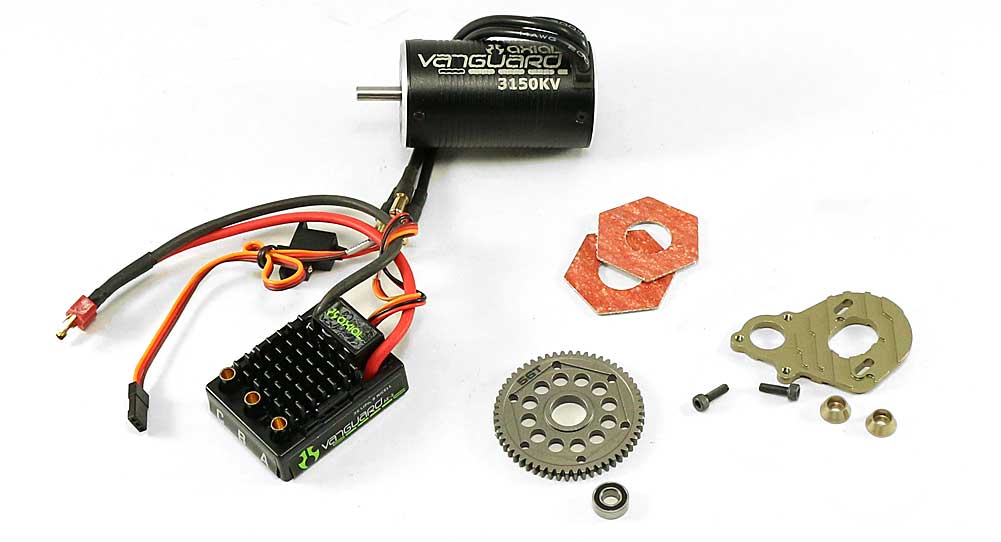
Alright - on to my favorite portion of the build, the electronics! Now, this is MAX-D - MAXIMUM DESTRUCTION - so I'm going big and replacing the stock brushed system with some serious Axial mojo; something Tom Meents would be proud of. I'll be dropping in an AX24260 Axial AE-3 Vanguard Brushless ESC and AX31047 Axial Brushless 3150kV Motor. Since this is a pretty healthy upgrade, I see it only fitting to upgrade a couple other parts as well.
STEP 31
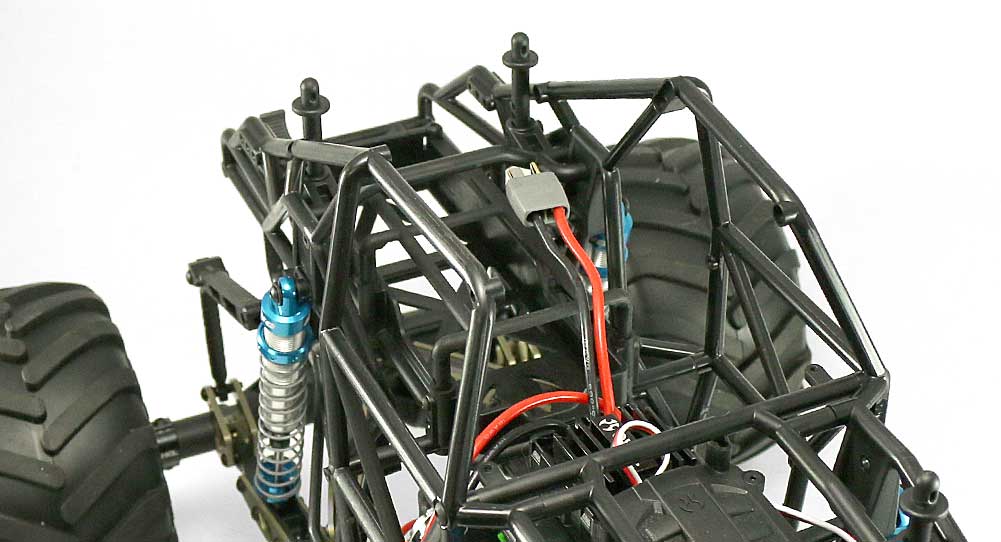
To make this part of the build easier, I started by removing the top part of the roll cage and interior.
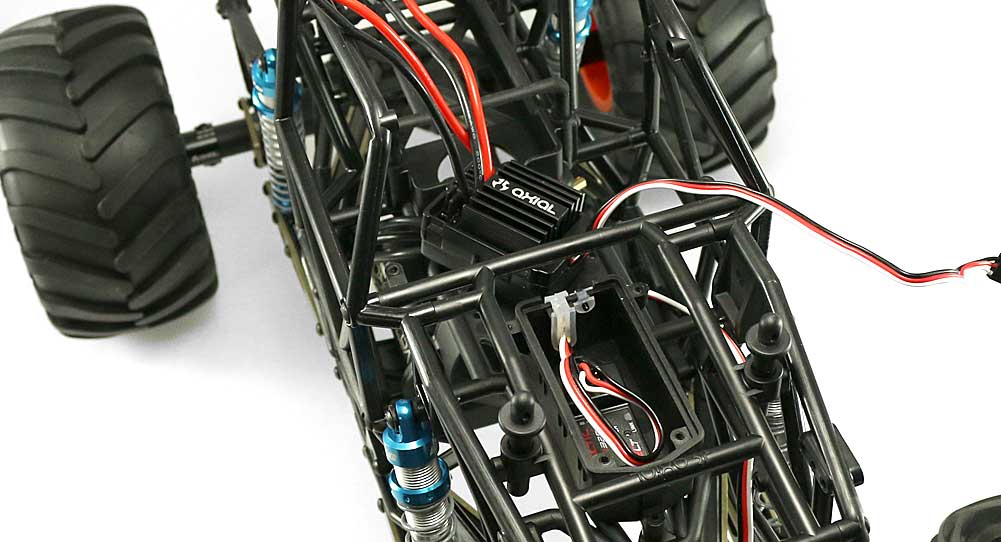
STEP 32
Here's a better look at the ESC tray. We'll get to it in a minute.
STEP 33
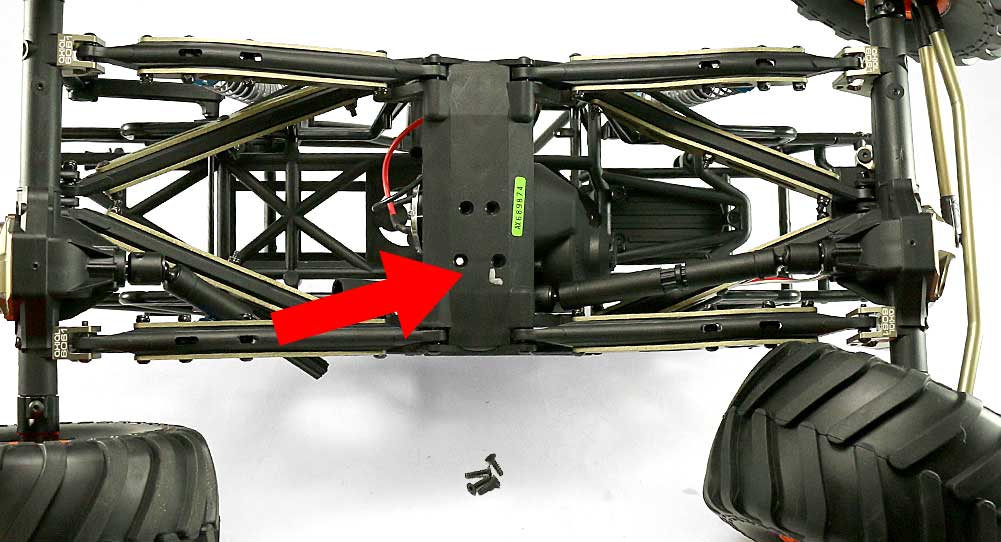
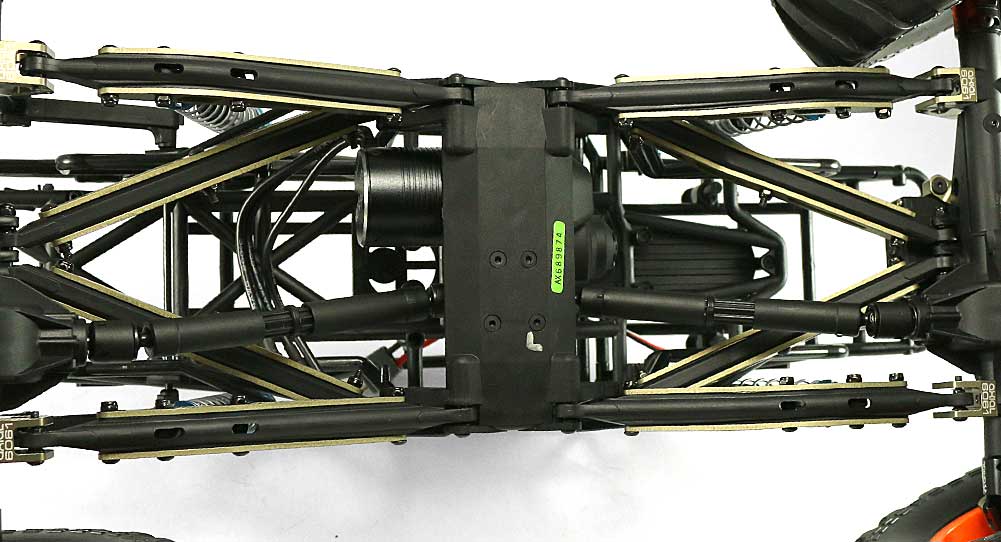
Flip the MAX-D over and remove the four screws that hold the transmission in place. Axial uses two different screw lengths here so to make sure I get them back in the correct holes, I've added a little L (for Longer). Once the screws are out, unplug the motor and pull the whole transmission assembly out. It's actually alot easier than it looks.
STEP 34
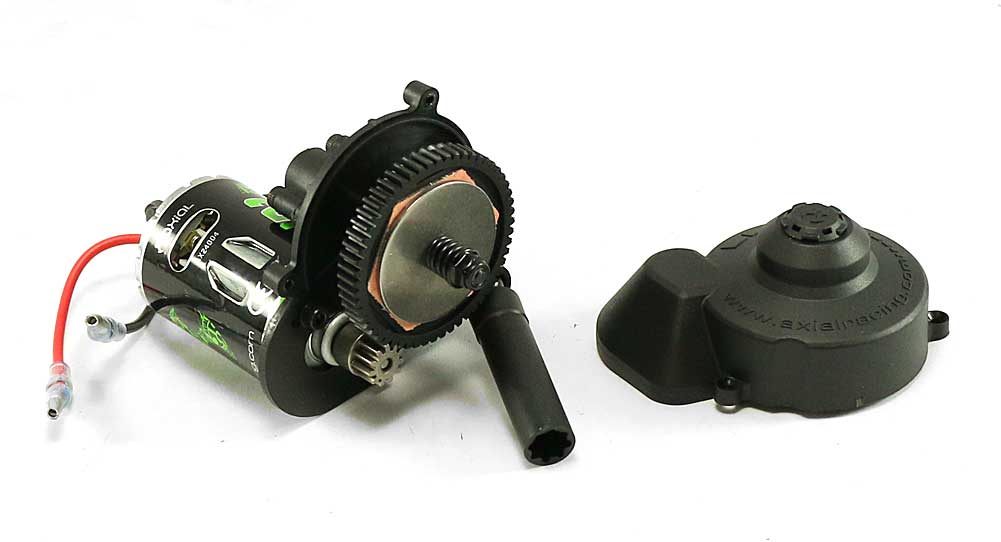
Remove the gear cover followed by the motor and slipper assembly.
STEP 35
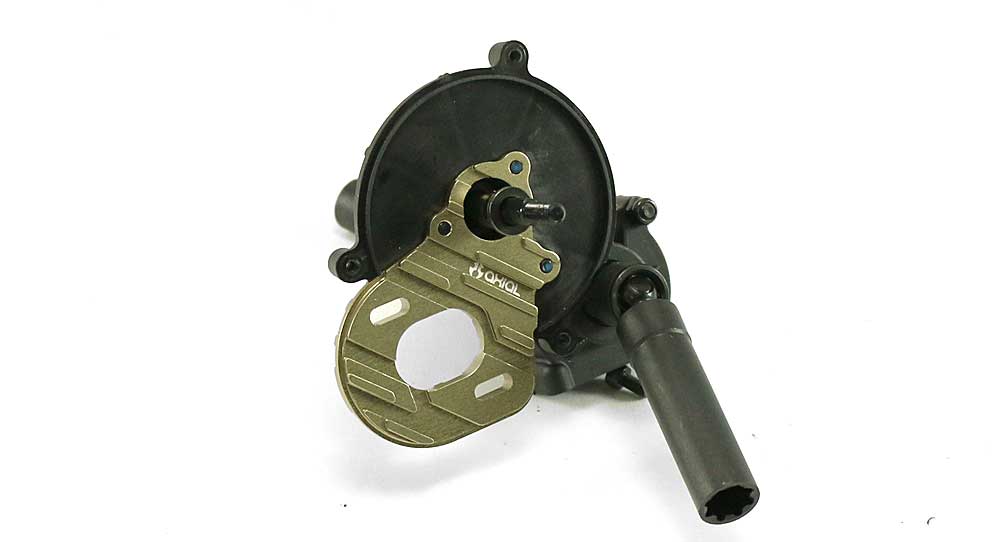
Remove the stock motor place and replace with the AX30860 Axial Machined Motor Plate.
STEP 36
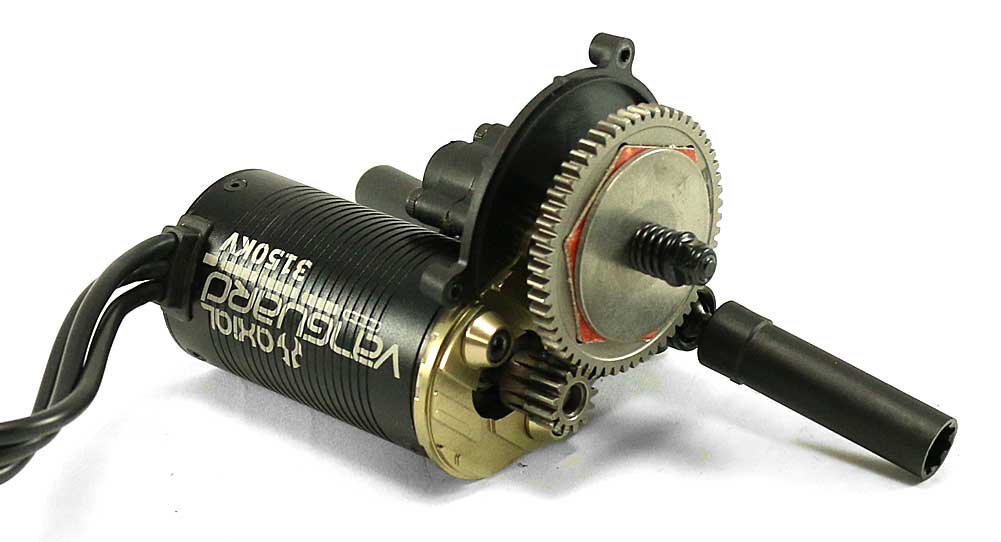
Before attaching the spur gear, make sure you attach the AX31068 Axial Slipper Pads. They're sticky-backed so they're not reusable; we have to add new ones to our AX31163 Axial Steel Spur Gear 32P 56T. Re-assemble the slipper clutch. I would suggest tightening down the slipper nut quite a bit; the added power needs a tighter slipper.
The only drawback with the AX31047 Axial Brushless 3150kV Motor is the fact that it uses a 5mm output shaft; the stock motor uses a 3mm. This means you'll need a new pinion gear. I didn't want the MAX-D to just have more power, I wanted it to be fast as well, so I'm starting with a AX30839 13T 32P Pinion Gear. MO' POWA ARH ARH ARH
STEP 37
Now that I have a new heart for the MAX-D, it's time to transplant it back in the truck. Remember to install the screws in the correct holes.
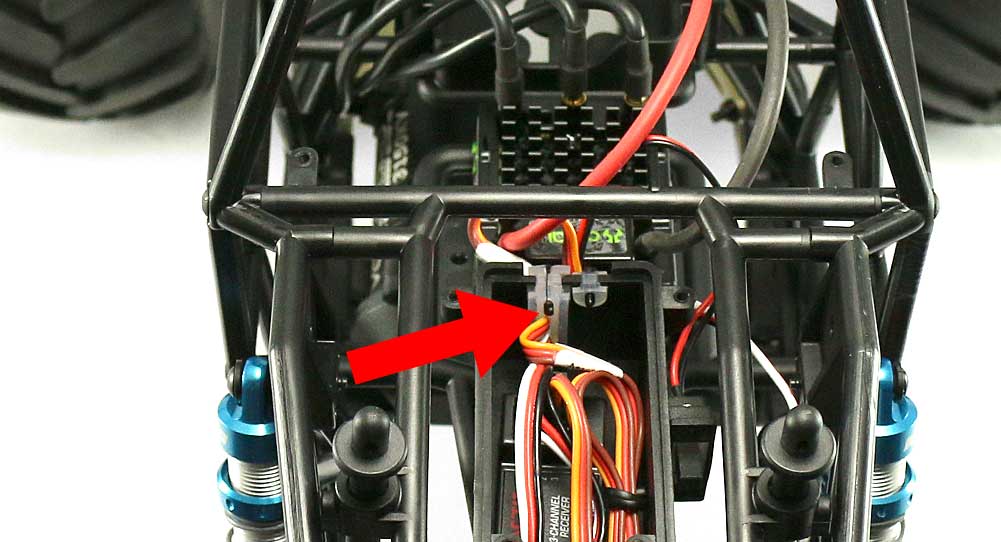
STEP 38
Flip the SMT10 back over and remove the top to the receiver box. Carefully pull the stock ESC power lead out of the receiver and remove it from the truck.
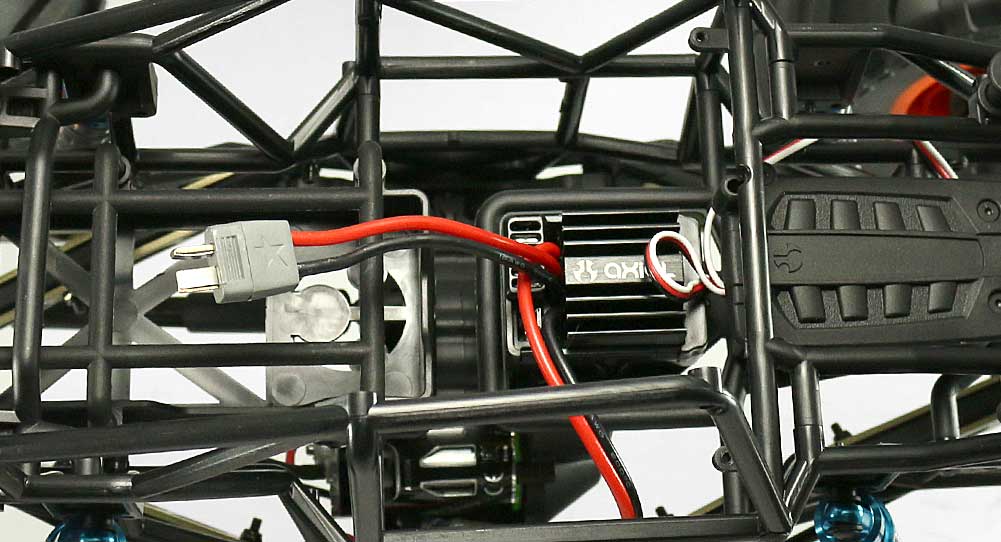
STEP 39
Apply some double-sided tape to the bottom of the AX24260 Axial AE-3 Vanguard Brushless ESC and attach it to the ESC platform. Route the ESC power lead through the waterproof seal and into the receiver box as shown. Re-attach the receiver box lid.
Finally, plug the brushless motor wires into the ESC, matching the A-wire to the A-plug, the B-wire to the B-plug and the C-wire to the C-plug.
STEP 40
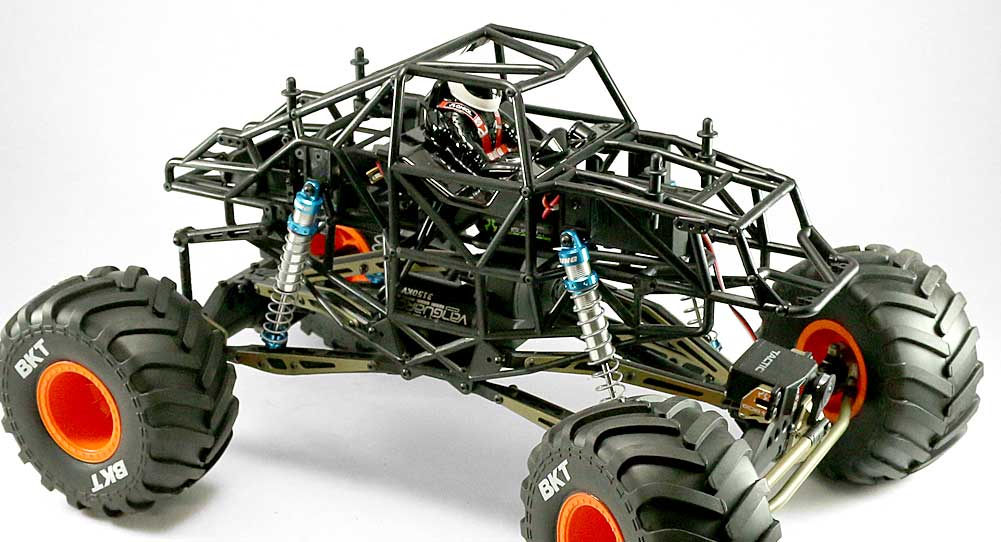
The final step is to re-attach both the interior and top of the roll cage. Looks super tough just sitting there! Time to go see what she can do!
Here’s the list of parts used in this article.
Front End
AX30395 Axial Heavy Duty Bevel Gear Set - 38T/13T
AX30762 Axial XR10 Aluminum C-Hub Carrier
AX31244 Axial Upper Link Plate Set
AX31245 Axial Lower Link Plate Set
AX31428 Axial AR60 Steering Upgrade Kit
AX31429 Axial AR60 Machined High Clearance Differential Cover
AX31430 Axial King Shocks Aluminum Caps and Collar Set - 12mm
AX31431 Axial Aluminum Shock Spring Retainer - 12mm
AX31432 Axial AR60 Machined Servo Plate and Mount Set
AX31433 Axial AR60 Machined Link Mounts
AX31434 Axial AR60 Machined Steering Knuckles
Mid-Section
AX24260 Axial AE-3 Vanguard Brushless ESC
AX30839 13T 32P Pinion Gear
AX30860 Axial Machined Motor Plate
AX31047 Axial Brushless 3150kV Motor
AX31068 Axial Slipper Pads
AX31163 Axial Steel Spur Gear 32P 56T
Rear End
AX30395 Axial Heavy Duty Bevel Gear Set - 38T/13T
AX30789 Axial AR60 OCP Aluminum Straight Axle Hub Carrier
AX31244 Axial Upper Link Plate Set
AX31245 Axial Lower Link Plate Set
AX31429 Axial AR60 Machined High Clearance Differential Cover
AX31430 Axial King Shocks Aluminum Caps and Collar Set - 12mm
AX31431 Axial Aluminum Shock Spring Retainer - 12mm
AX31433 Axial AR60 Machined Link Mounts