Posted: 5/15/11
Sent to Axial From Team Driver Ryan Gerrish:A few months ago I was approached by Jeff Fishback, a Tammie’s Hobbies customer and the director of the Auto Show. He was thinking of ways to make the event more interactive and dynamic, and not just a ‘look at the new models’ affair. We discussed having a R/C crawling display, and I immediately thought it’d be a fantastic way to showcase Axial’s products, and expose crawling to thousands of people that might not otherwise get involved. Axial agreed, and we were off!
I began construction in my shop. I knew I’d have about 20’x20’ to work with, so I settled on (6) 4x8’ sections, lined up to create a 16’x12’ course. In order to fit everything in my shop, I ended up cutting 2’ off the end pieces, leaving the display 16’x10’. I knew I wanted it to be as light as possible while still being durable enough to withstand endless ‘crawler impact,’ and after some research, I went with a special concrete over layered foam.
Basic Material list:
- (18) 50lb bags of V/O Patch Concrete.
- (25) 4’x8’ sheets of foam, 2” thick.
- (6) 4’8’ sheets of plywood..
- (10) 8’ lengths of 2”4”’s.
- A few boxes of different length wood screws.
- 90 degree shelving brackets.
- BBQ skewers for pinning foam.
- Drywall knives and a Sawzall for foam carving and cutting.
- Mixing buckets, trowels, Nitrile gloves for applying concrete by hand, respirators for mixing.
- Paint, spray bottles, Woodland Scenics train layout greenery.
- Compound miter saw, drill, screw driver.
Construction took a couple months of casual working, with a few non-stop weekends tossed in. Big thanks to the Brett Carlson and the other ORCRC members who assisted with the construction!
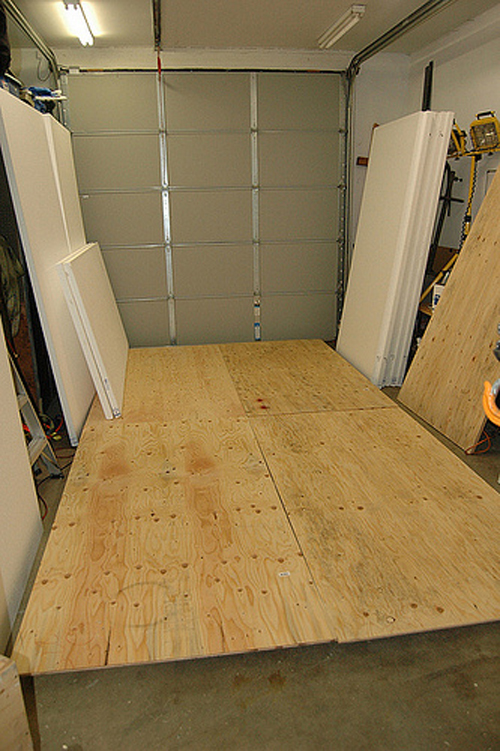
Here you can see the basic plywood platforms and foam in my shop:

The elevation change was accomplished by building up plywood shelves, and they also provided good storage at the show:

The foam sheets stacked and the beginning of the carving:

I kept a Honcho on hand to be sure the obstacles would be suitable for a vehicle of its design:

I went back in with expandable spray foam to adhere various sections together as well as fill areas that needed build-up:

The V/O Patch concrete is good stuff- it sticks nicely to vertical surfaces. We hand mixed and applied it all in buckets, although next time I’m renting a little cement mixer! Here’s Brett hard at work:

We applied multiple coats (probably ¼” thick) to the whole display, leaving it thicker where the trucks would be impacting it often:


“Two by Two, Hands of Blue!”

We found some perfect 1/10 scale trees at Michaels, and added a bunch of bushes, ground texture and paint from Tammie’s Hobbies to ad realism:

Transport was accomplished with a rented 26’ U-haul truck, my pickup and 18’ trailer. Unloading at the Auto Show was made easy thanks to forklifts:


Once unloaded we arranged the pieces and set up all the furniture, as well as the TV which looped the 2010 Axial MSD Scale Nationals DVD:


The test fleet of Axial Honchos before their 40 straight hours of abuse! I installed 55 turn lathe motors and smaller pinions in all the trucks to slow them down for the beginners. They averaged about 2 hours of run time on a 3000mah 2 cell Lipo battery.

Considering the torture they endured, the trucks sustained zero damage for the first 2 days. As Saturday and Sunday wore on, we saw only minor breakage, such as LED wires snapping, body cracks, bumper mounts and shock tower breakage. Nothing that stopped any one truck for more than 10 minutes! We were all very impressed by their durability, as were the show drivers. The environment they were exposed to was definitely outside the realm of normal usage. Enjoy the pictures! To see them all, as well as many of the cool 1:1 cars at the show, please visit:
https://www.flickr.com/photos/rbgerrish/sets/72157624951500145/with/5400471724/


Many thanks to Axial racing for enabling this awesome event. We exposed thousands of new people to the joys of crawling!