Posted: 9/26/17

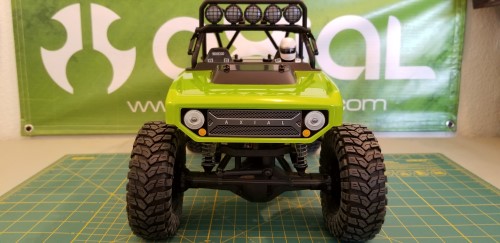
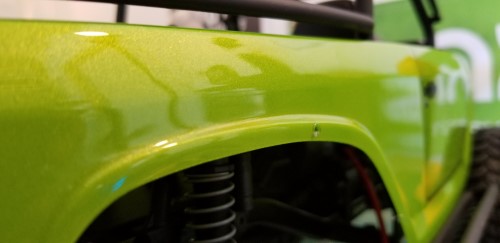
Starting with a stock Axial Deadbolt RTR straight out of the box, before ever putting power to it. I am going to try and make this different than any other! I have heard it both ways as far as this body goes. This is actually one of my favorites.
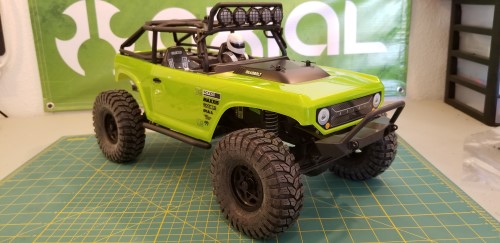
I really like the hood scoop, dovetail, and I truly love this green! It's a perfect platform to start with in my opinion.
Now that you have seen what I am starting with, let me show you my idea. I happen to have an Axial Ridgecrest, I have always liked the bumpers and tubing. I want to try and put these bumpers on the Axial Deadbolt.
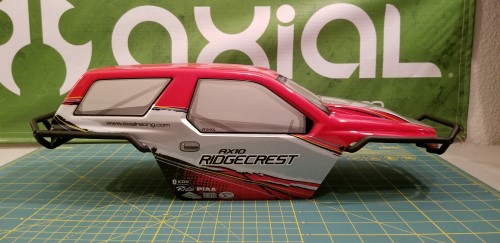
I have always been a fan of reusing parts, or just using them in ways they might not have been specifically designed for. So lets just see where this takes us. If you do not have a Ridgecrest the part number is AX80117, but I will also try to have a hyperlink at the end of this blog! Just in case you want to do this.
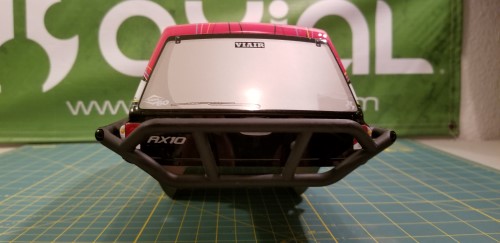
The rear seems to fit like it was made for this body. The front is wide enough at the open end, but it tapers a bit more at the front. I still don't think this will be an issue.
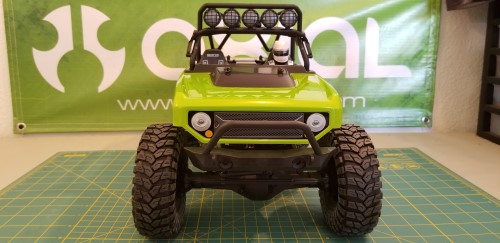
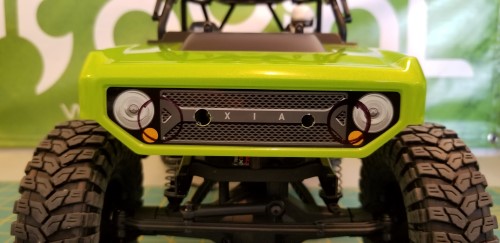
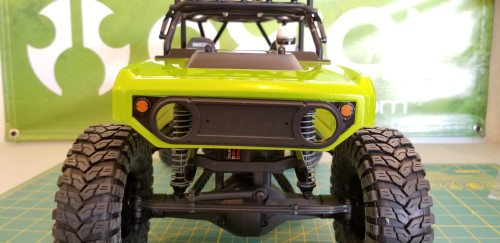
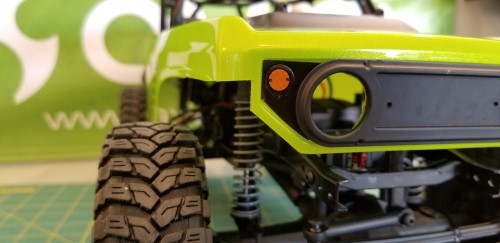
After removing the Poison Spyder front bumper, I am looking really hard at the front grill.
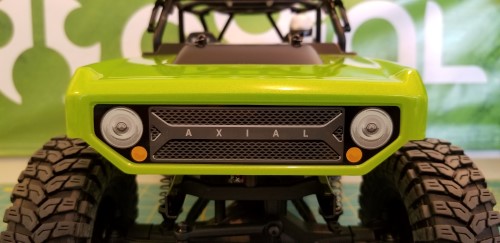
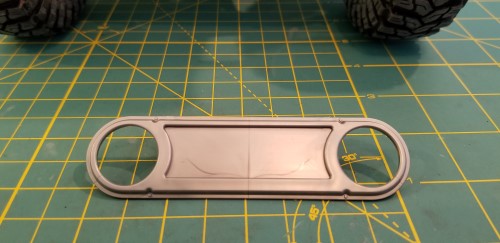
I have a plastic grill from another truck I never used, it is a very simple grill. I want to try and incorporate it into this build. I think it will help in this makeover.
I drilled the center posts of grill and I reamed the holes to the appropriate size. Also marking the headlights with a sharpie.
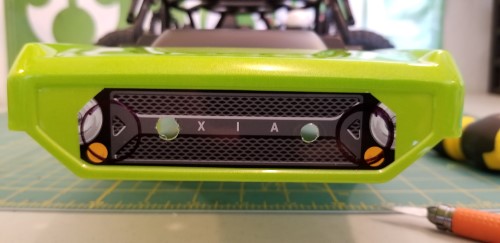
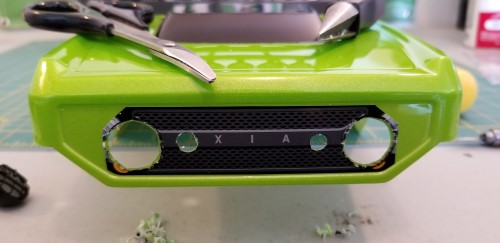
I used a body reamer and scissors to start. I also trimmed away the outer corners of factory stickers. Next I used a dremel to round out the headlights.
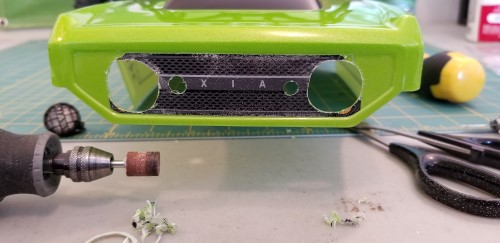
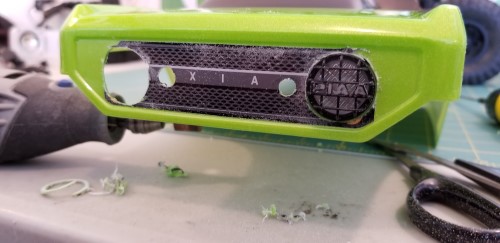
The goal is to fit some headlight in the grill. so I keep test fitting the hole until I like the fit of light. Once I have the holes big enough on both sides, I turn my attention to the back.
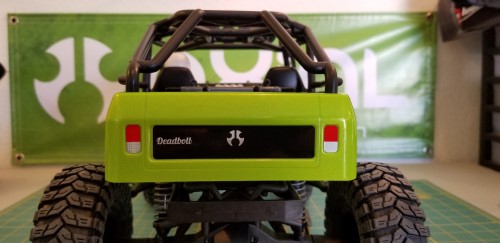
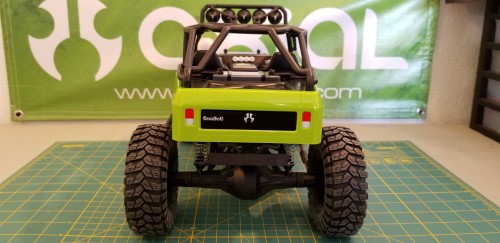
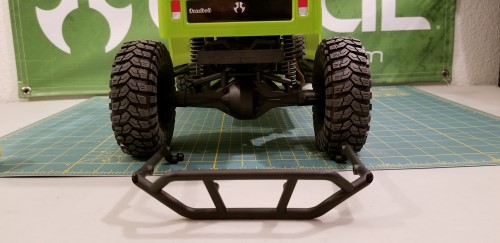
After simply holding the rear bumper where I want it to fit, I mark it with a sharpie and drill the mounting holes.
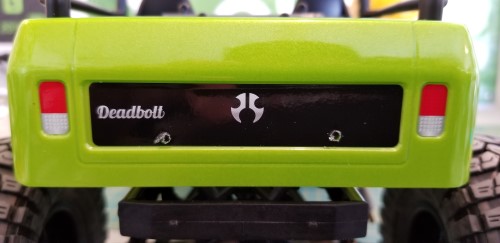
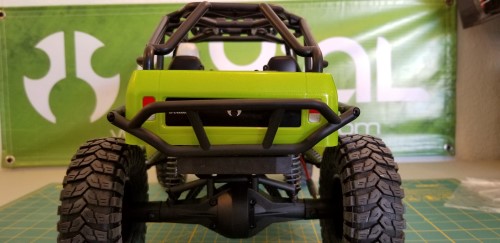
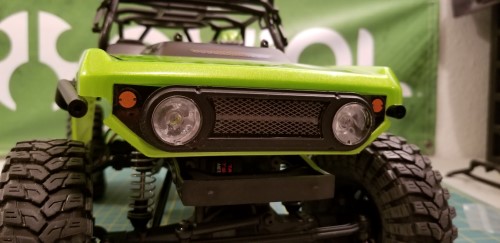
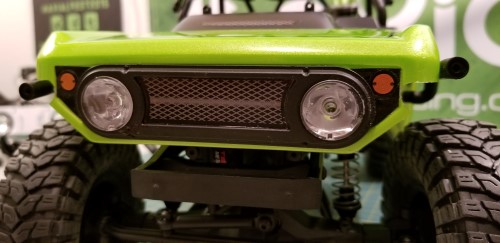
After drilling the holes, it bolts right up! No modifications at all. Be sure to slide the end tab to the inside of the body. After the rear is done I am returning to work on the front. I painted the new grill black, used solid black stickers for outer corners and Axial Dingo stickers for the marker lights. I ran two screws through the back side of the grill and that's what holds it in place.
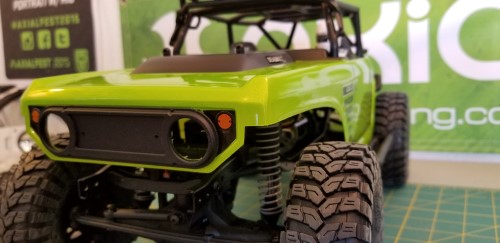
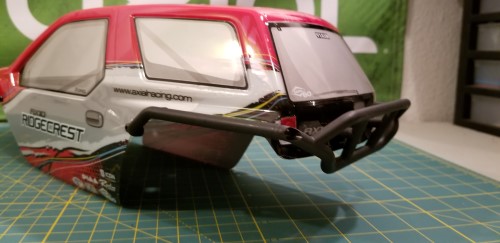
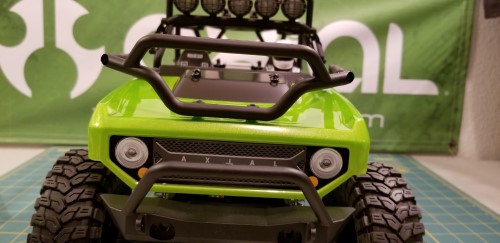
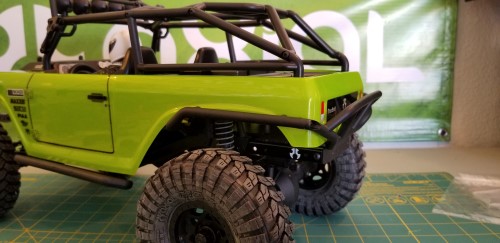
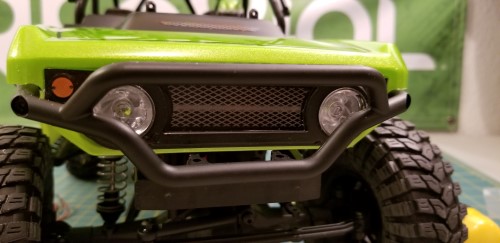
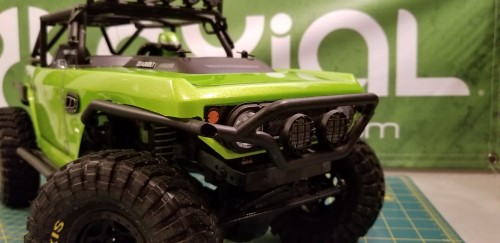
After the grill I simply hold the front bumper to front and cut as straight as I can to the outer edge of grill. After test fitting again the Axial Ridgcrest bumper is still a bit to narrow. Using a dremel I slowly start cutting closer to the grill. You can see picture below for reference.
After several test fits and finally getting the fit I wanted, I bolted on the front bumper. Just a tip, if you look in the picture below, you can see the posts used to mount tube bumper to the front of the Ridgcrest stick directly into the headlight holes.
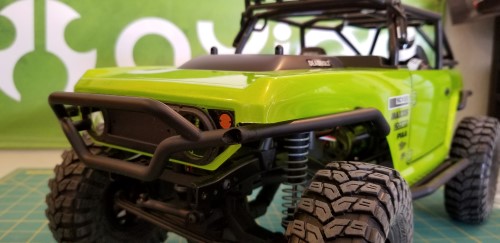
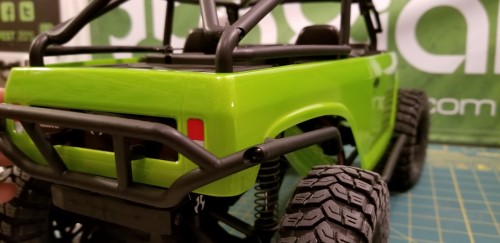
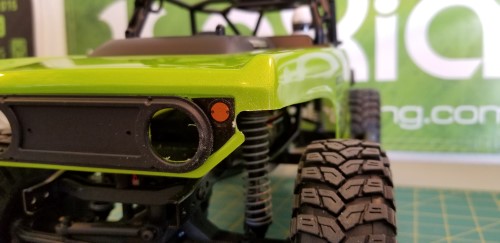
From the side profile maybe you can see why I said I tried to cut as straight as possible. Pictured below you can see I removed the bumper and cut mounting posts off I was talking about earlier.

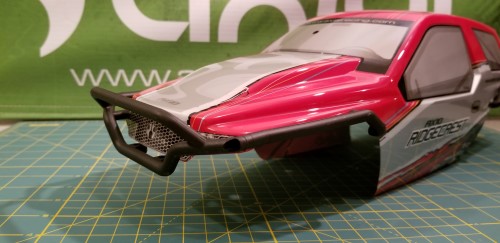
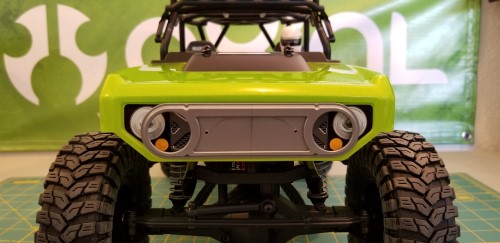
So I did run into one issue. Nothing with the bumper, but rather with the headlights. I ran out of Axial light buckets, I had planned on using and measured for. I am sure if you build you have had to improvise. I happen to have some glass lights for home interior, they are designed to go under your cabinets as custom lighting. So off comes the front bumper once again, you can just take out corner screws and it makes it easier.
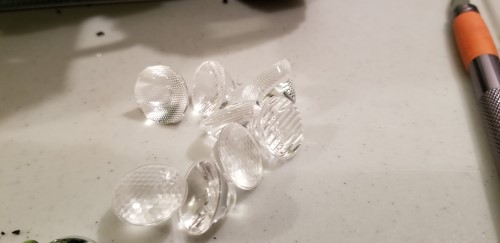
Well they look good to me, so after some shoe goo, I put the front of the bumper back on. I am very pleased with how this makeover is turning out.
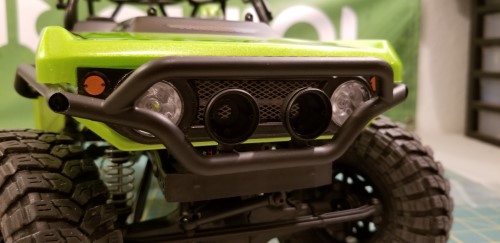
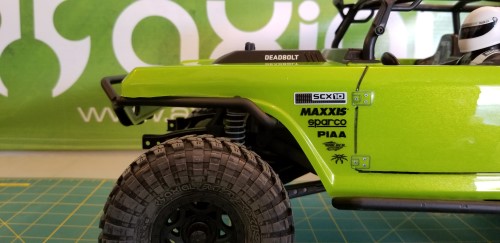
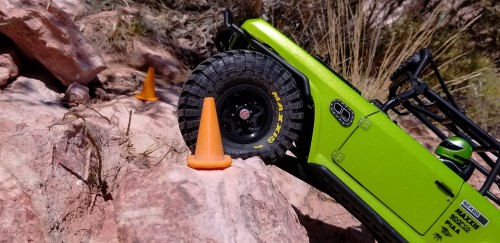
With the bumper back on I add my last to Axial Light buckets. They are Part AX80045, there will be a link to part at the end of this blog. After this I am going to add a little to the stock Axial Maxxis Trepadors.
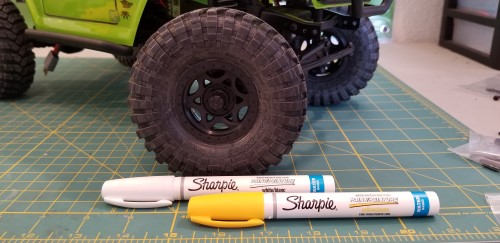
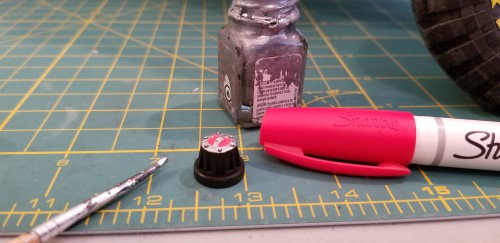
A couple of Sharpies I purchased should do the trick. I am putting white down first.
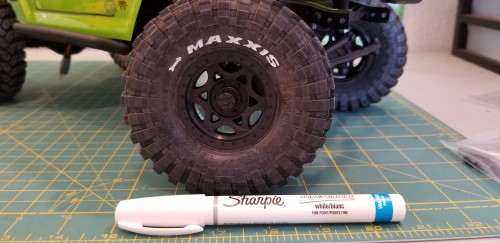
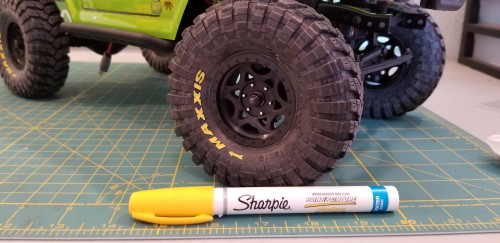
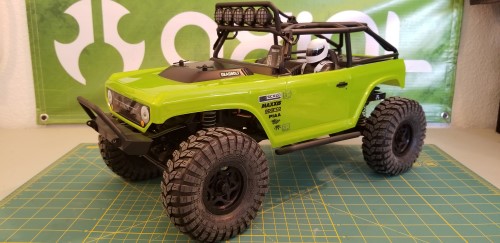
Putting the white down first really helped the yellow to pop and stand out. I am very happy with the look. If you have never done this before, I will just tell you now. It is not permanent. You WILL have to touch it up and or redo it! How often just depend on your driving style. I like the look, so I do it. Next some silver model paint and a red sharpie are used to create scale hubs. Your RTR should have these hubs on it, solid black in color. I think it is an easy scale look.
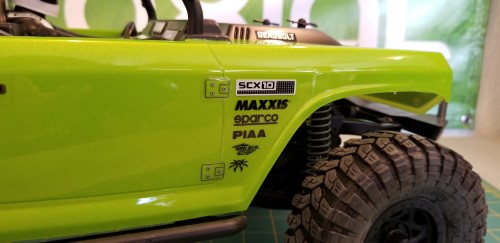
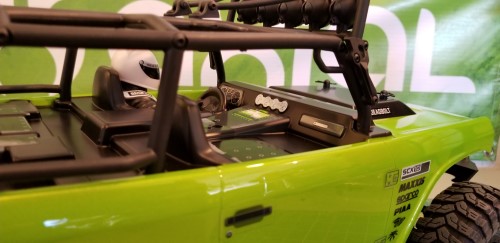
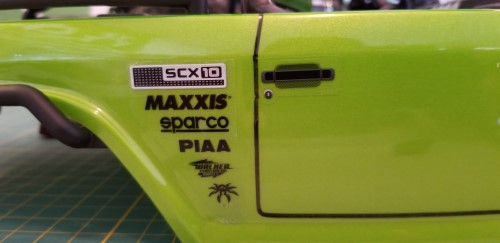
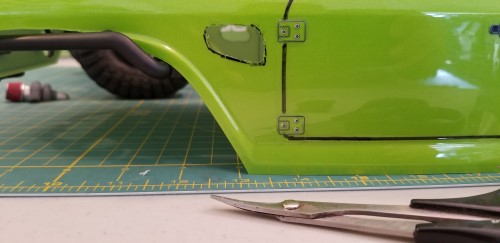
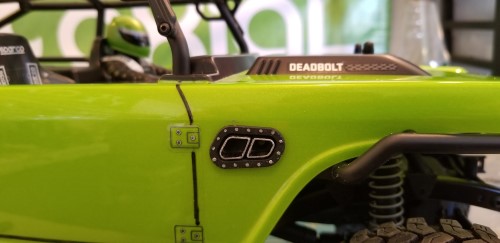
Going back to the body, up top you can see exactly how it looks out of the box. So with an exacto knife I carefully lift the stock sticker and relocate it to the back. For this exact look you must swap stickers from driver to passenger side to follow contours of the fender. I also used a black sharpie on the door and hood jams. Here is a tip, rubbing alcohol or nail polish remover with acetone will take the sharpie completely off should you mess up the lines.
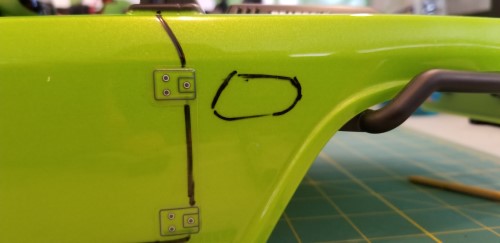
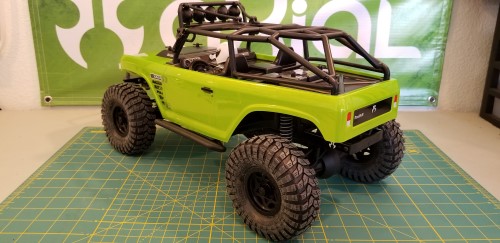
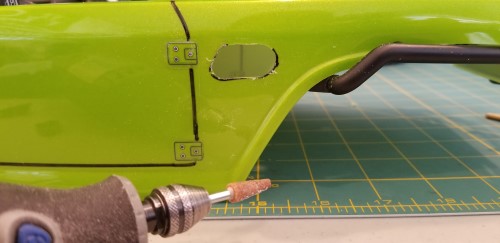
As I mentioned before, I like using parts from other cars. Can you guess what part this is by the outline?

First using a body reamer and then getting as close as I can with lexan body scissors. I use the dremel again test fitting until I like the fit.
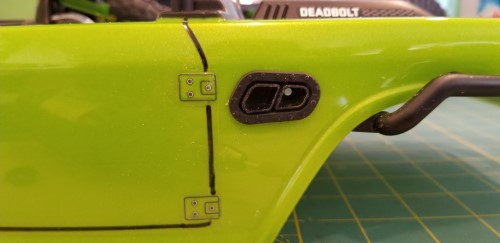
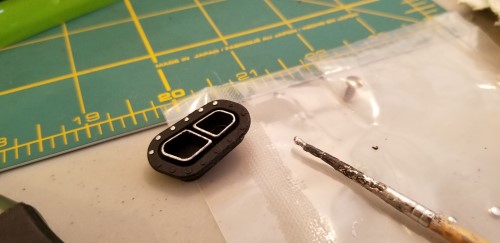
Once the Axial Yeti Rock Racer exhaust fits (found on part tree Part AX31116), I decide to dress it up a bit with some silver model paint. Once it dries I hold it in place with shoe goo!
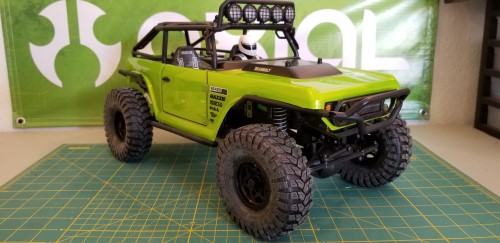
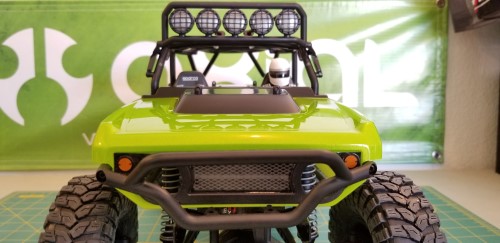
Once installed I am really happy with the over all look. I feel it has completely changed the look. I throw on one of my scale antennas just for a touch more of scale detail.
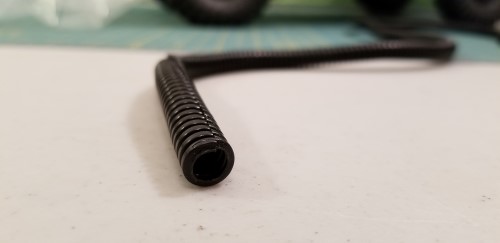
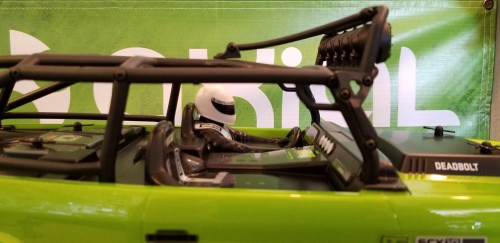
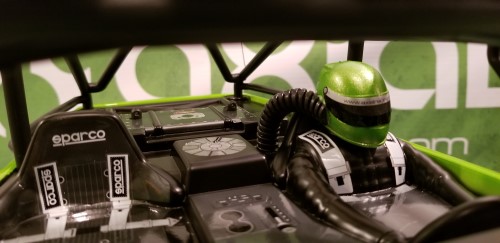
I am not to worried about interior, but just to make it different I will do another easy trick. Take some 1/4" open loom conduit, cut one side to the contour of Axial driver helmet. Use a body reamer where ever you want to run hose in the car, only ream hole big enough to hold the hose snug. I painted the drivers helmet, you can do as you want. Shoe goo the hose to the helmet, and once it is dry. Feed hose into the hole you made with body reamer! That's it, you now have scale fresh air hose on your driver. A tip for you, take the drivers helmet off the vehicle to glue on hose and let it set. There is a screw underneath helmet that is simple to remove.
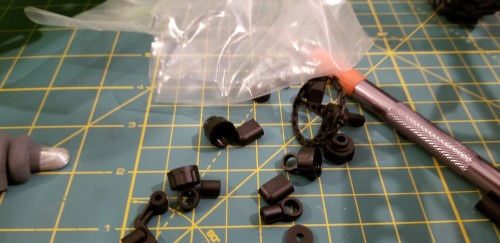
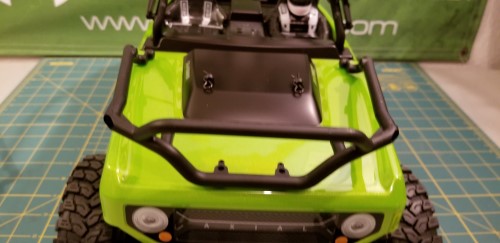
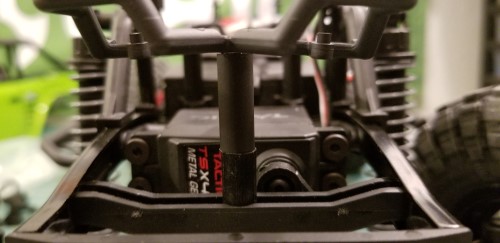
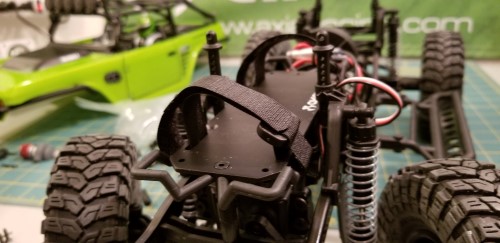
Moving onto the chassis, this is the only mod this will get at this point. Open the clear plastic bad that came in your RTR and remove the three long post with bevel on one side. Remove the battery tray from the rear of chassis.
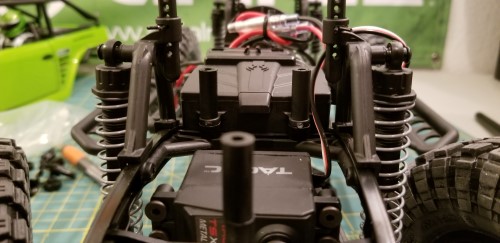
Place the posts as pictured above, you will need to remove two small screws from receiver box before fitting beveled edges. Next place battery basket over posts.
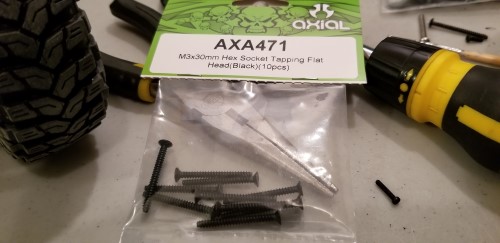
Axial Screws AXA471 work perfectly for this relocation. Tighten it down with three of these screws and reuse the small screw to attach battery tray on rear section.
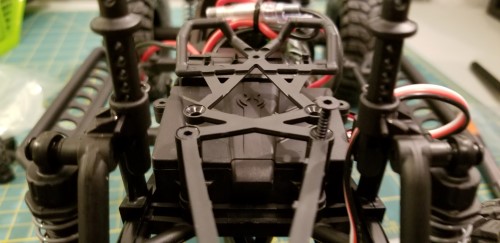
You have just relocated the battery for forward weight and performance. Yes you can definitely spend money on a battery tray to move the battery from the rear to the front. In my opinion this is the most inexpensive way to go, the parts are provided, minus the longer screws! Something to think about. So what's next?
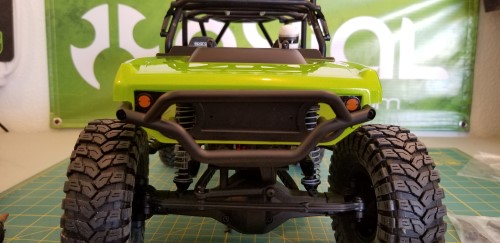
Well I installed the lens inserts and lens covers on the Axial light buckets on the bumper.

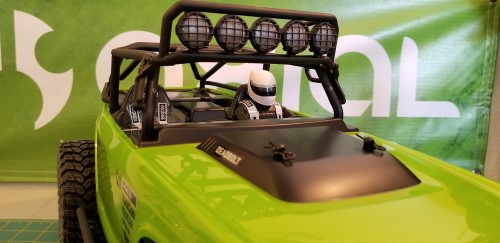
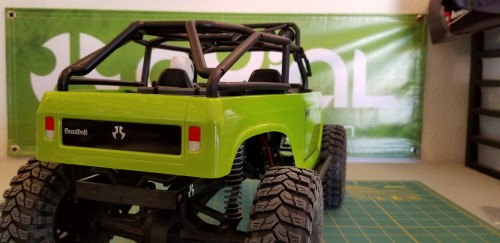
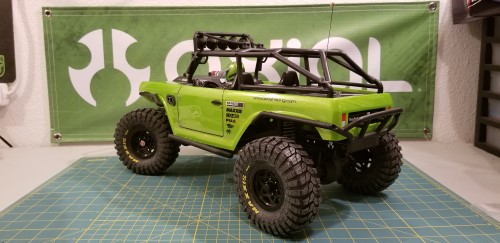
Take step back and look at the transformation. Now the hubs are on after being painted, the driver helmet is also installed. Ummm next I would say take it outside and take it for a drive! That was my plan anyway!
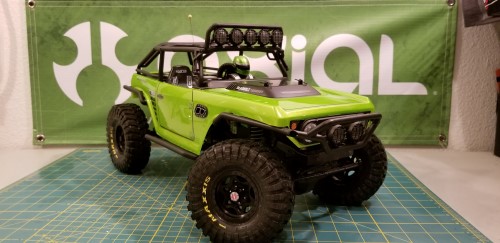
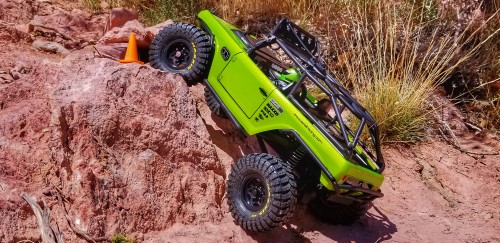
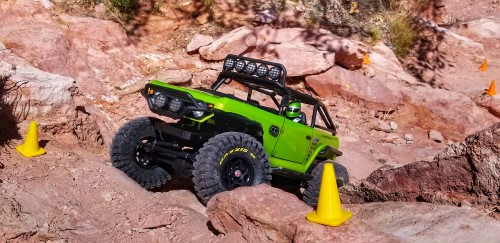
The repositioned battery tray is a huge gain for climbs, and I love how the wheels and details pop when its outside.
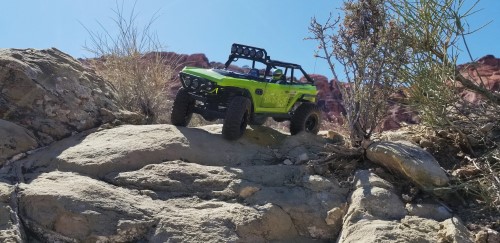
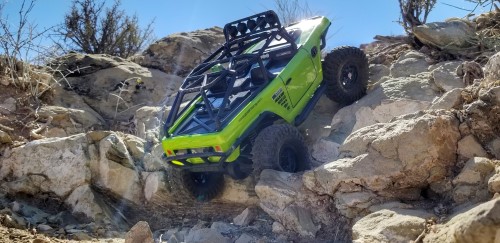
Well this is my attempt at simply changing the look and one performance gain with the battery relocation. Hopefully this has inspired you to try new things or build one like this. This crawler is the most bang for the buck in my opinion. If you are looking to get into scale crawling, I would suggest looking at the https://www.axialadventure.com/products/ax90044 !
Axial Parts Used:
AX80117 Axial Ridgecrest bumpers
AX80045 Axial Light buckets
https://www.axialadventure.com/products/ax80045 (You will need 2)
AX31116 Axial Yeti Rock Racer Exhaust Tips
https://www.axialadventure.com/products/ax31116
AXA471 Axial Screws for Battery relocation
https://www.axialadventure.com/products/axa471