Posted: 10/5/18

Building your AX90046 kit is going to be a great and rewarding experience. You'll see how each and every piece fits together and you control the build how you want it to be assembled. We're starting the build at the beginning of the manual of course. This also means we'll be starting with bag A and will eventually need to dip into some other bags of supporting parts.
TOOLS NEEDED
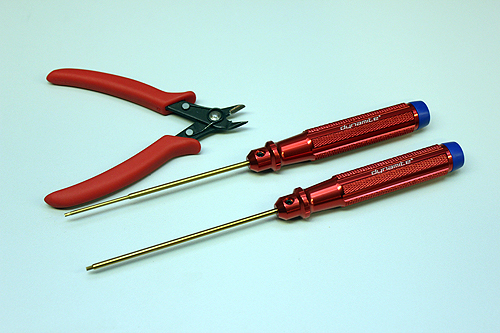
Cutters
1.5 and 2.0mm Hex Drivers
STEP 1
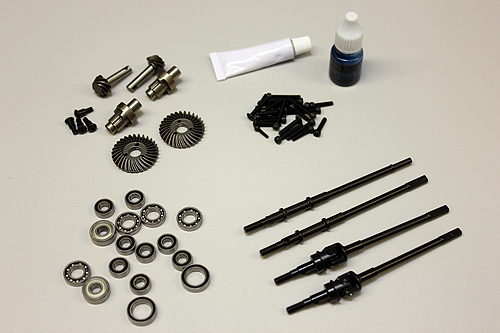
Open Bag A and organize your parts so you can see everything you're working with.
STEP 2
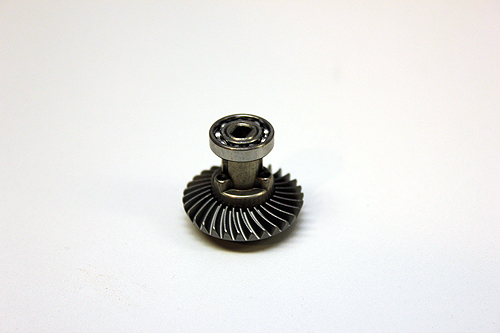
Start by assembling the spool and ring gear. The gear is held onto the spool with three M2x8mm screws. Use a small drop of the included thread locking compound on each screw before installing it. Tighten the screws well so they do not back off. Then slip the 7x14x3.5mm bearing onto each end of the spool. Make two of these.
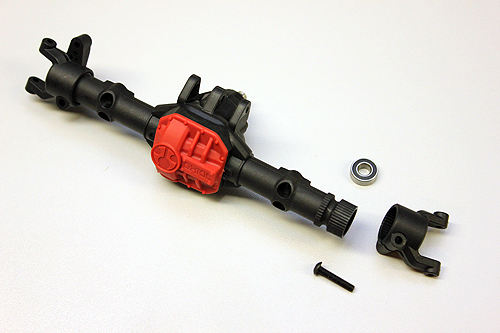
STEP 3
You now need to search for additional parts outside of Bag A. Look for Plastic Bag 1. This will have the axle parts you need for the next several steps.
STEP 4
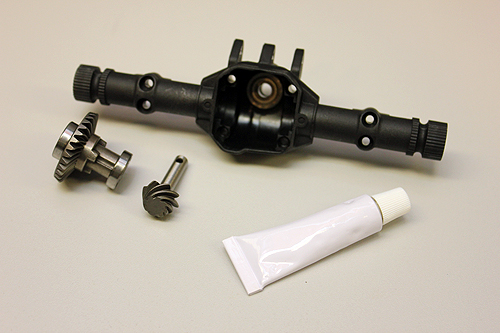
Push the appropriate bearings into the plastic axle housing that support the bevel pinion gear followed by the gear itself. Take the supplied grease, puncture the end and liberally coat the ring gear on the spool with grease. More is better here, but make sure you have enough to coat the axle gears and the transmission gears later in this build.
STEP 5
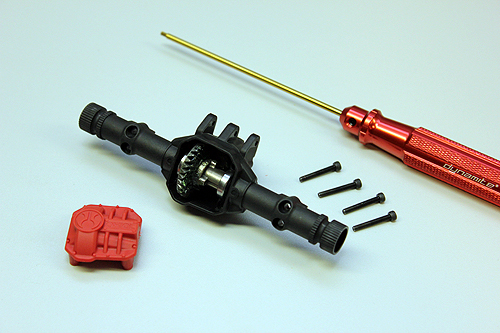
Slip the spool assembly into the axle housing. It will only fit in one way. Cap the axle with the cover and the four M2.6x18mm screws. Use a quality 2mm hex driver to tighten the screws to a firm feel.
STEP 6
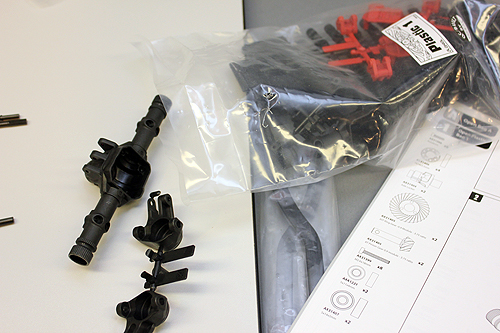
Next find the rest of the plastic axle components. When it time to cut them from the parts trees, use a good quality sprue cutter.
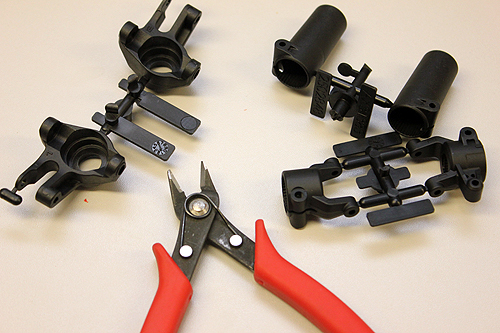
STEP 7
Cut the steering knuckle from the tree and insert the appropriate bearings into the knuckle to support the front universal shafts.
STEP 8
Push the universal driveshafts into the bearings.
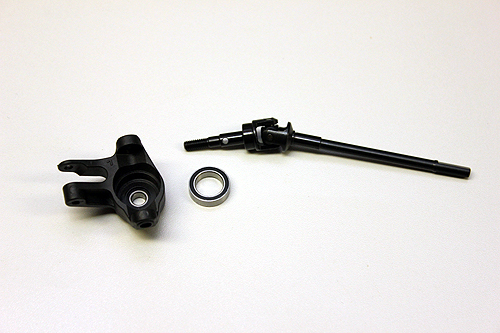
STEP 9
Turn your attention back to the axles. It's time to install the C-carriers. Slip the bearing into the axle followed by the carrier and secure it with the screw. Take extra time here and follow the manual. These carriers are installed in a certain way that is well diagrammed in the manual. Failure to install them correctly will result in some funky geometry that will not work well on the trail.
STEP 10
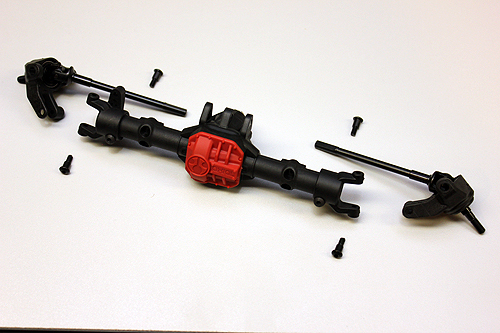
Slip the assembled driveshafts with carriers into the axle housing. You'll then use the shoulder screws to secure the knuckles to the C-carriers. Take note of the direction of the parts here too. When screwing in the shoulder screws, make sure they are a bit past snug. Don't over-tigthen the shoulder screws or you chance stripping out the C-carrier.
STEP 11

Gather up the parts to complete the rear axle assembly.
STEP 12
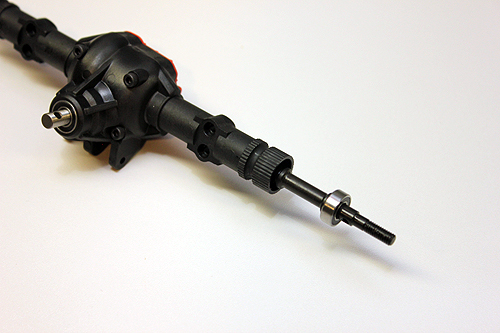
Slip the half-shaft into the axle housing making sure the flat end keys into the spool. Then place a bearing at the end of the shaft.
STEP 13

Slide the axle extension tube over the half-shaft and secure the part in place with the pinch screw.
STEP 14
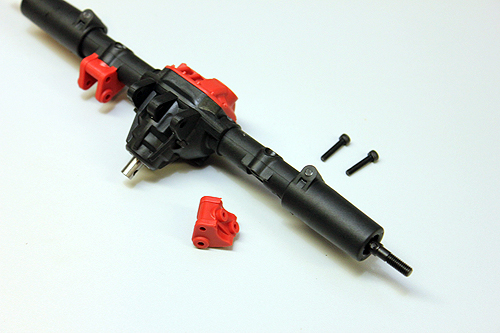
We're getting close to wrapping up the axle assembly. Locate the link mounts and secure them using M2.6x1mm screws. Tighten these screws firm, they support the suspension links. Install two link mounts on each axle case.
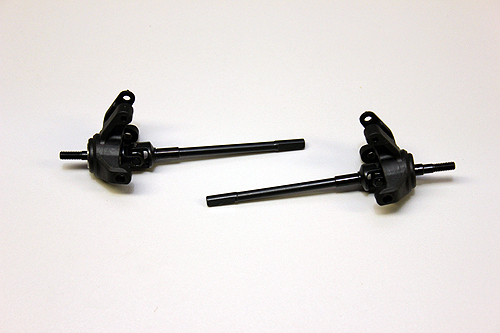
FINISHED
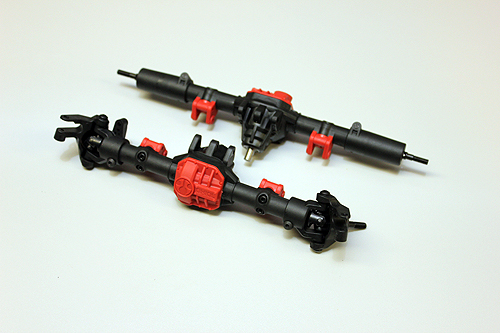
Here are the assembled front and rear axles. This build blog would also be helpful if you were building the AX31438 AR44 Locked Axle Set for a custom project. Take your time and build the axles right for smooth bind free operation.