Posted: 5/6/16
Words and photos by Tony Phalen
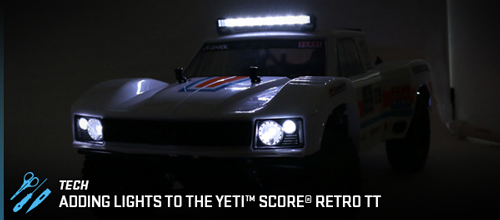
Did you know that the Axial Yeti SCORE Trophy Truck comes pre-configured for LED lighting? Yup, that's right, all you have to do is attain and install the LEDs, route the wiring to the receiver and enjoy some brightly lit evening drives.
In this article, I'll take you through the step-by-step process of installing a full set of LEDs in the front and rear buckets as well as adding an Axial Universal Rigid Light Bar Set. In addition to all the lighting components (listed at the end of the article), you'll also need a few other tools to make the installation easy.
Tools
1. Body reamer or something similar to enlarge the holes in the plastic headlight/taillight parts and for making holes in the body.
2. Shoo Goo or something similar to secure the LEDs in place.
3. Hobby Knife.
4. Silver Sharpie. Optional, but great for that extra detail.
5. Tape. Black for securing wires to the cage, clear for securing wires to the inside of the body.
6. Y-connector for combining the front and rear light strings into one.
7. 6" (or longer) servo lead extension.
Step 1
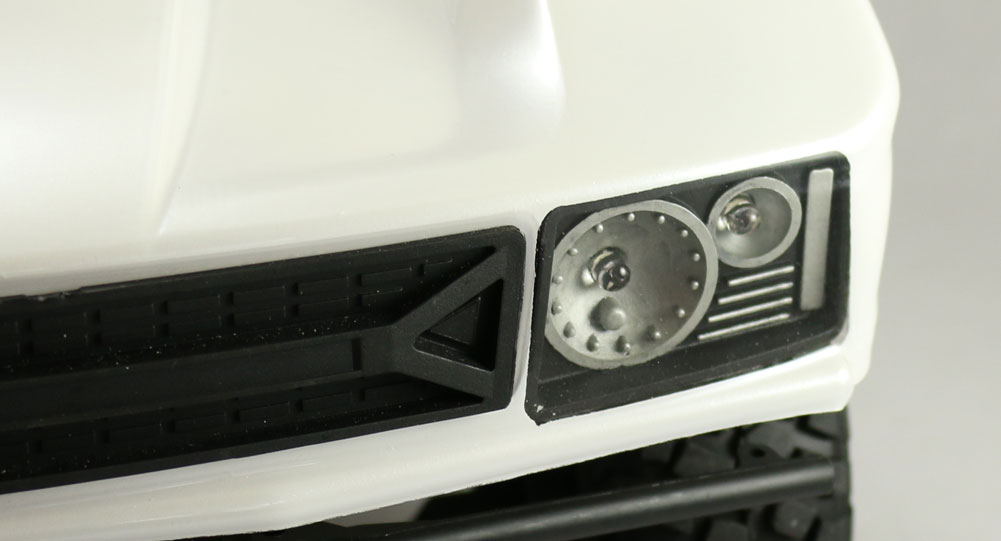
Before installing the LEDs in the light buckets, there is a little bit of prep work that needs to be done first. The buckets have provisions for 2 LEDs; 1 standard headlight and one smaller turn signal. Since I wanted to have both sockets use the super bright LEDs (for a headlight and driving/fog light), I had to use the reamer to open the hole up in the smaller socket to fit the larger LED. Widen the hole in small increments, test fitting the LED a couple times until the fit is nice and snug.
For some added detail, I highlighted the area with a silver Sharpie. I think it turned out pretty cool looking and having it mounted behind the Lexan body helps protect it.
Step 2
Once you have the front buckets mounted, press fit the LEDs into the them. We have two solutions to securing the LEDs; you can use the supplied cap and screw (left LED) or Shoo Goo (right LED). Either method works great but since I didn't have enough of the small 2-56 screws to complete the project, I opted for Shoo Goo.
Step 3
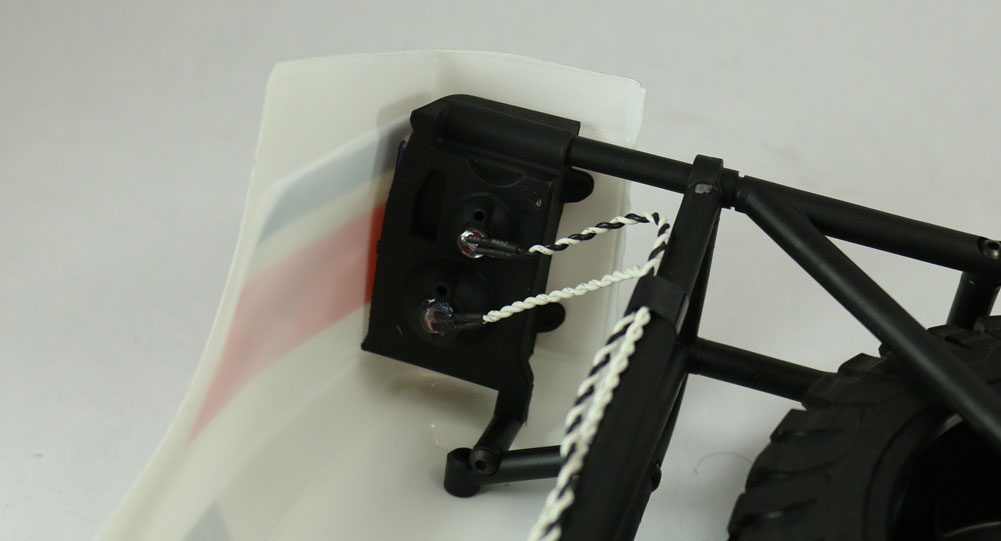
Using the same procedure, install the buckets and LEDs on the rear of the Retro TT body. You'll need to ream out the smaller hole in this bucket as well. Since I was using the red tail light stickers on the rear of the Retro body, I opted to use white LEDs. You could also use red ones here instead for more red lighting - I listed the red LED part numbers at the end as well.
Step 4
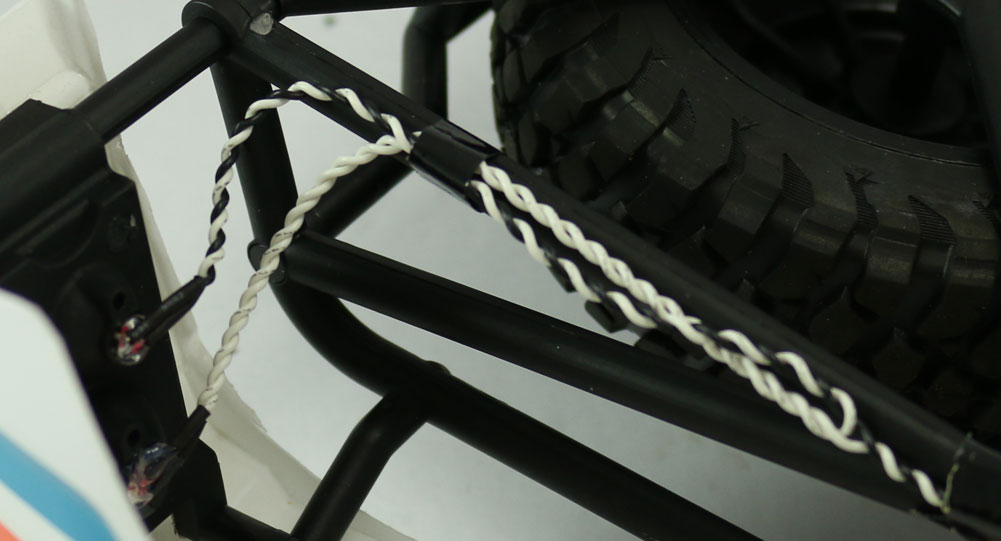
Route the rear LED power leads along the rear cage and secure with the black tape. This helps keep the wires away from the spinning tires. If you have some available, you can feed the wires through some shrink tubing for added protection.
Step 5
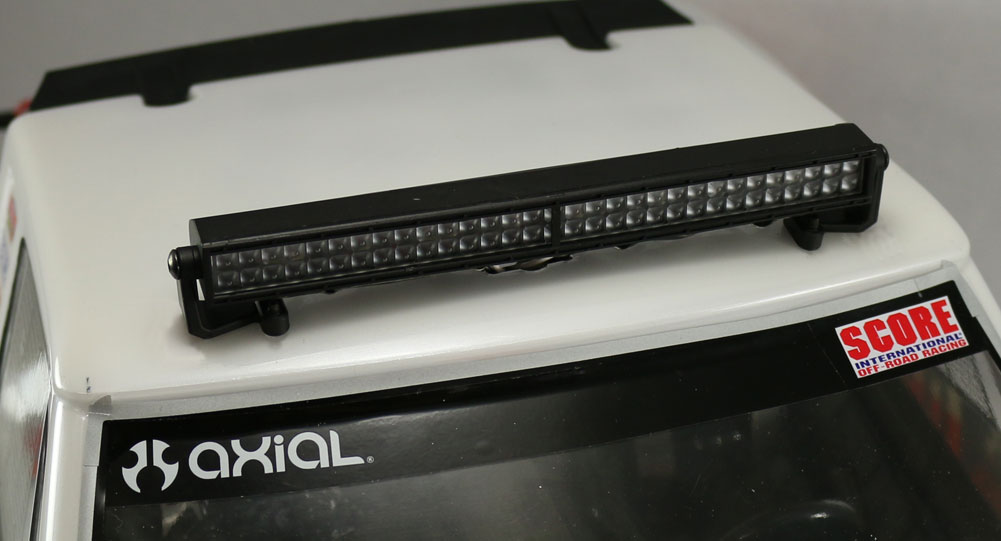
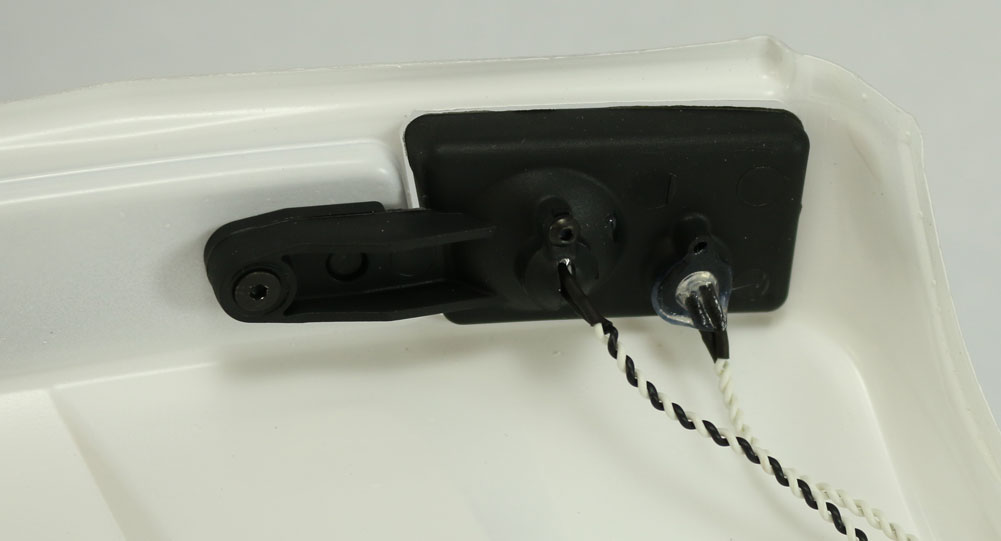
Build and mount Axial's roof-mounted LED bar. A slit can be cut into the roof to pass the wires through. We won't get into detail about building it - it's pretty simple. Just take a little extra care to make sure it's mounted square on the roof.
Step 6
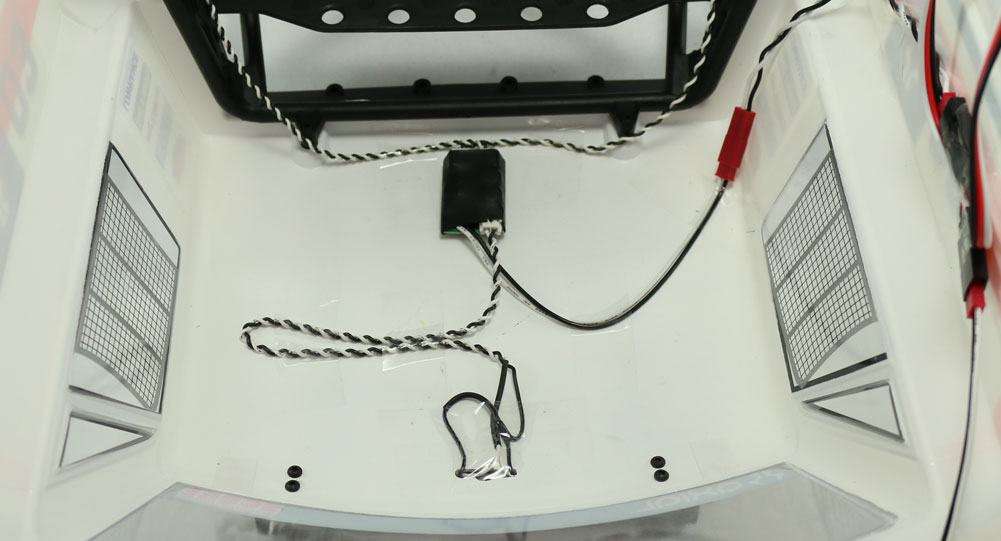
Flip the Retro TT body over and feed both the front and rear LED power leads into an AX31097 3-Port High Output LED Controller (use double-sided tape to secure the controllers on the body). The roof mounted LED light bar will connect to the high-output port on the rear 3-Port High Output LED Controller. Masterfully tape all the wires down using the clear tape.
Step 7
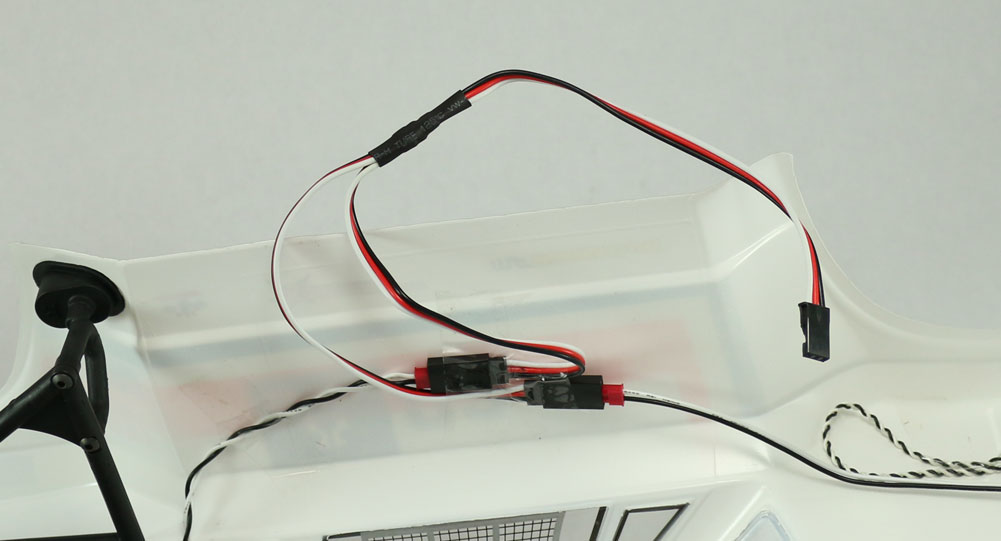
Feed the 3-Port High Output LED Controller leads to the side of the body and tape them down using the clear tape. Take your Y-connector and connect them as shown. The LED controller wires use a 2-wire, mini JST plug - our Y-connector has standard 3-wire plug. Just make sure the black wires match up and you'll be good to go. You can add a little extra tape here to secure any additional wires.
Step 8
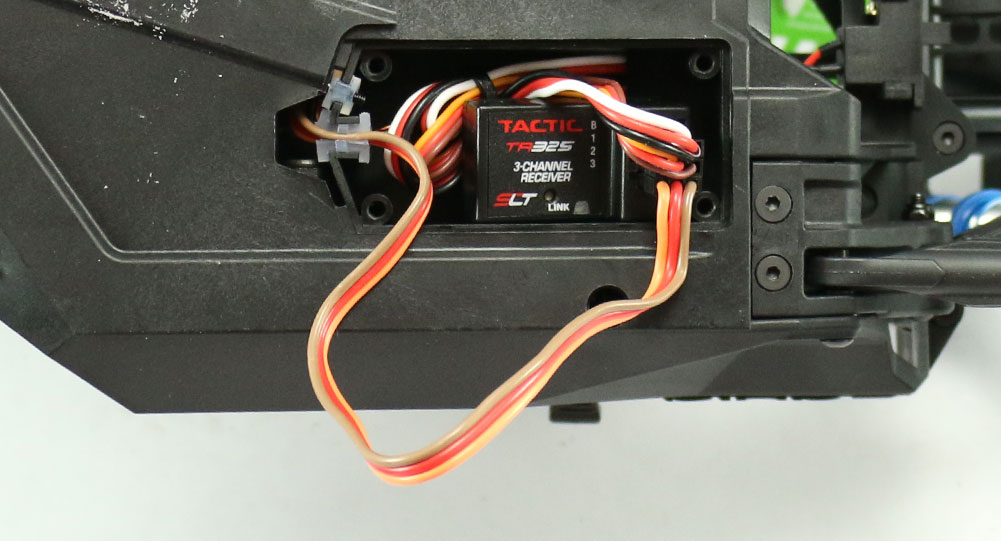
Next, we'll be installing the 6" extension, so start by removing the little door on the bottom of your TT to expose the receiver compartment. You may need to 'pop' the receiver off of the tape used to secure it to make this a little easier. You'll also need to remove the little black spacer used in the clear silicone grommet. We'll be filling that space with the new 6" wire.
I found it way easier to feed the 6" extension down to the box from the top of the truck and into the box. Insert the 6" extension plug into your receiver with the negative wire (black or brown) towards the outside of the receiver. Press the wire into the clear silicone grommet, making sure it's down below the top of the grommet.
Step 9
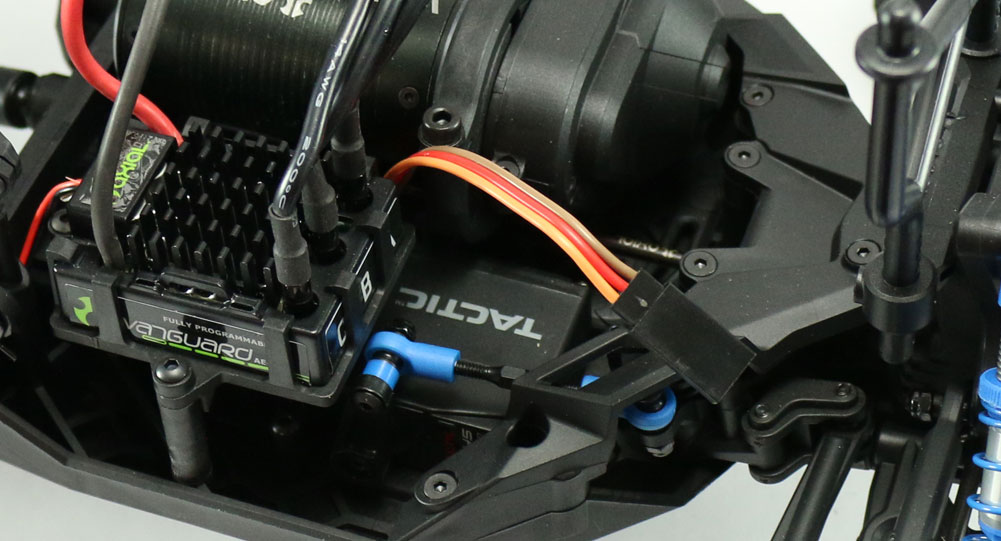
Turn the truck over and inspect how much of the 6" extension you have available. This picture shows an adequate amount you'll need. Flip the TT back over, press the receiver back into place and coil up any additional wire into the receiver box. Replace the receiver box cover.
Step 10
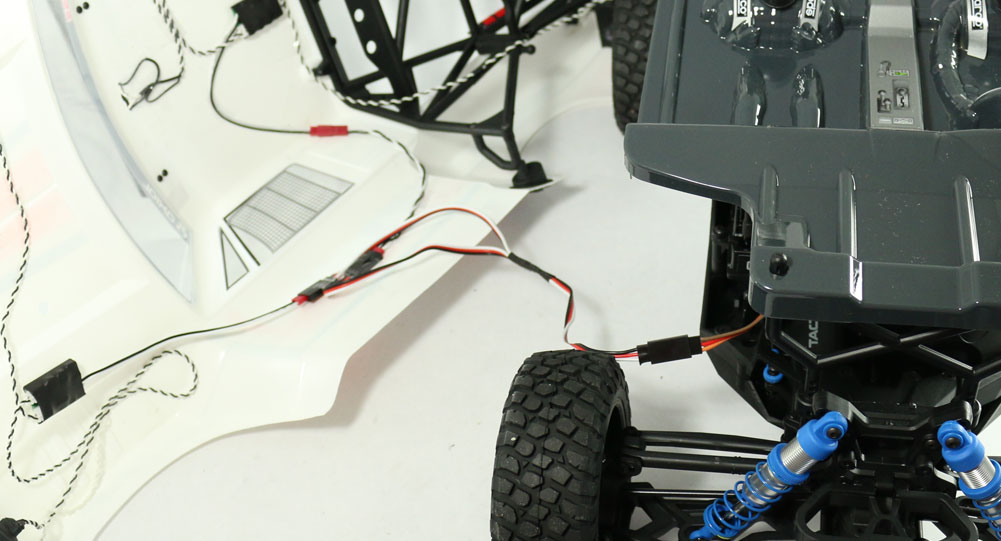
Install the plastic interior in place, connect the lighting power wires (black to brown in this case) and fit the Retro body to your TT. We've left enough slack in the wire to remove the body without having to unplug the wires each time, but if you feel it's too long you can always shorten the lead by pulling a little more into the receiver box.
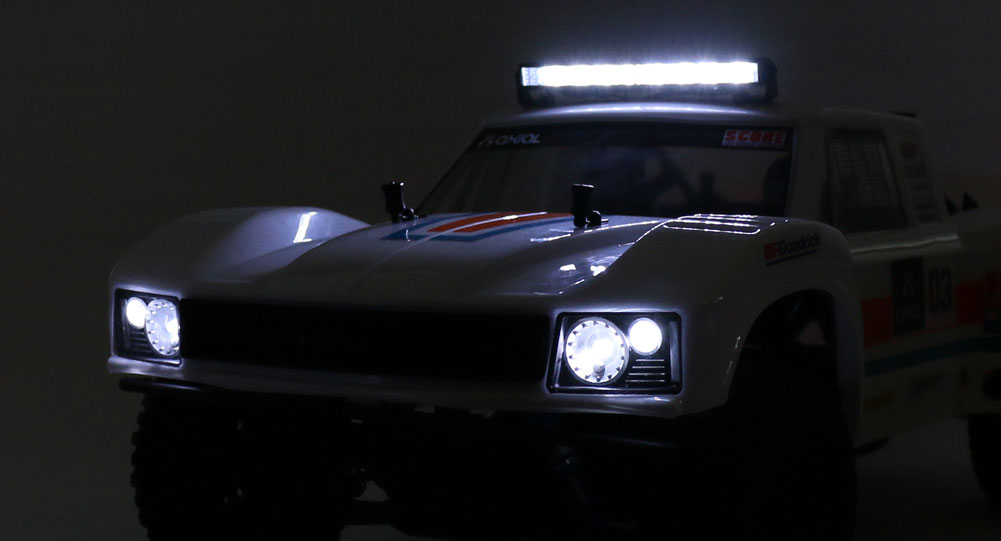
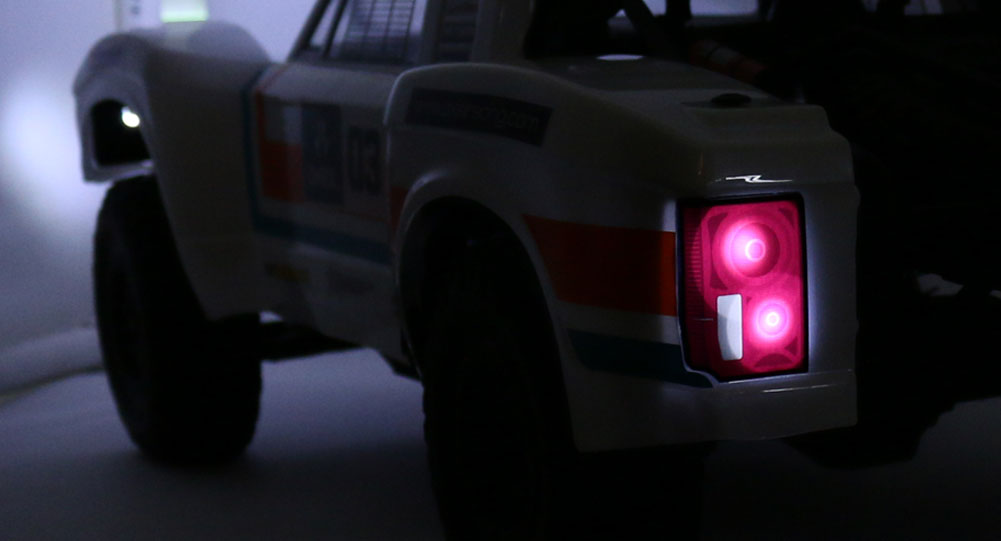
And just like that, we've got some very bright lights on our Retro bodied TT! Here's an example of how it should look when you're finished:
As promised, here’s the full list of the Axial parts used in this article:
AX31310 Axial TT-380 Retro Trophy Truck Body
AX31152 Axial Universal Rigid Light Bar Set
AX31097 Axial 3-Port High Output LED Controller
AX31098 Axial 8 LED Light String (White LED) - Qty 2
AX24252 Axial Double LED Light String (White LED) - Qty 4